【Table of contents】
- Introduction
- Rule structure
- Switching between new AWS WAF and AWS WAF Classic
- Creating Web ACL
- Conclusion
1. Introduction
AWS released a new version of AWS WAF on Nov 25, 2019. In this blog, we explained about the AWS Management Console Operation (Original Rules).
Part 1: [new AWS WAF] Summary of changes
Part 2: [new AWS WAF] AWS Management Console Operation (Managed Rules)
Part 3: [new AWS WAF] AWS Management Console Operations (Original Rules) (This blog)
Part 4: [new AWS WAF] AWS Management Console Operations (Pattern Sets & Rule Groups)
Part 5: [new AWS WAF] JSON Explanation
2. Rule structure
The first thing you need to know is how the rules work.
In AWS WAF Classic, you can set a condition under a rule, and filters can be set within the conditions.
※See the blog below for more information.
In contrast, in the new AWS WAF, we configure conditions in units of statements under a rule.
Since now you can combine statements with AND and OR, it's possible to create rules such as combining "string matching statement" and "country match statement" with an AND condition to block “accesses that contain specific characters from a specific country.”
Reference: AWS WAF Explanation [Part 2: Relation between Condition and Filter]
https://www.wafcharm.com/en/blog/aws-waf-condition-filter/
3. Switching between new AWS WAF and AWS WAF Classic
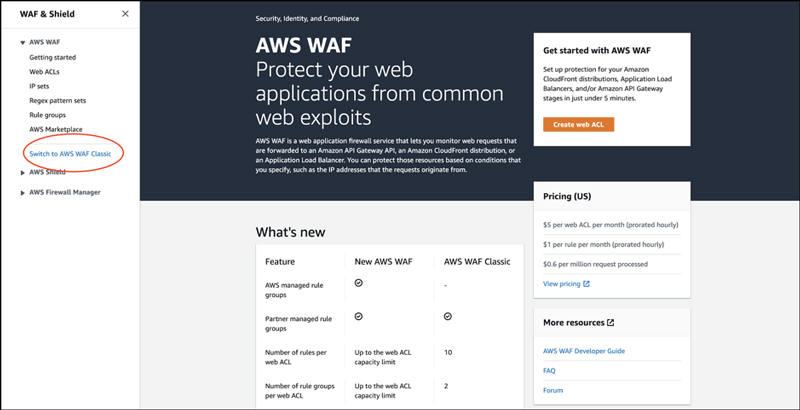
New AWS WAF management console
AWS WAF Classic management console
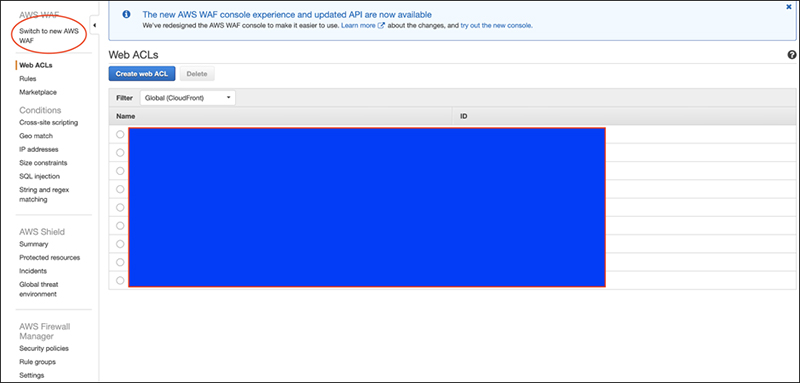
There is a link on each page to switch between AWS WAF Classic and the new AWS WAF.
4. Creating Web ACL
Please refer to "Creating a Web ACL" in Part 2: [new AWS WAF] AWS Management Console Operation (Managed Rules)
Original rule selection screen
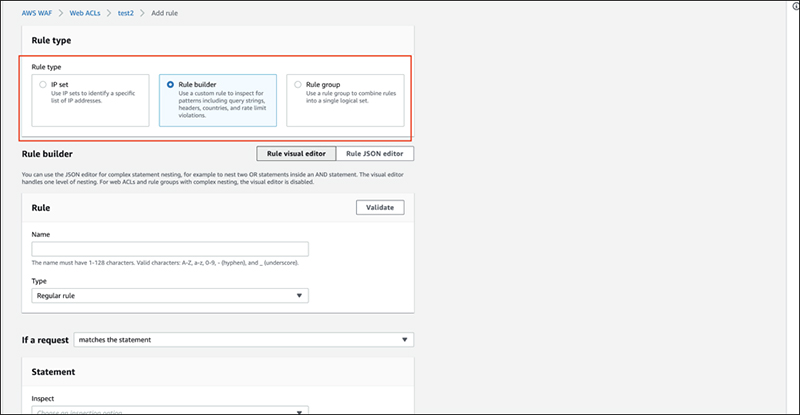
At the top of the screen, you can select a rule.
The items are as follows.
・ IP set
This allows you to select a list of IP restrictions (IP rule sets).
You can configure the IP rule set by registering it in advance.
・ Rule builder
You can create rules. We will get into specifics after this.
・ Rule group
You can select a "unique rule group" that summarizes several rules.
You can set up a rule group by creating and registering it in advance.
Here, we will select "Rule builder".
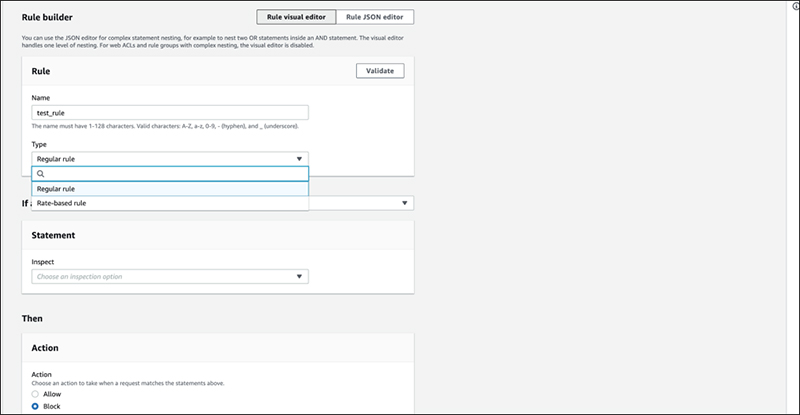
Next, select “Regular rule" from the drop-down menu in type of rule.
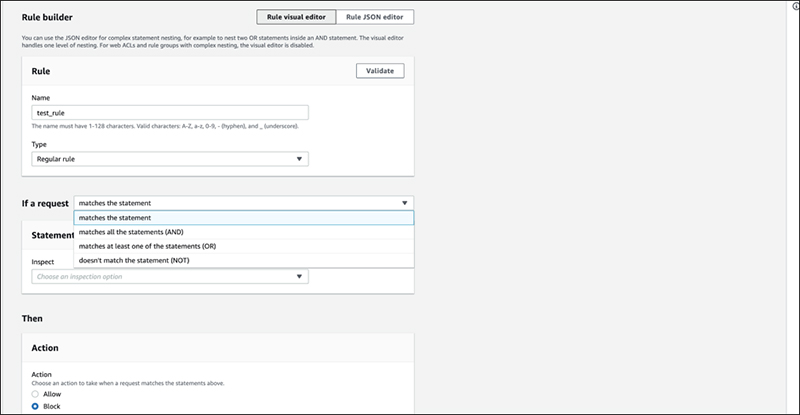
For "If a request", select from the logical conditions from the drop-down menu.
Select "matches the statement" or "doesn’t match the statement" for single logical conditions, or "AND" or "OR" for combining multiple conditions.
This time, we will choose "matches the statement" as a single logical condition for "Match".
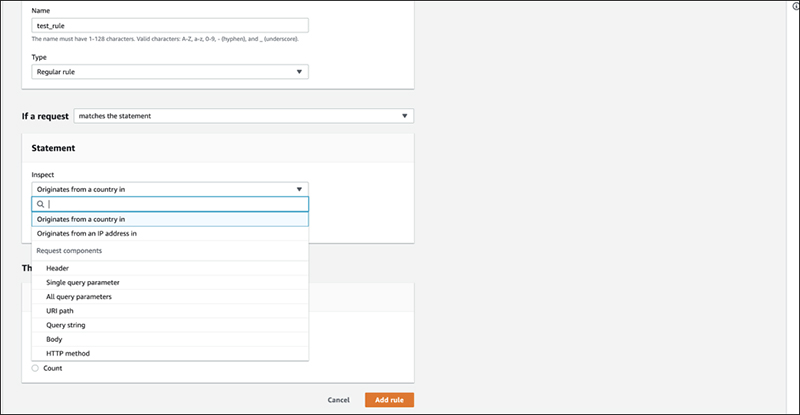
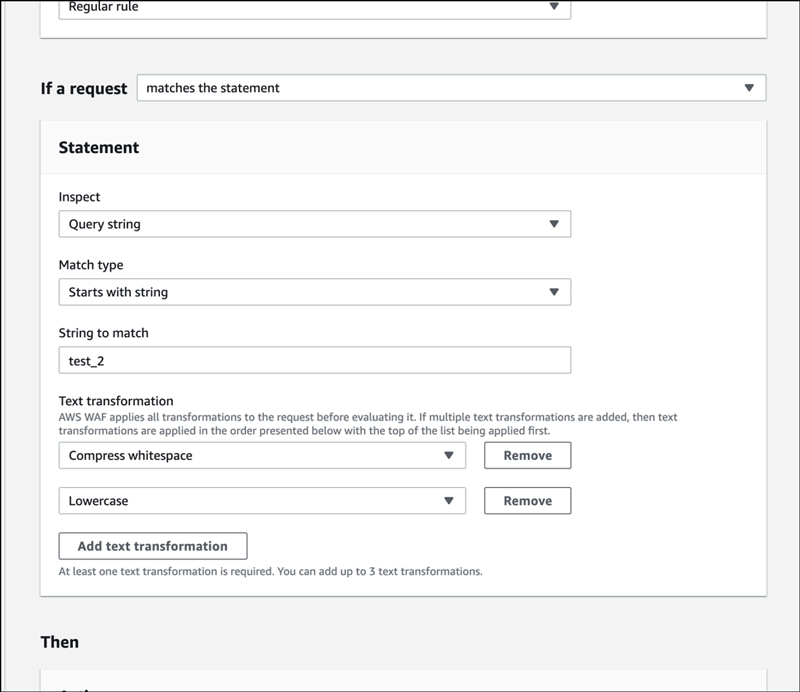
Under the statement field, there are different request components that you can select to inspect, such as "Header", "country", "IP", etc. The settings are the same as for AWS WAF Classic. The only thing is that you can now increase the number of logical conditions, so you can specify them as per the previous image. This time, we will create a rule to detect a specific string in the query part.
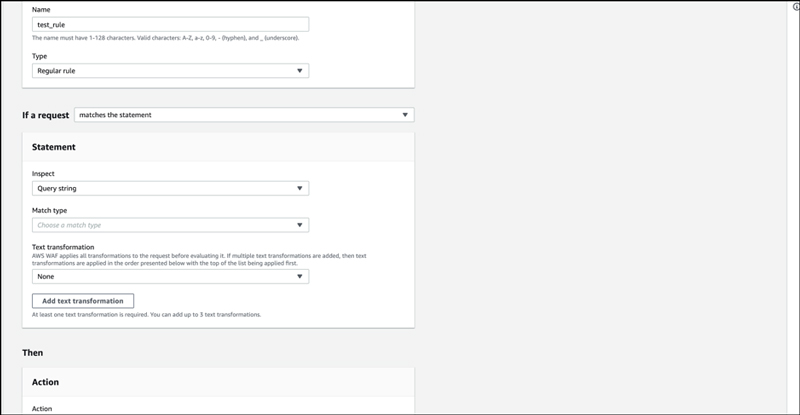
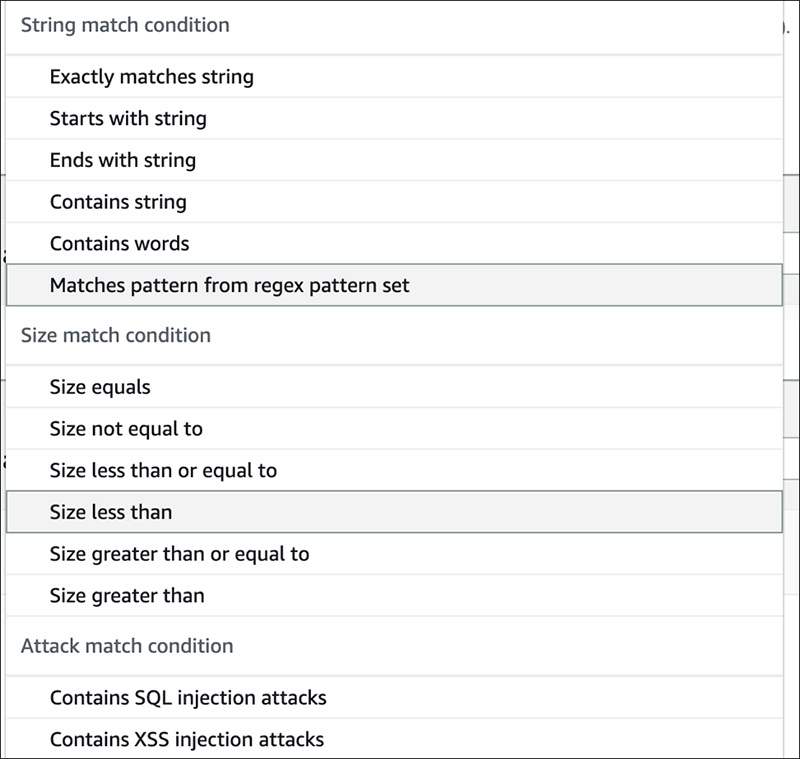
When we selected the query, we were presented with an item to set the matching criteria. When string match is used, the condition is specified as "Exactly matches string" or "Starts with string", etc. which was also present in AWS WAF Classic. The “Attack match conditions” such as XSS and SQL injection conditions are also specified here. Regular expression matches can be specified by creating them in advance.
This time, we will proceed with "Exactly matches string".
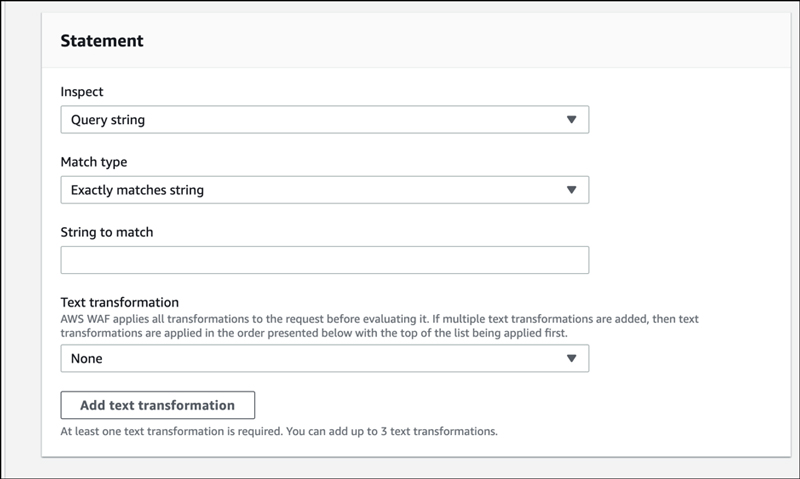
Input a string in “String to match” field.
Enter the transformation process in “Text transformation”. It can now be used to specify multiple text transformations.
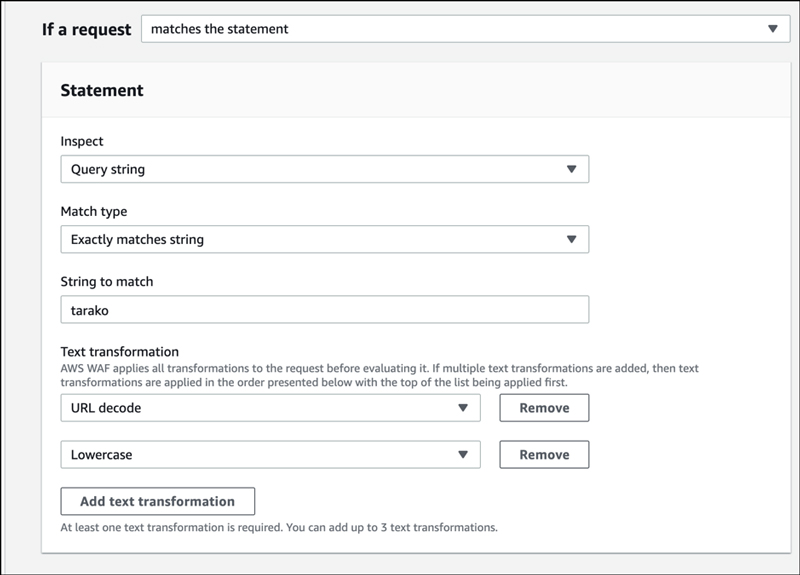
That’s it. Click “Add Rule” and you will be taken to the following screen.
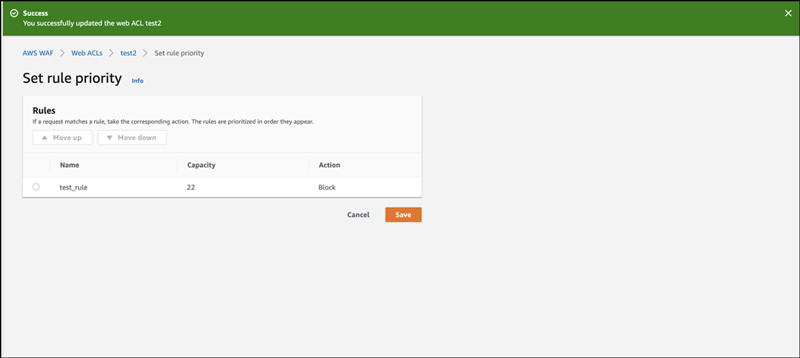
You can change the priority of the rule on this screen. Click “Save” to proceed.
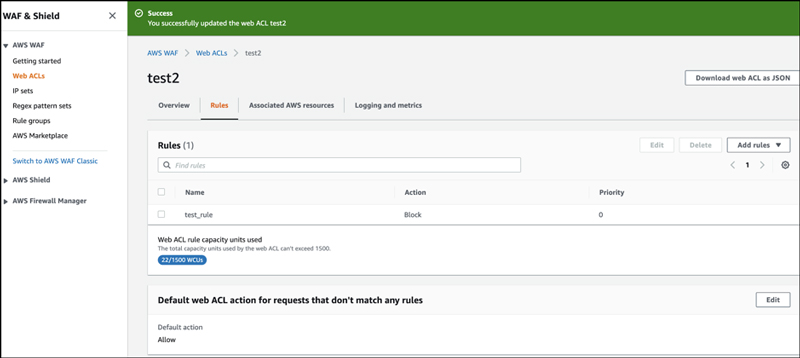
If you look at the Web ACL screen, you'll see that the rule you've created has been attached.
Let's also create a rule with multiple conditions using AND.
In the query part, create a structure that connects the string match condition and the country match condition with the AND condition.
First, we created a string match in the query part.
Change "matches the statement" to "matches all the statements (AND)".
The "Add another statement" is now displayed.
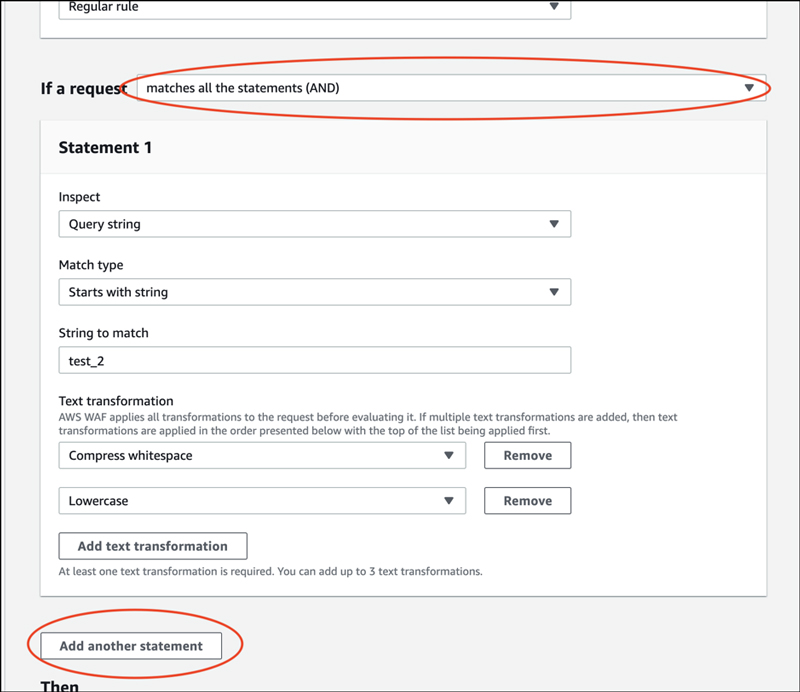
Click "Add another statement".
Connected by AND, there is now a new field to enter a statement. It is intuitive and easy to understand even on the screen.
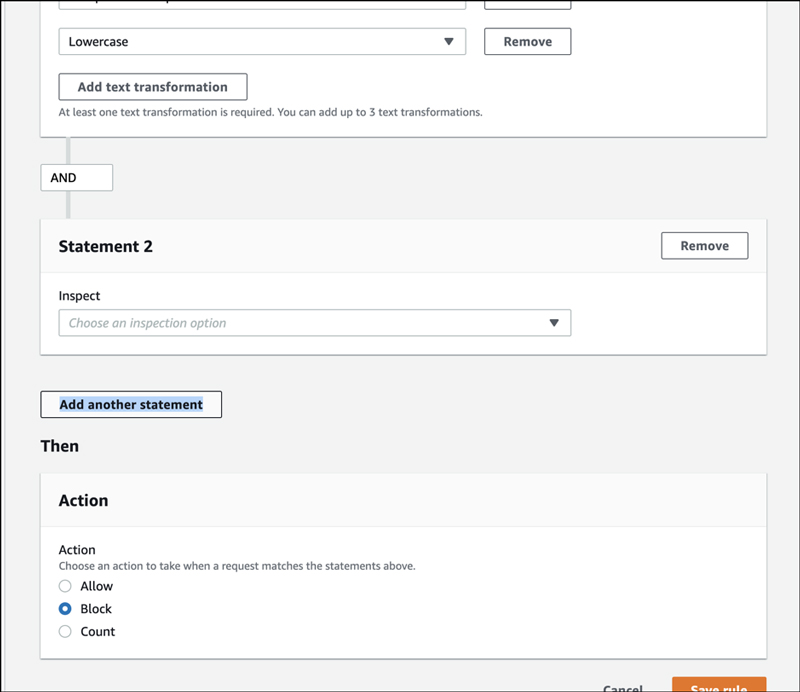
Set country restrictions, as additional condition.
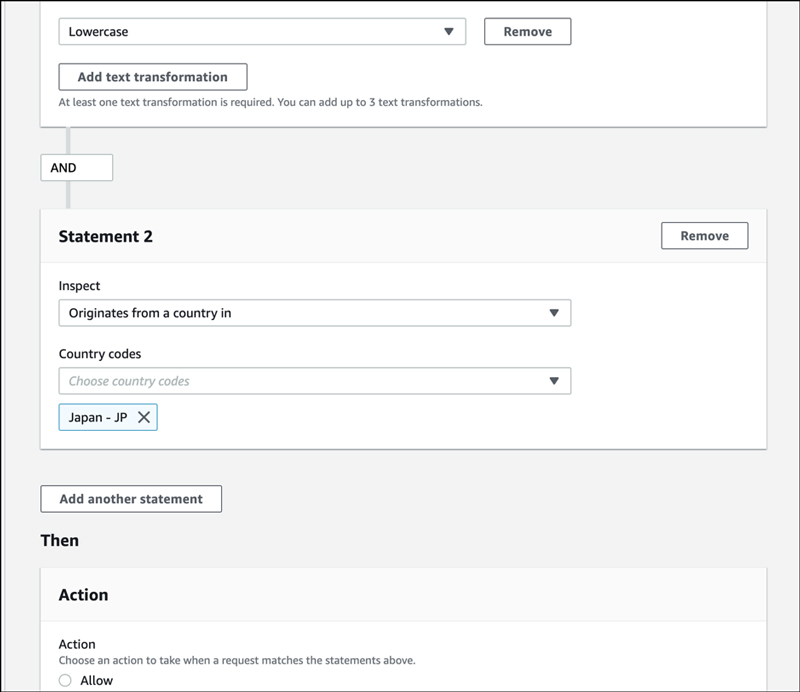
Let's take a look at it on JSON.
{
    "Name": "test_rule2",
    "Priority": 0,
    "Action": {
        "Block": {}
    },
    "VisibilityConfig": {
        "SampledRequestsEnabled": true,
        "CloudWatchMetricsEnabled": true,
        "MetricName": "test_rule2"
    },
    "Statement": {
        "AndStatement": {
            "Statements": [
                {
                    "ByteMatchStatement": {
                        "FieldToMatch": {
                            "QueryString": {}
                        },
                        "PositionalConstraint": "STARTS_WITH",
                        "SearchString": "test_2",
                        "TextTransformations": [
                            {
                                "Type": "COMPRESS_WHITE_SPACE",
                                "Priority": 0
                            },
                            {
                                "Type": "LOWERCASE",
                                "Priority": 1
                            }
                        ]
                    }
                },
                {
                    "GeoMatchStatement": {
                        "CountryCodes": [
                            "JP"
                        ]
                    }
                }
            ]
        }
    }
}
5. Conclusion
The operation was simple and easy to recognize, and we were able to create AND and OR conditions without any problems.