【Table of contents】
- 1. Introduction
- 2. Switching between new AWS WAF and AWS WAF Classic
- 3. Creating Web ACL
- 4. Adding managed rules
- 5. Invalidation of rules in managed rules
- 6. Conclusion
1. Introduction
- Part 1: [new AWS WAF] Summary of changes
Part 2: [new AWS WAF] AWS Management Console Operation (Managed Rules) (This blog)
Part 3: [new AWS WAF] AWS Management Console Operations (Original Rules)
Part 4: [new AWS WAF] AWS Management Console Operations (Pattern Sets & Rule Groups)
Part 5: [new AWS WAF] JSON Explanation
※If you haven't read the previous blog, we recommend that you start from the first one.
※The previous version of AWS WAF is now known as AWS WAF Classic. The new version is known as AWS WAF.
In this blog, we refer to the new version as the new AWS WAF and the previous version as AWS WAF Classic.
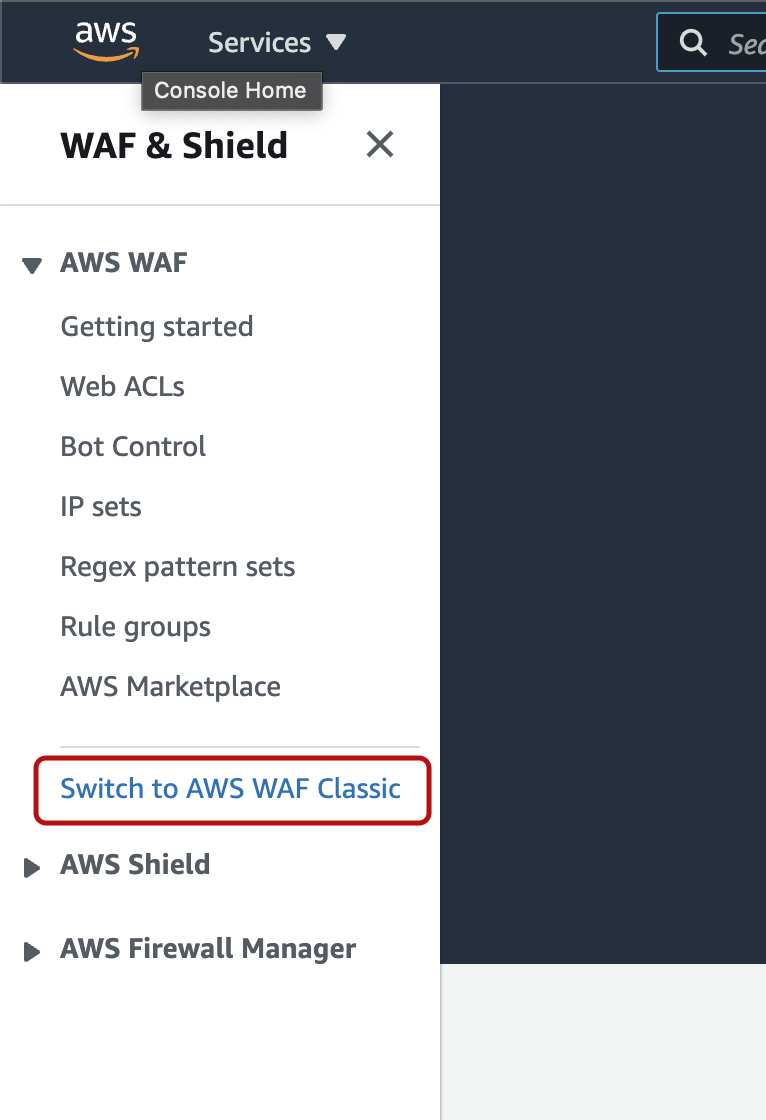
2. Switching between new AWS WAF and AWS WAF Classic
New AWS WAF management console
AWS WAF Classic management console
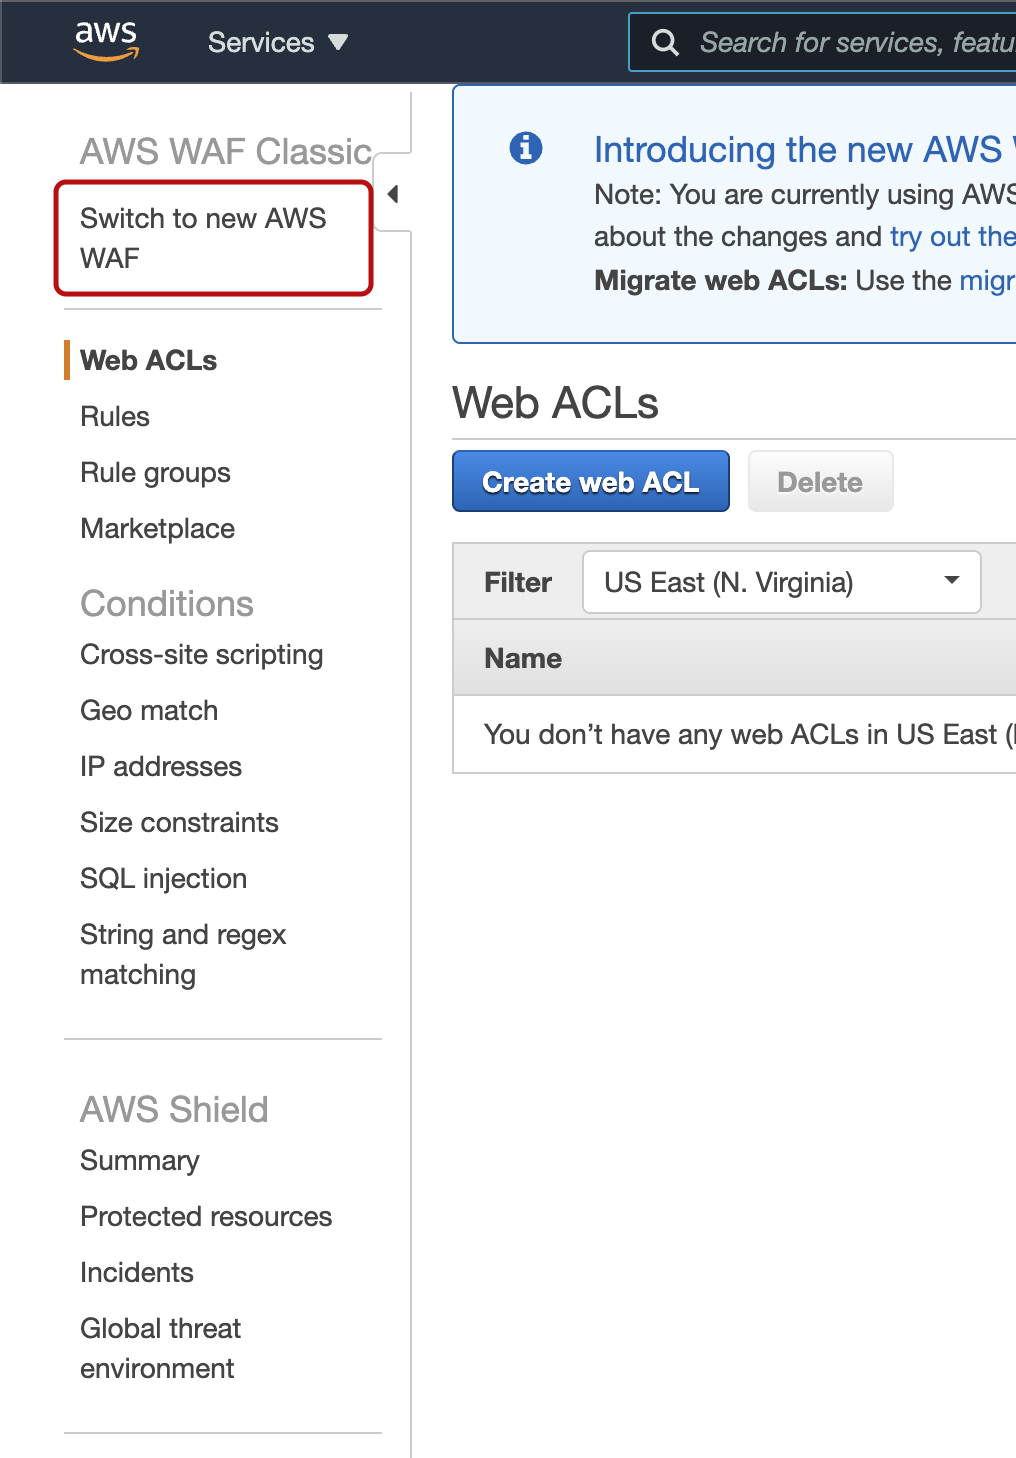
There is a link on each page to switch between AWS WAF Classic and the new AWS WAF.
3. Creating Web ACL
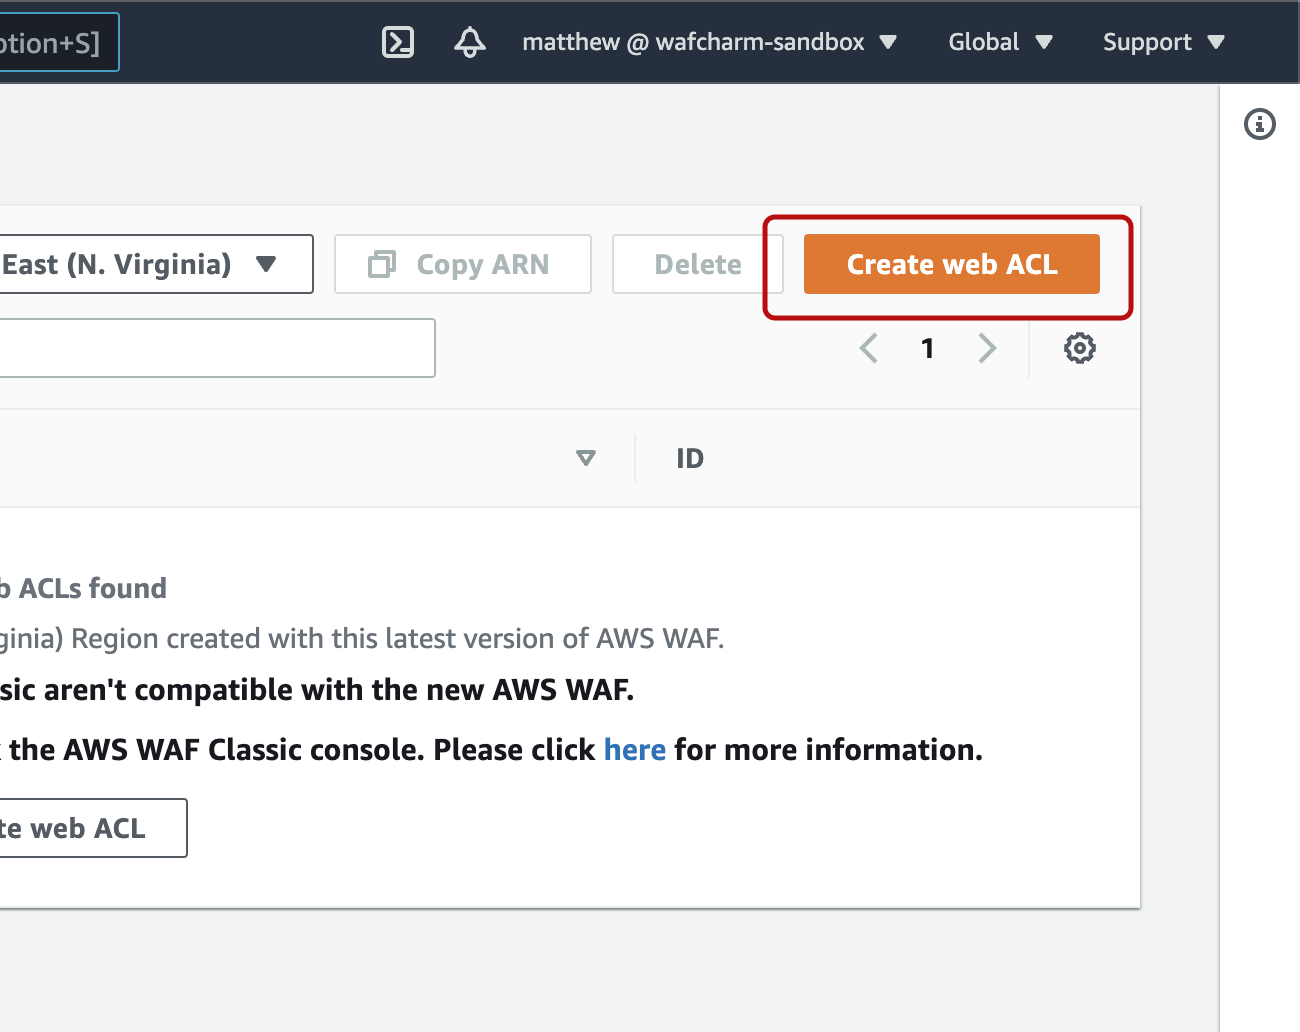
Select Web ACL from the left menu and choose the region from the drop down menu on the top right, and then click “Create web ACL”.

Enter a name for the web ACL. "CloudWatch metric name" is automatically entered as the same name as the web ACL name, and can also be changed to a different name.
After selecting the “Resource type” and “Region”, you’ll be taken to a screen to select which resource (e.g. ALB) to apply to. You can proceed without entering anything in it.
Click "NEXT" at the bottom right of the screen.
※From this point onwards, you will be asked to name different items. Therefore, it is recommended to have a regularity (e.g. name it ~ ACL if it is a web ACL name, ~ rule if it is a rule, etc.), as it is likely that the same name will make the situation difficult to understand.
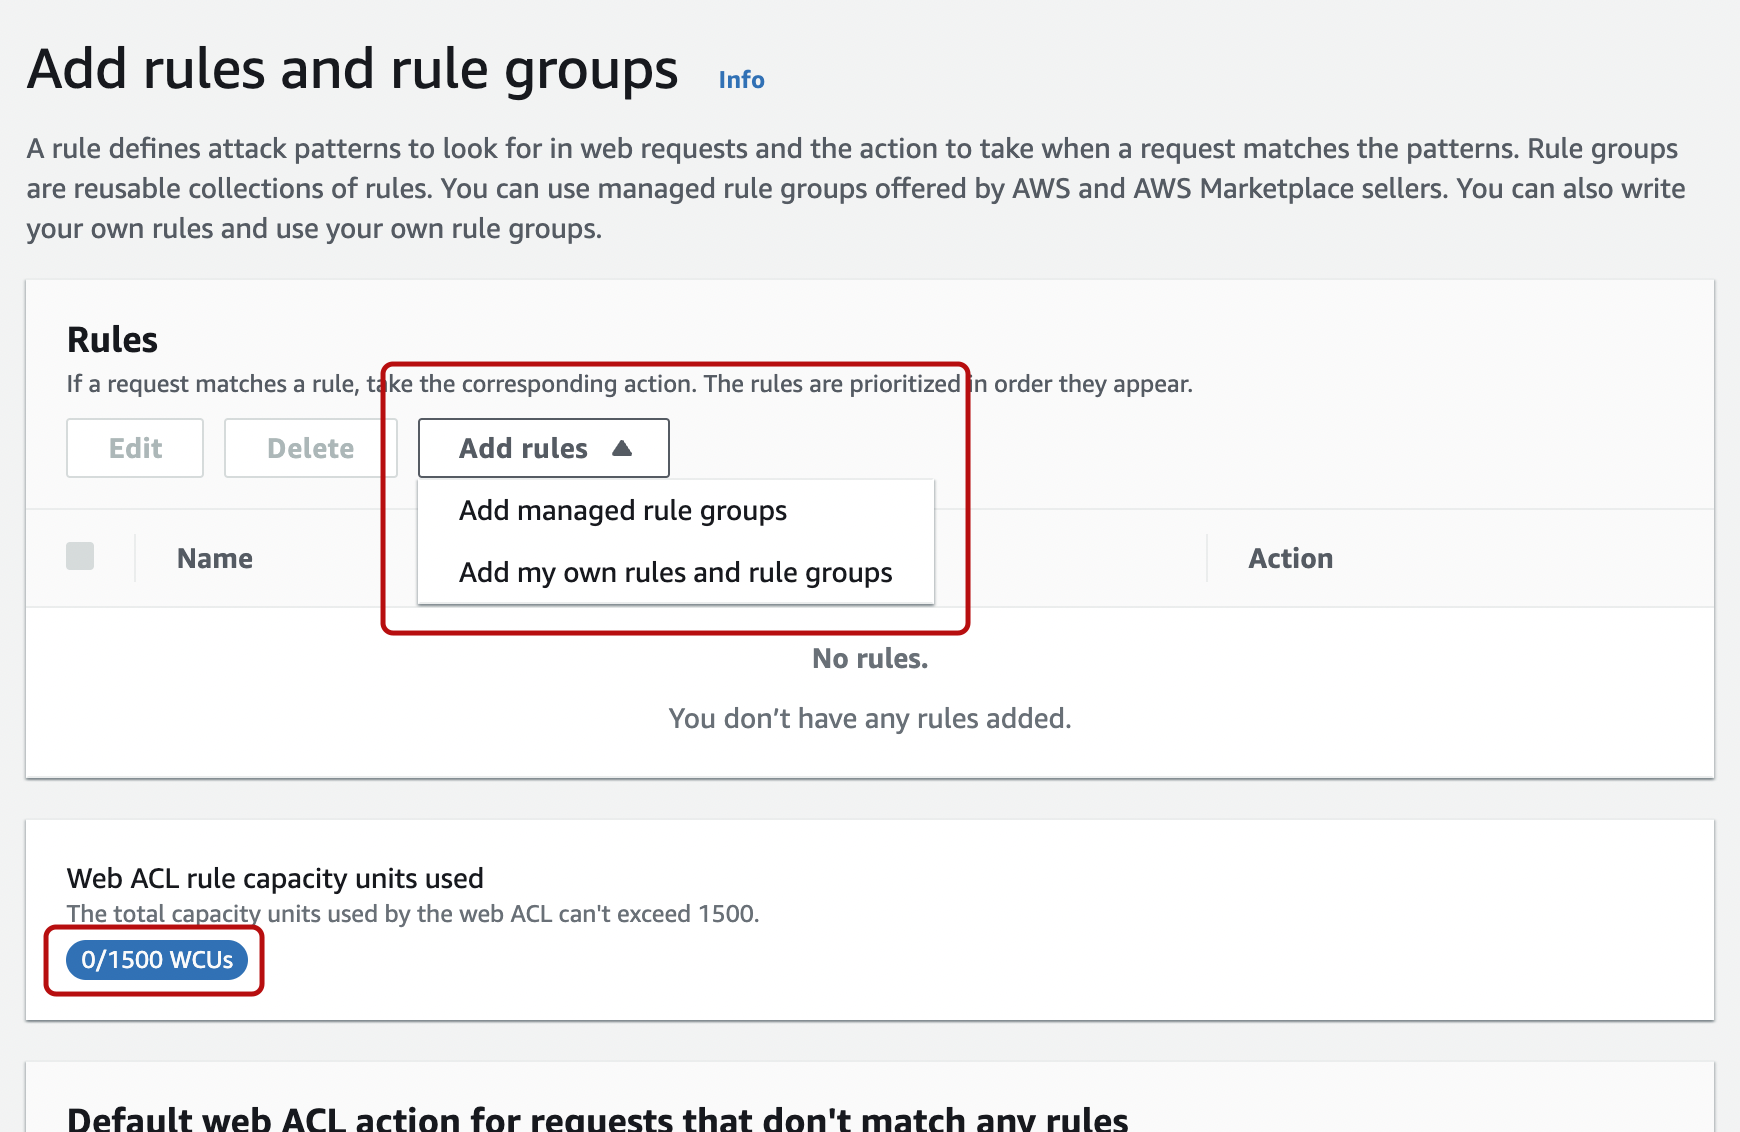
Next is the rule registration screen. Clicking on "Add rules" will allow you to select either managed rules or your own rules.
In the center of the screen, it shows the amount of WCU usage, which changes as the rules are updated. Below that, you can select the Default web ACL action for requests that don’t match any rules.
※ For calculation method of WCU, please refer to Part 1: [new AWS WAF] Summary of changes"
You get the following screen when “Add managed rule groups” is selected under “Add rules”
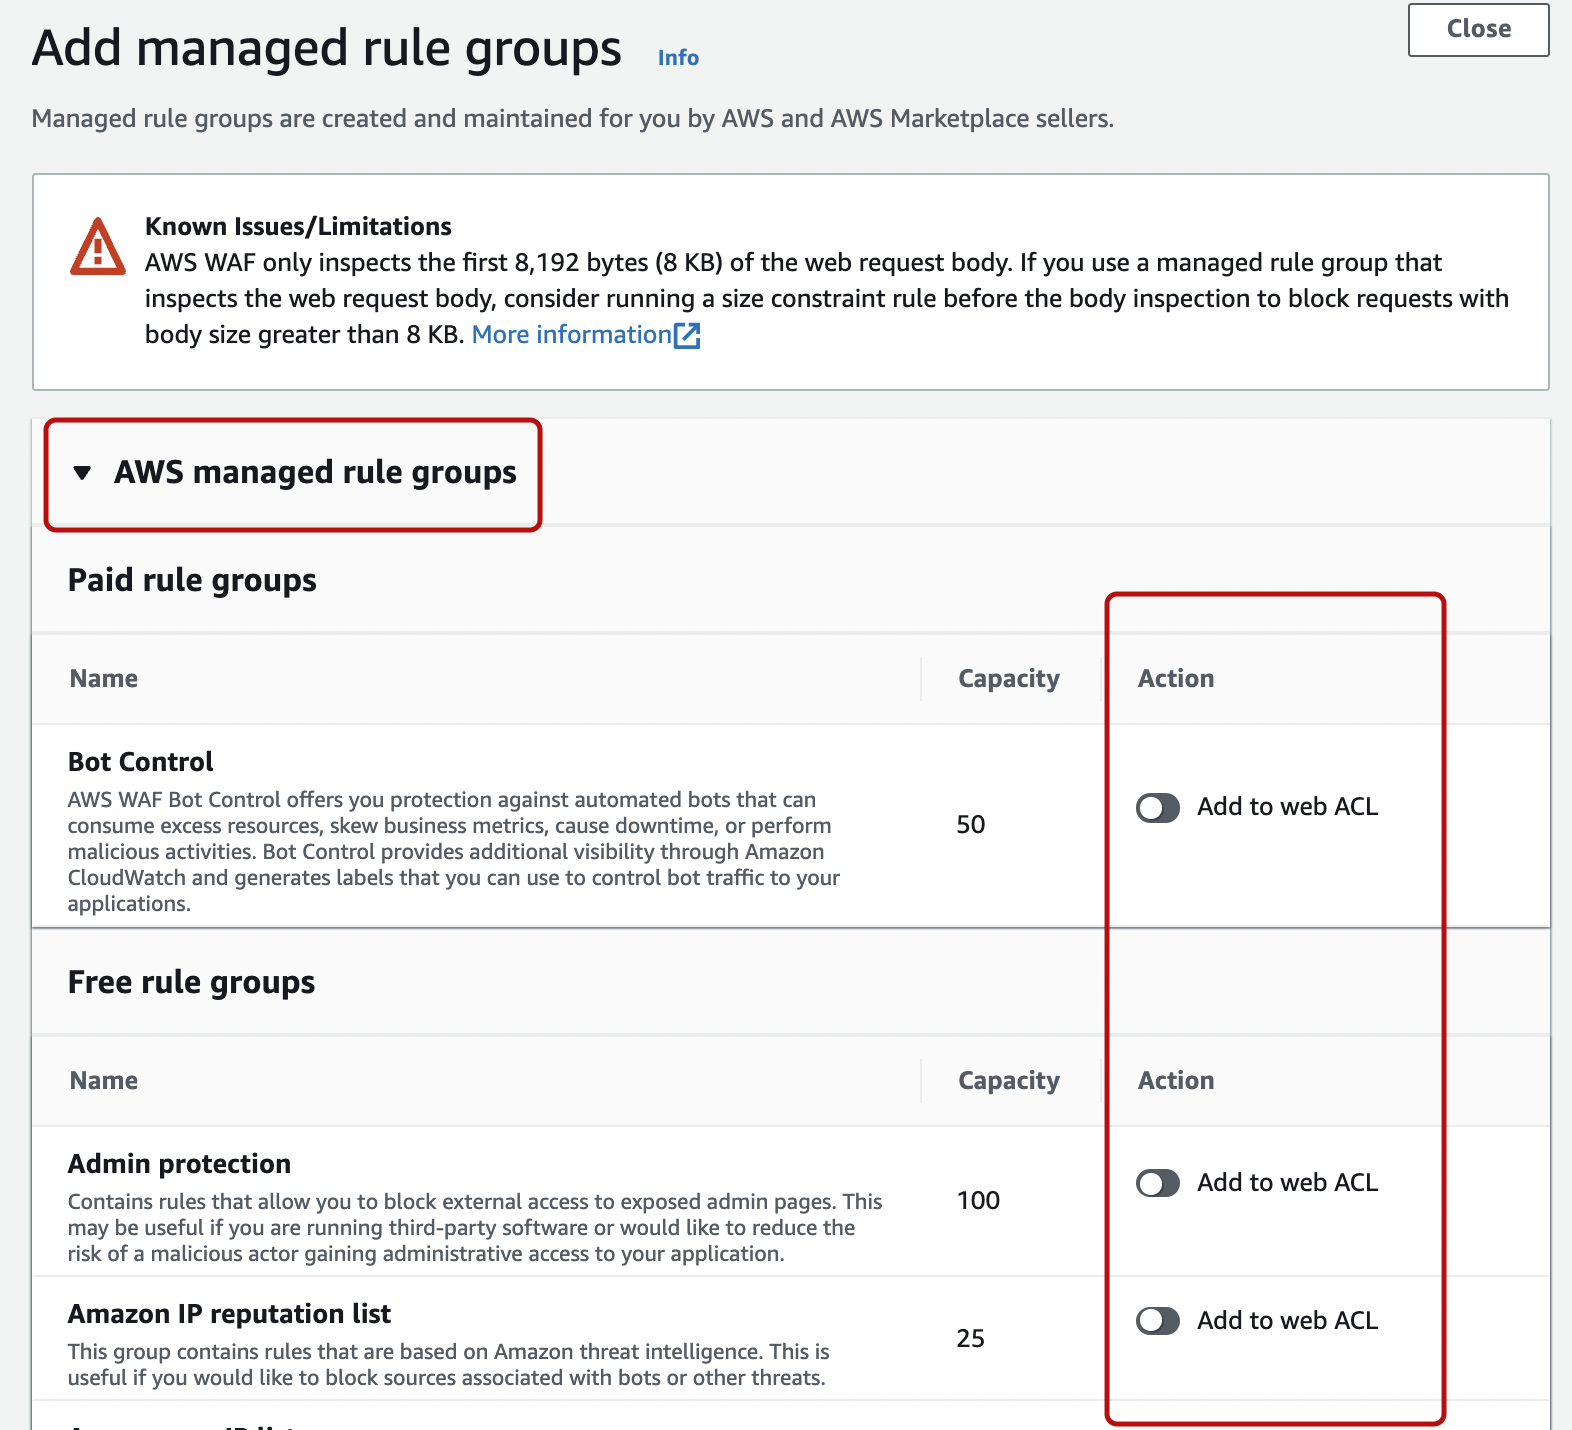
A list of available managed rules will be displayed and clicking on "AWS managed rule groups" will show its contents. Under the “Action” tab on the right, you can decide whether to apply it to the web ACL and select the mode.
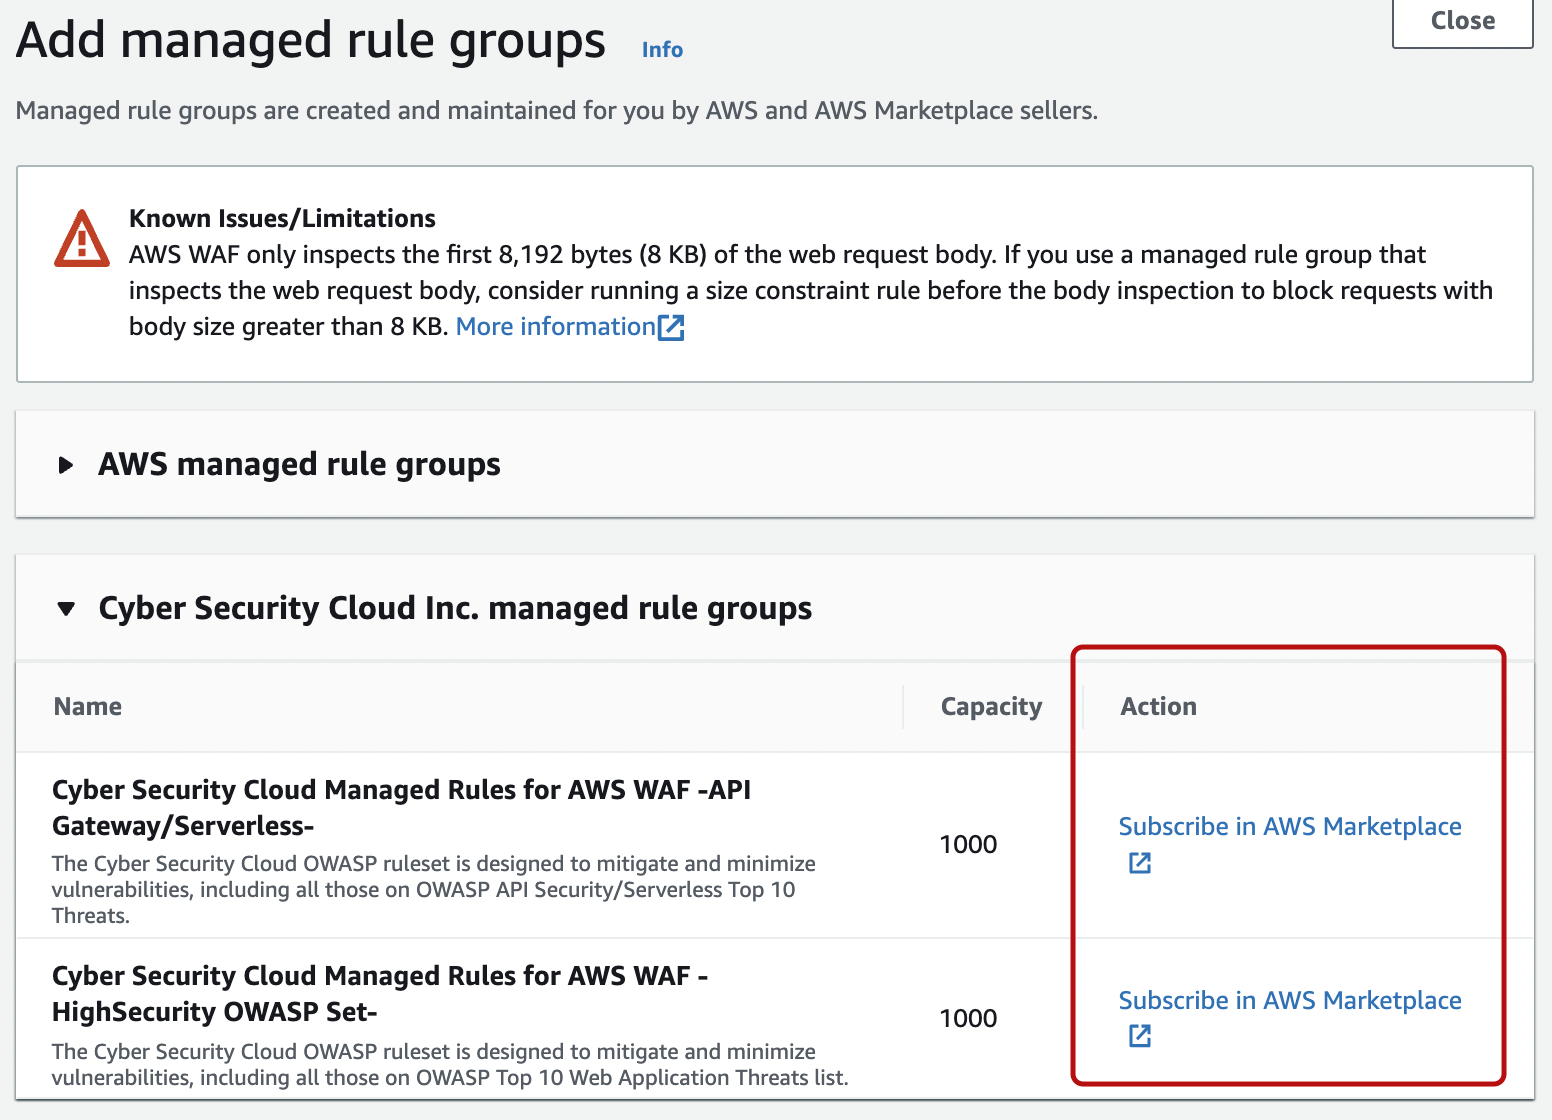
For managed rules that are available on the marketplace, this is a link to the marketplace.
※The following image is a set of managed rules by CSC.
When one of the AWS managed rule is added, we were able to see that the WCU value increased by its capacity.

At this point, click "NEXT".
On the next screen, you can set rule priority.
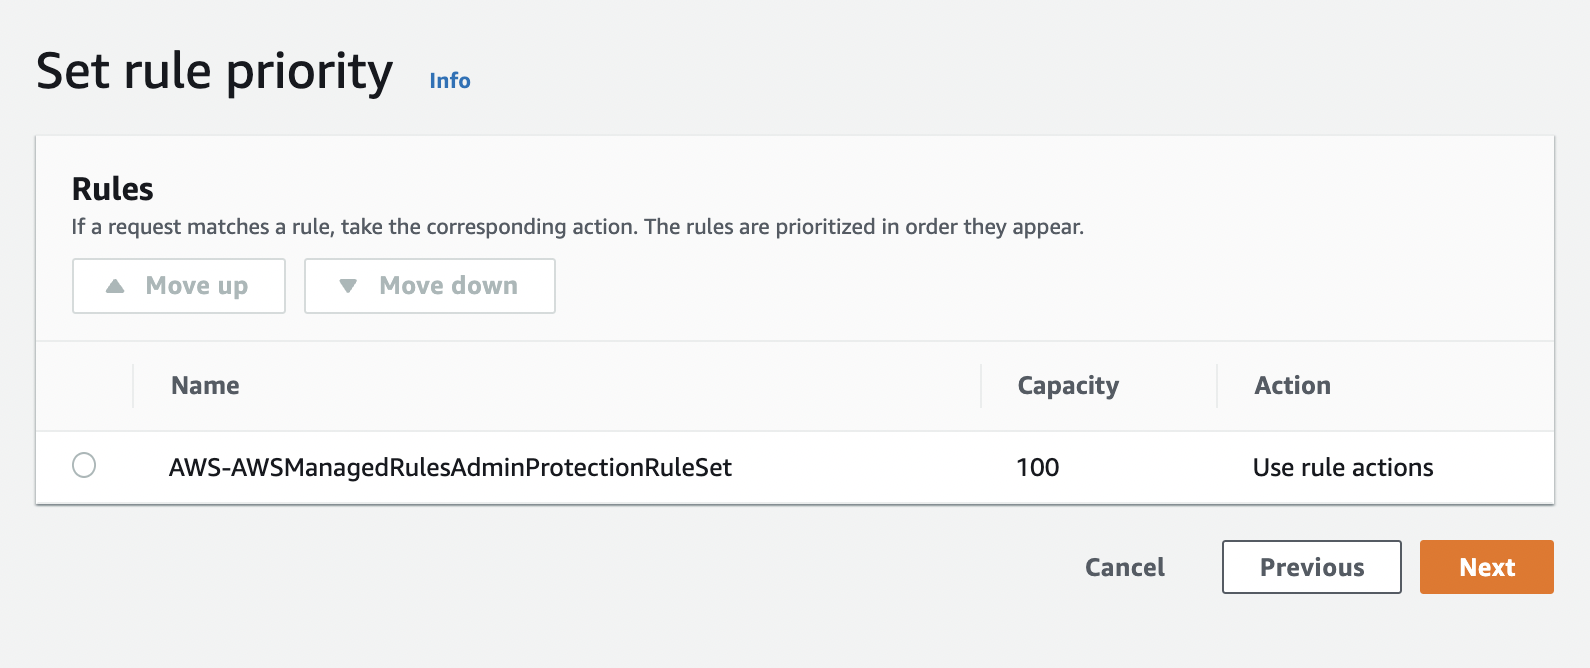
Click "Next".
On the next screen, you can configure the metrics to integrate with CloudWatch. Unchecking the checkbox will remove the CloudWatch integration.
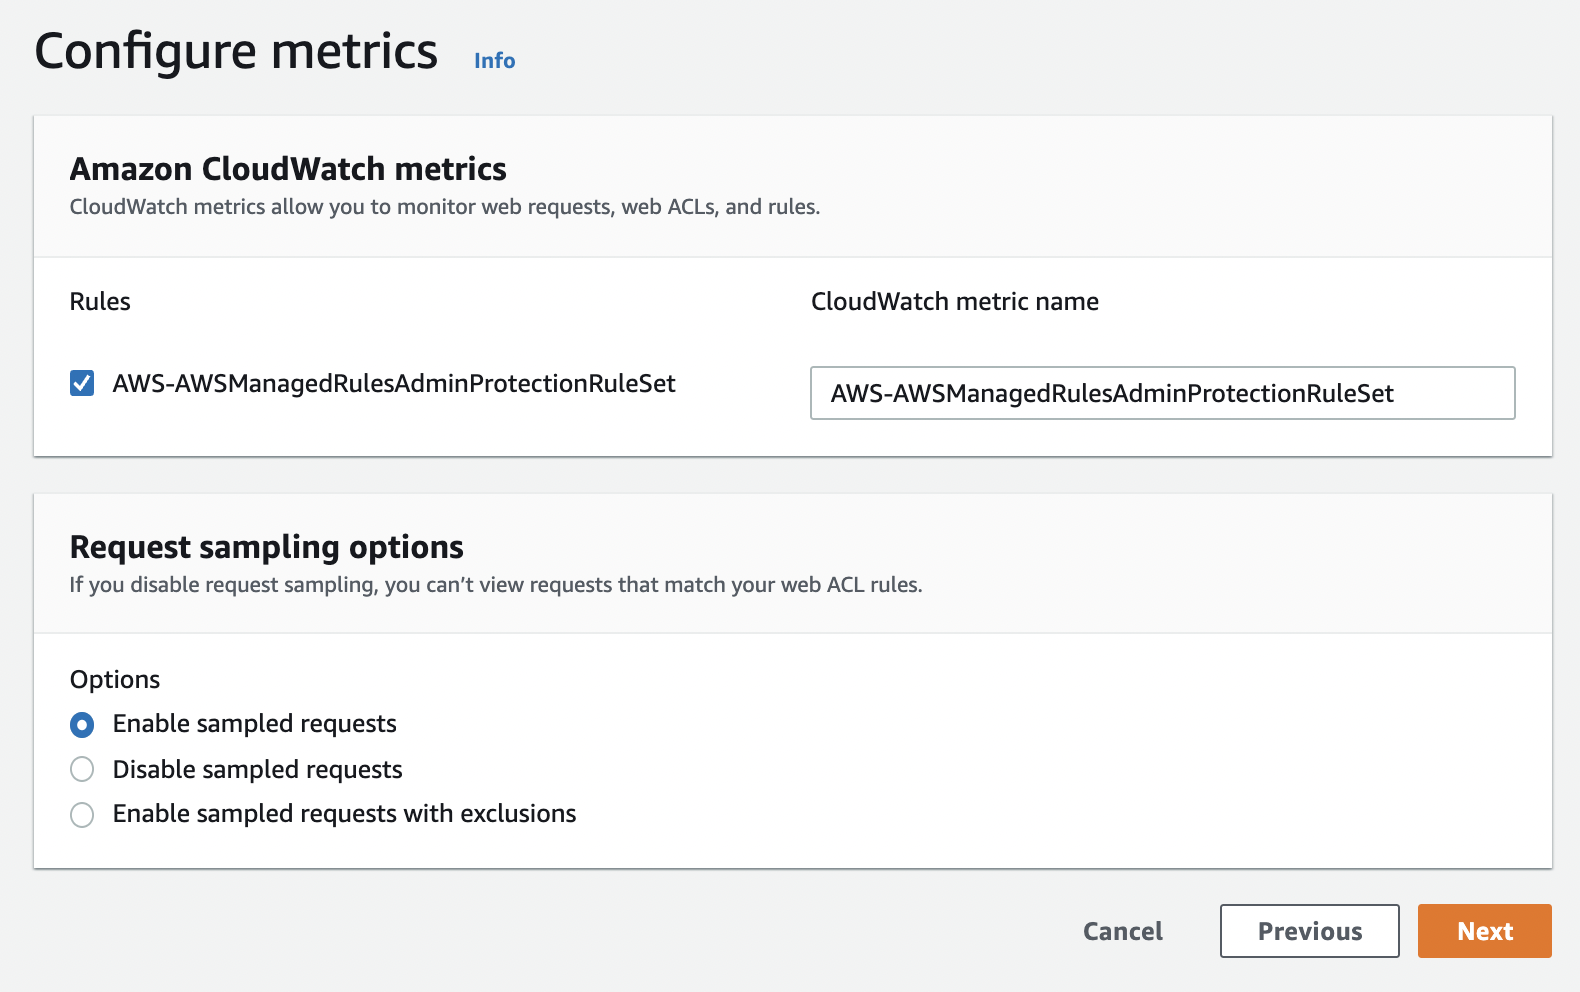
Click "NEXT".
Step 5 is the confirmation screen.
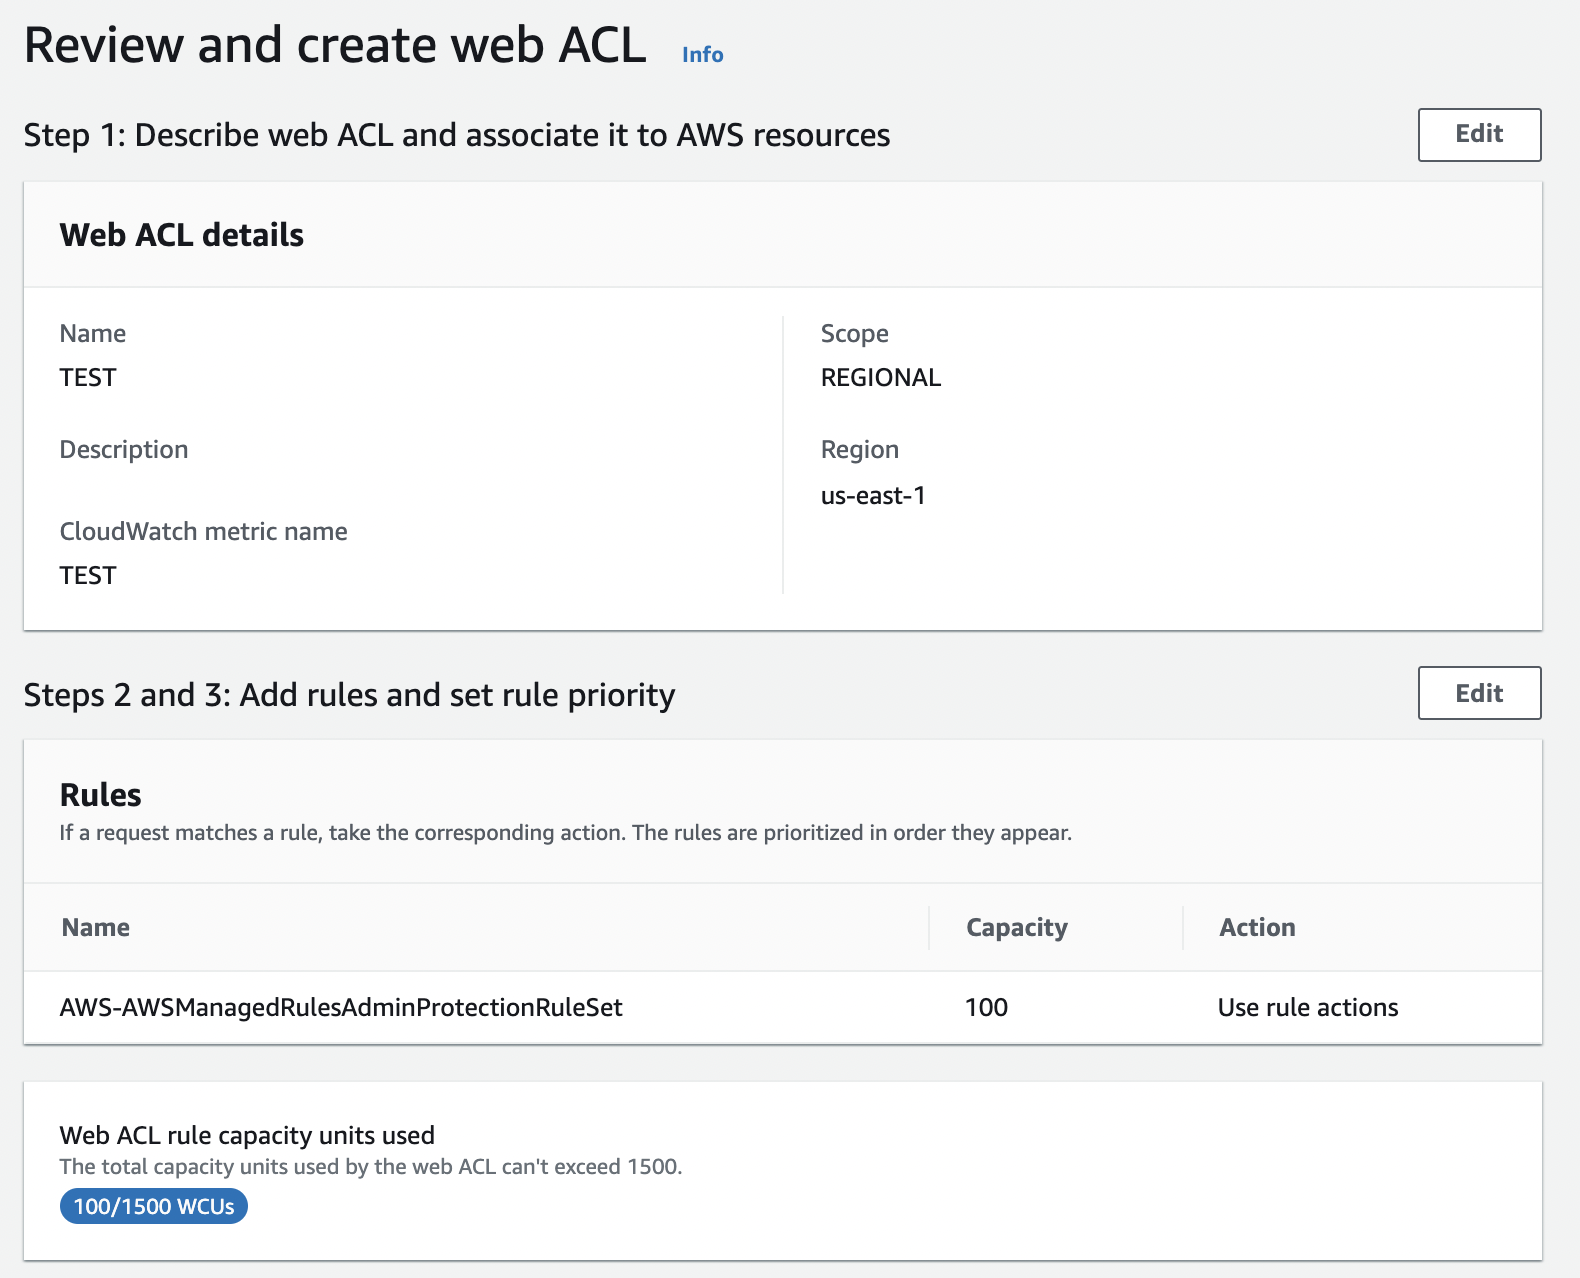
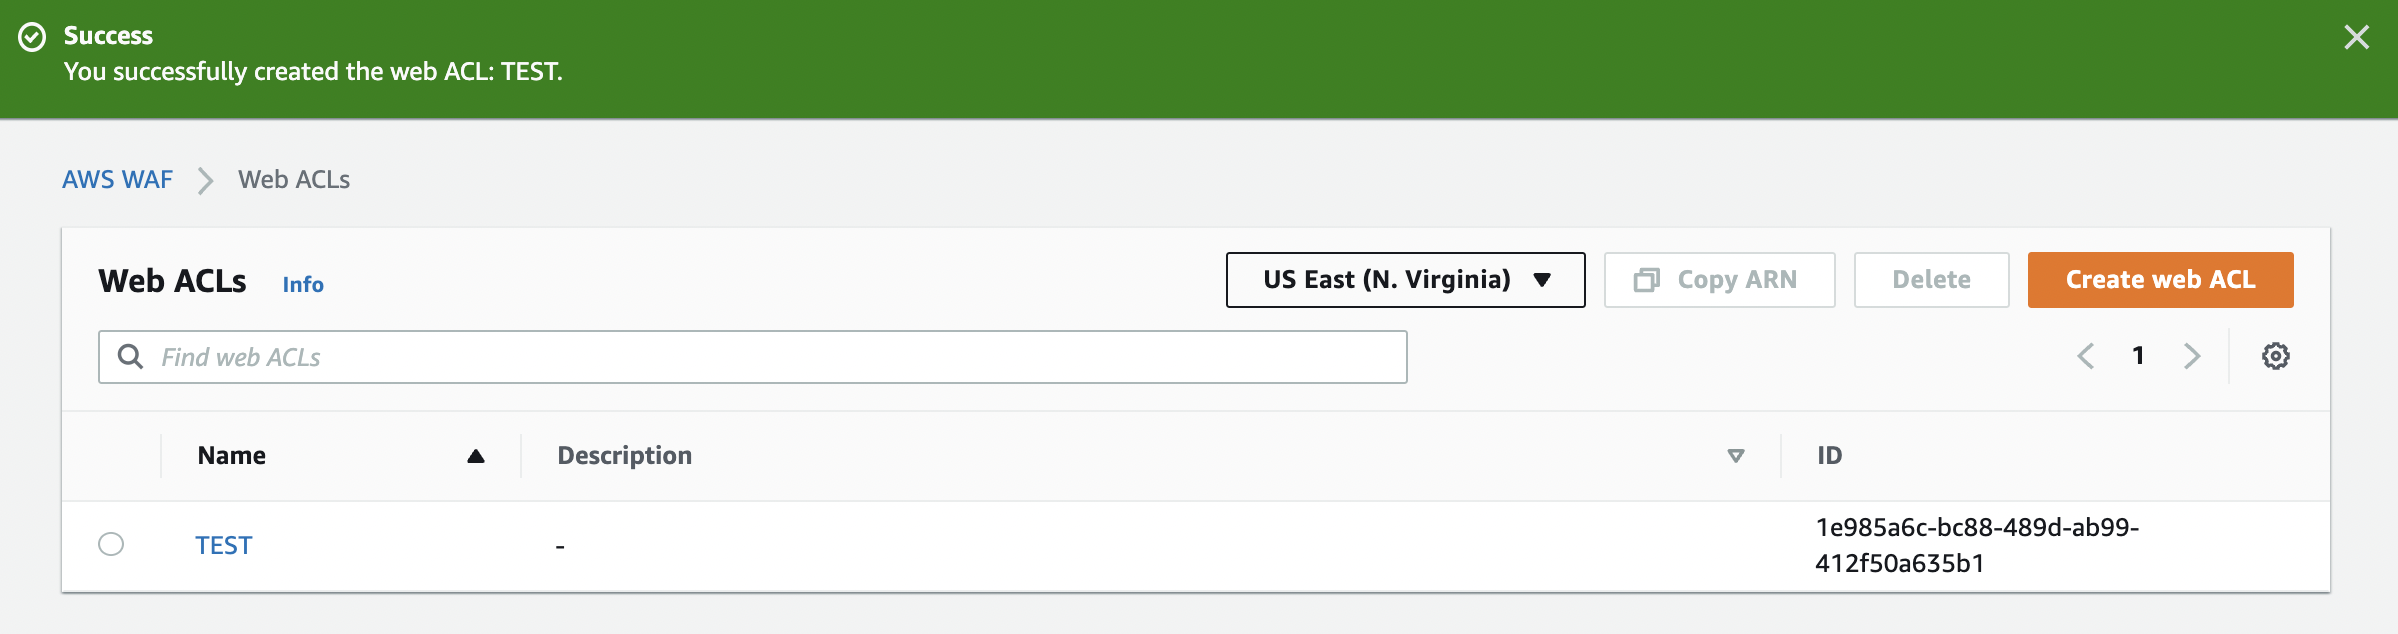
Review and click the create button and you're done.
4. Adding managed rules
Within managed rules, it is possible to set a specific rule to COUNT mode.
We selected a set of managed rules with multiple rules to review.
When you select the target Web ACL, a screen will appear where you can check the requests and sample logs.
You can change the target resources or rules, and the CloudWatch settings by switching the tab from the top of the screen. Here we will explain about adding a rule.
The rule editing screen was the same as the rule editing screen when creating the Web ACL. You can add them by clicking "Add rules".
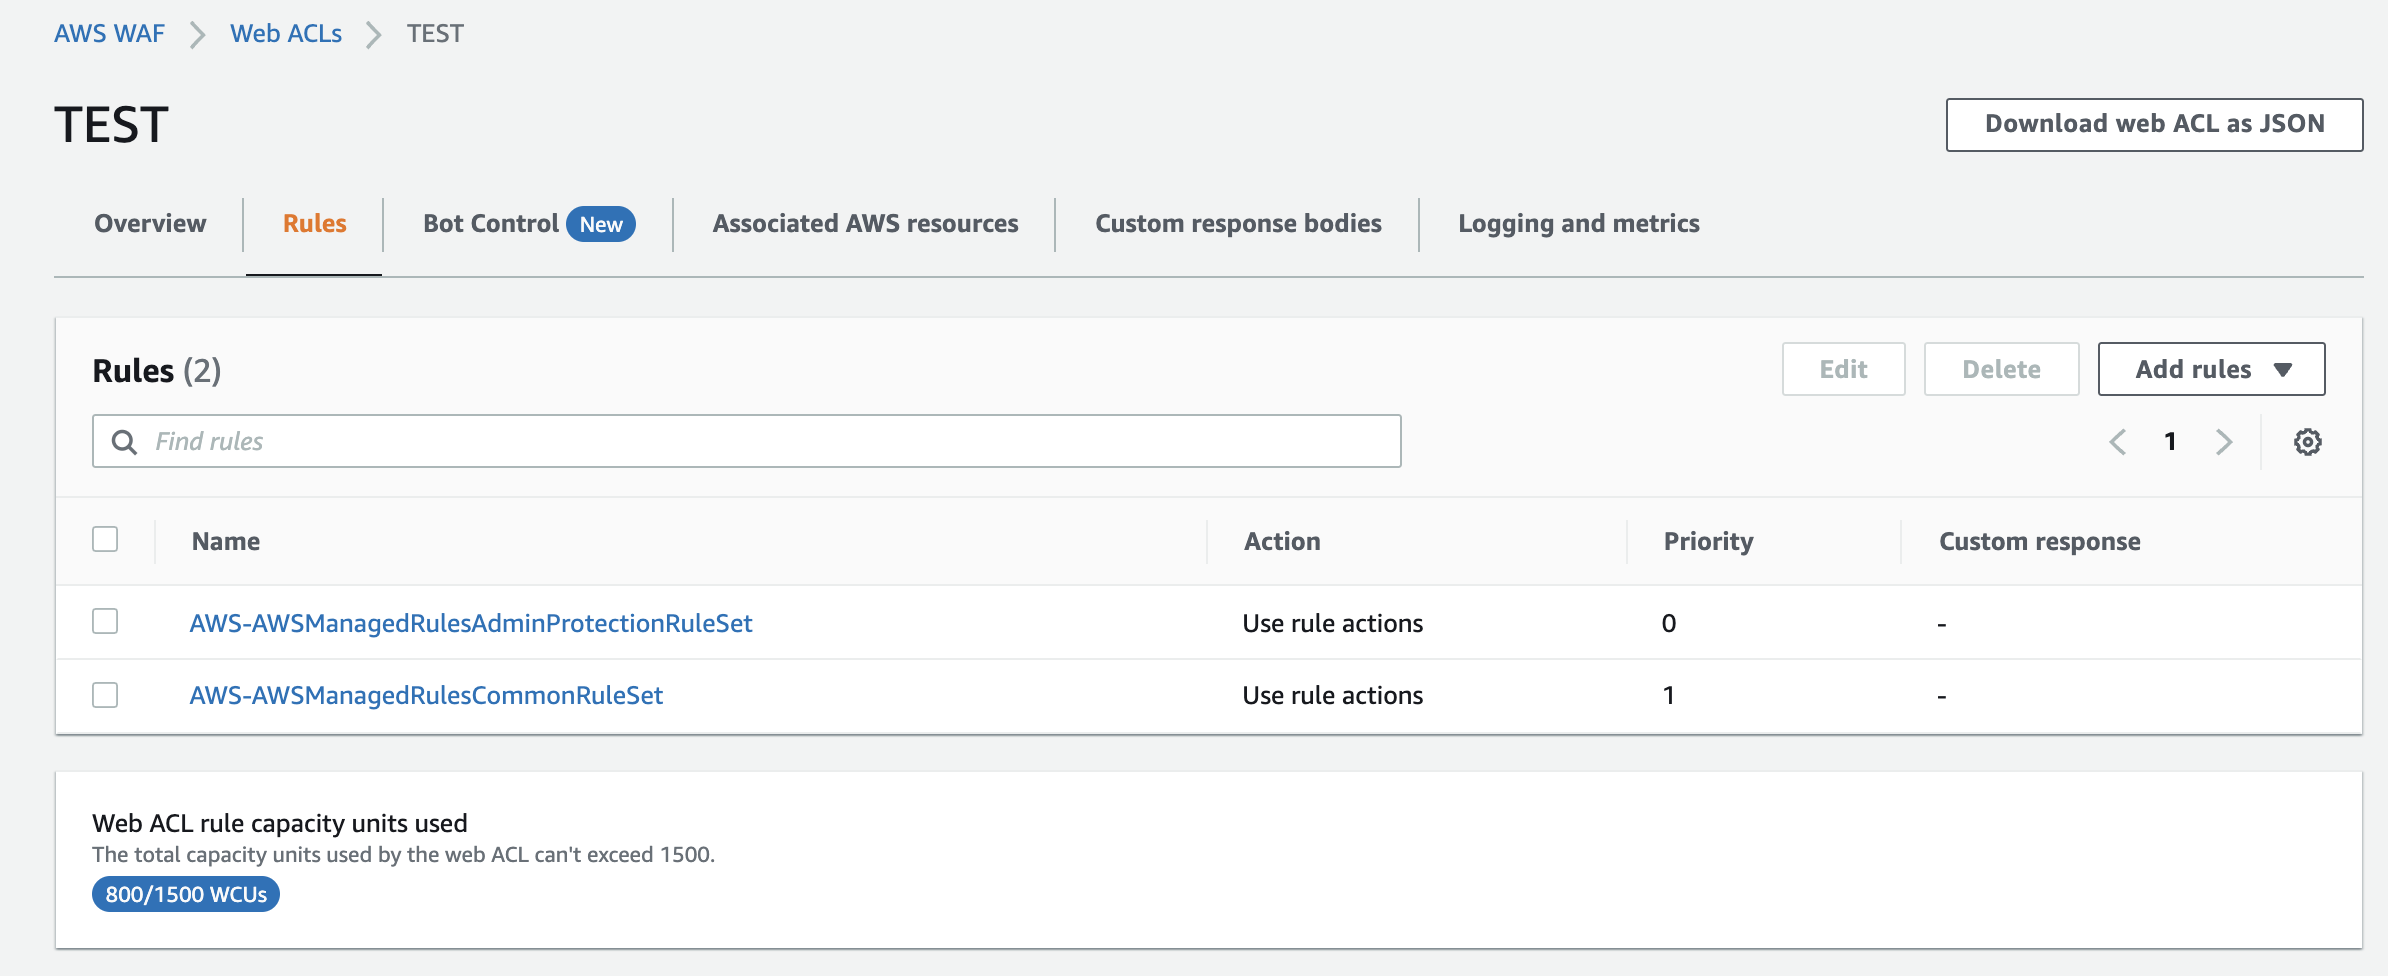
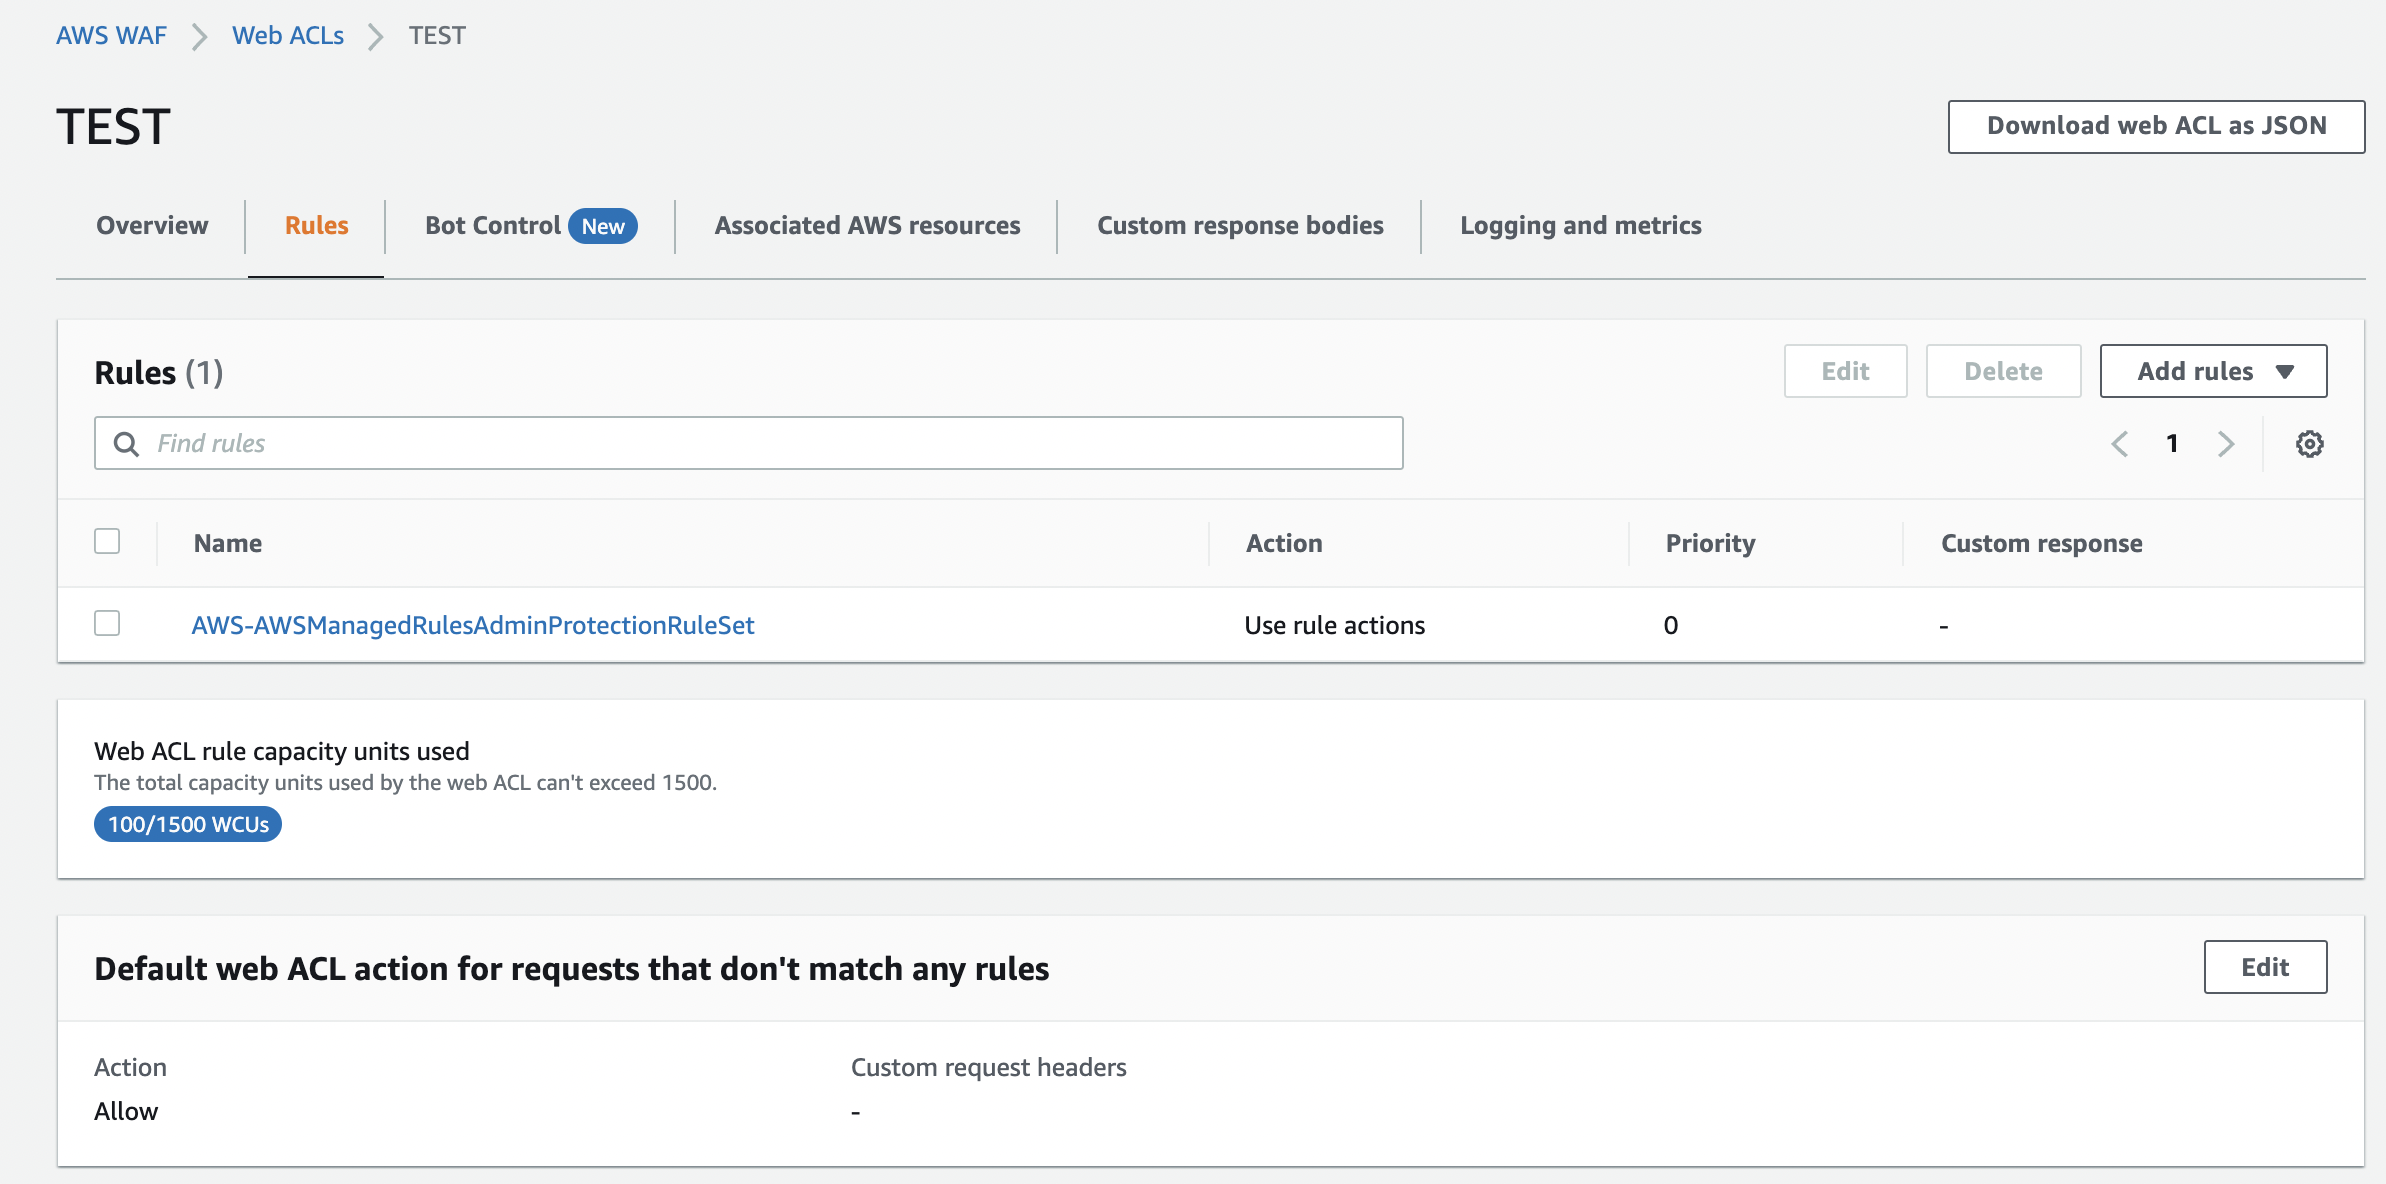
Managed rules have been added.
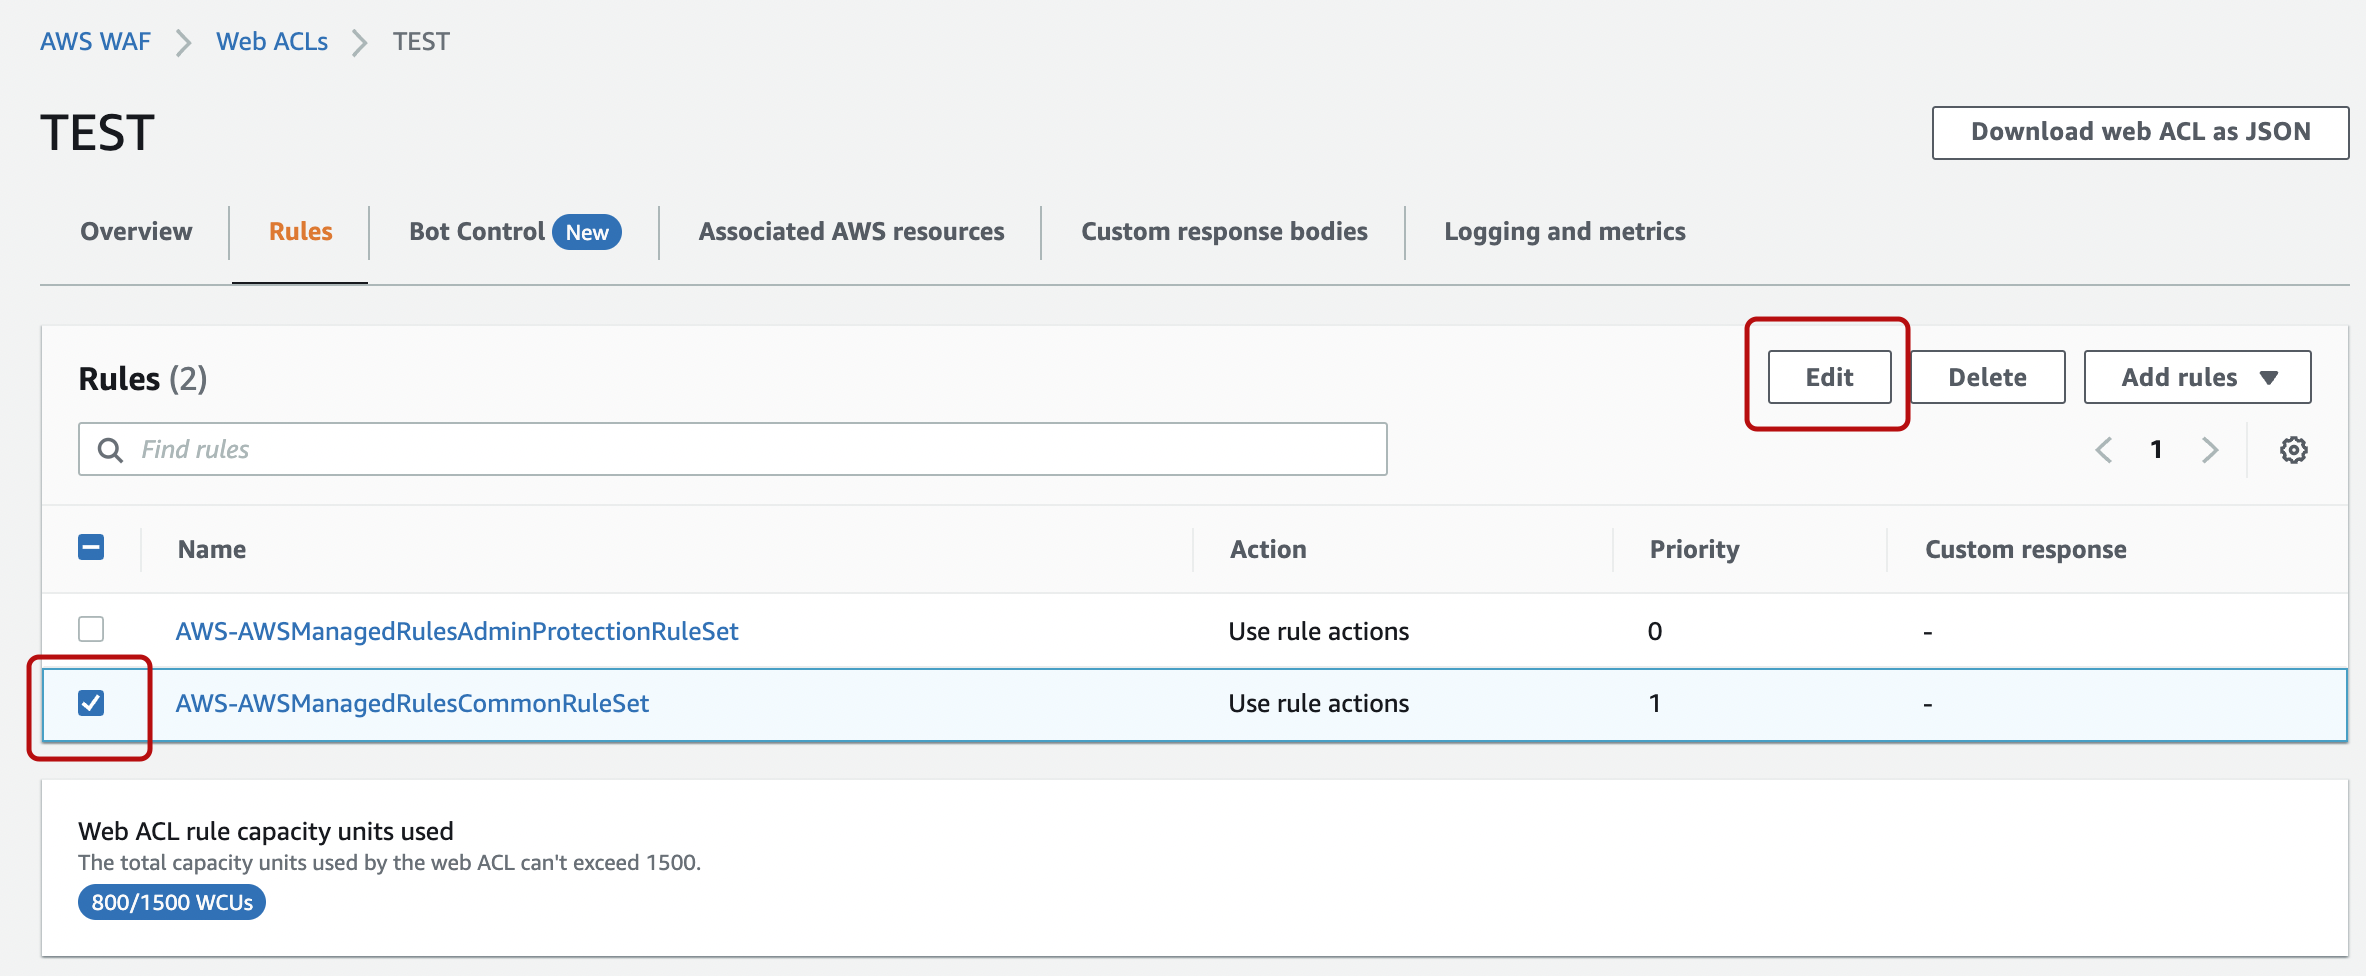
5. Invalidation of rules in managed rules
Here we’ll show how to change a specific rule within the managed rules to COUNT mode. Select the target rule and click “Edit”.
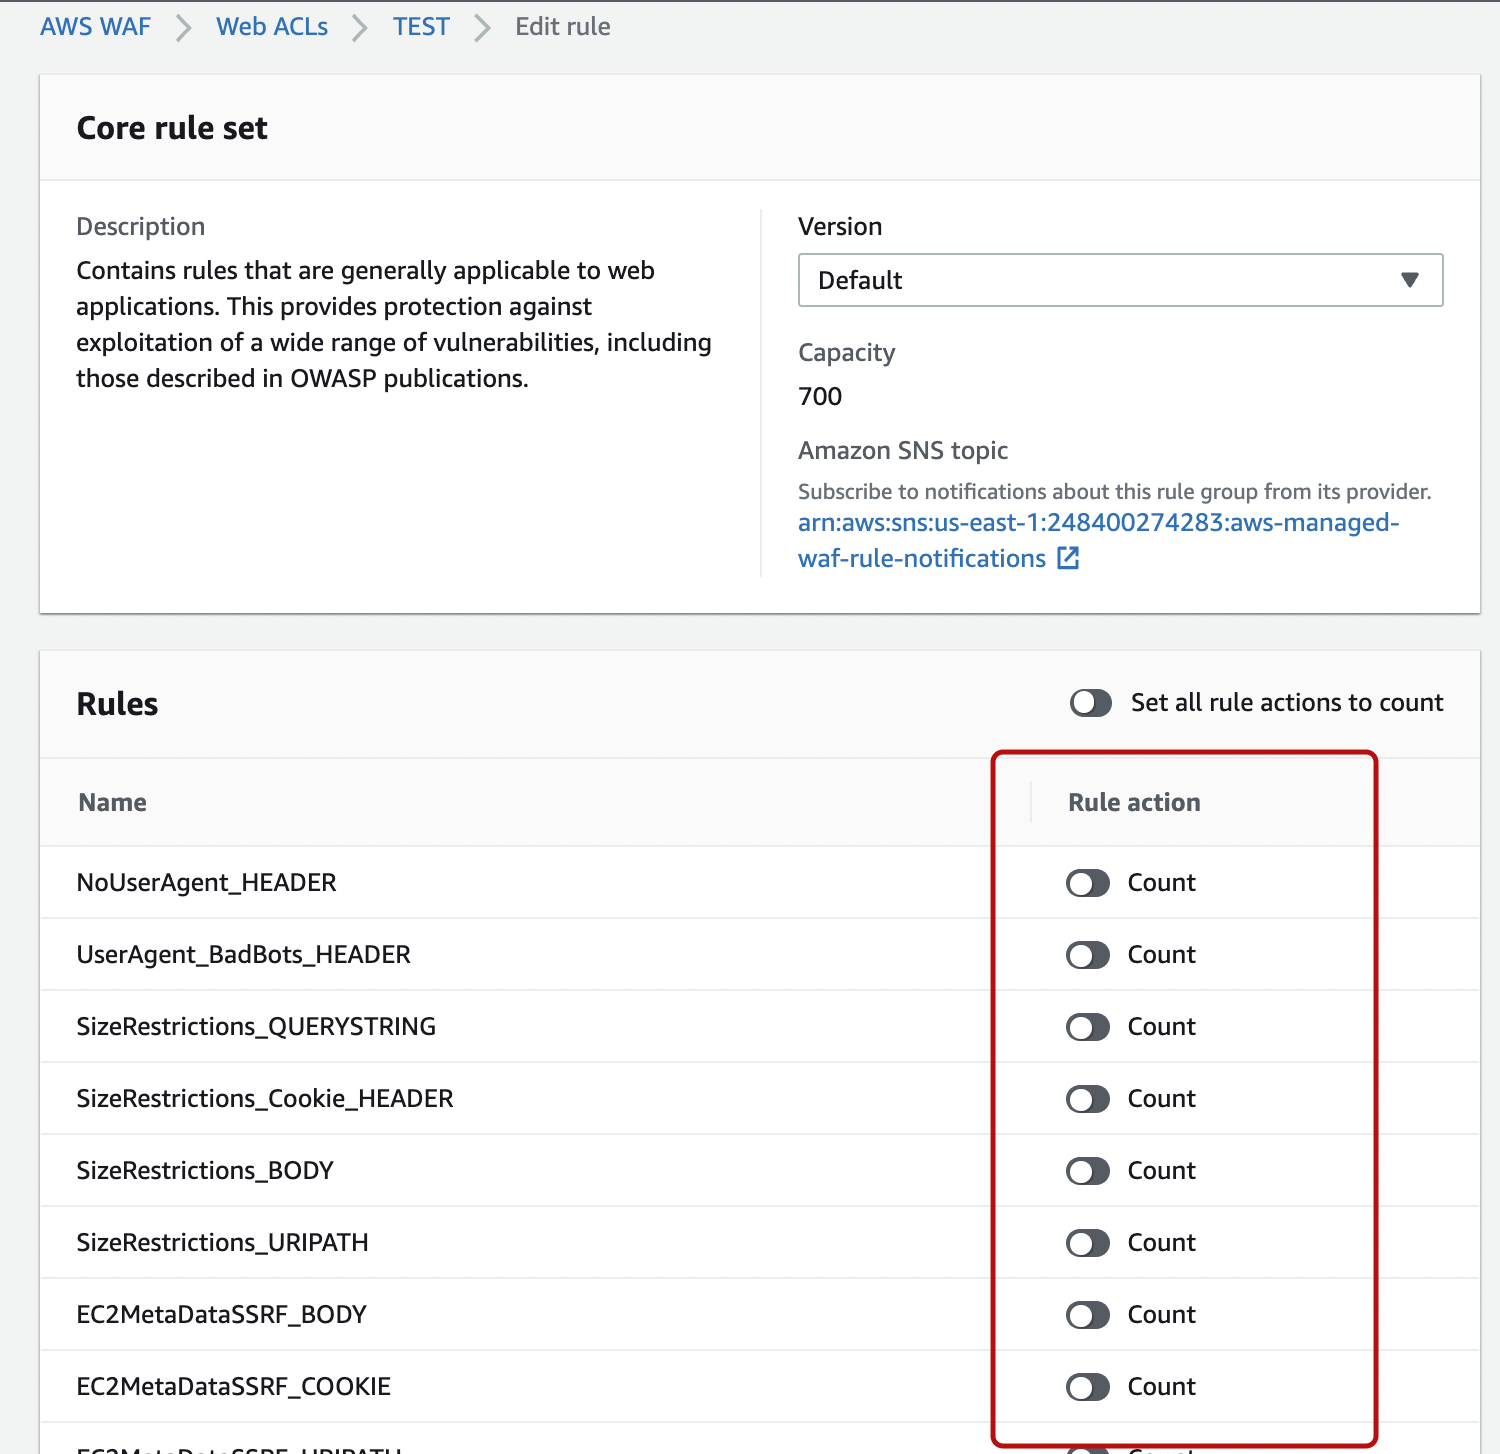
We were able to override the rules within.
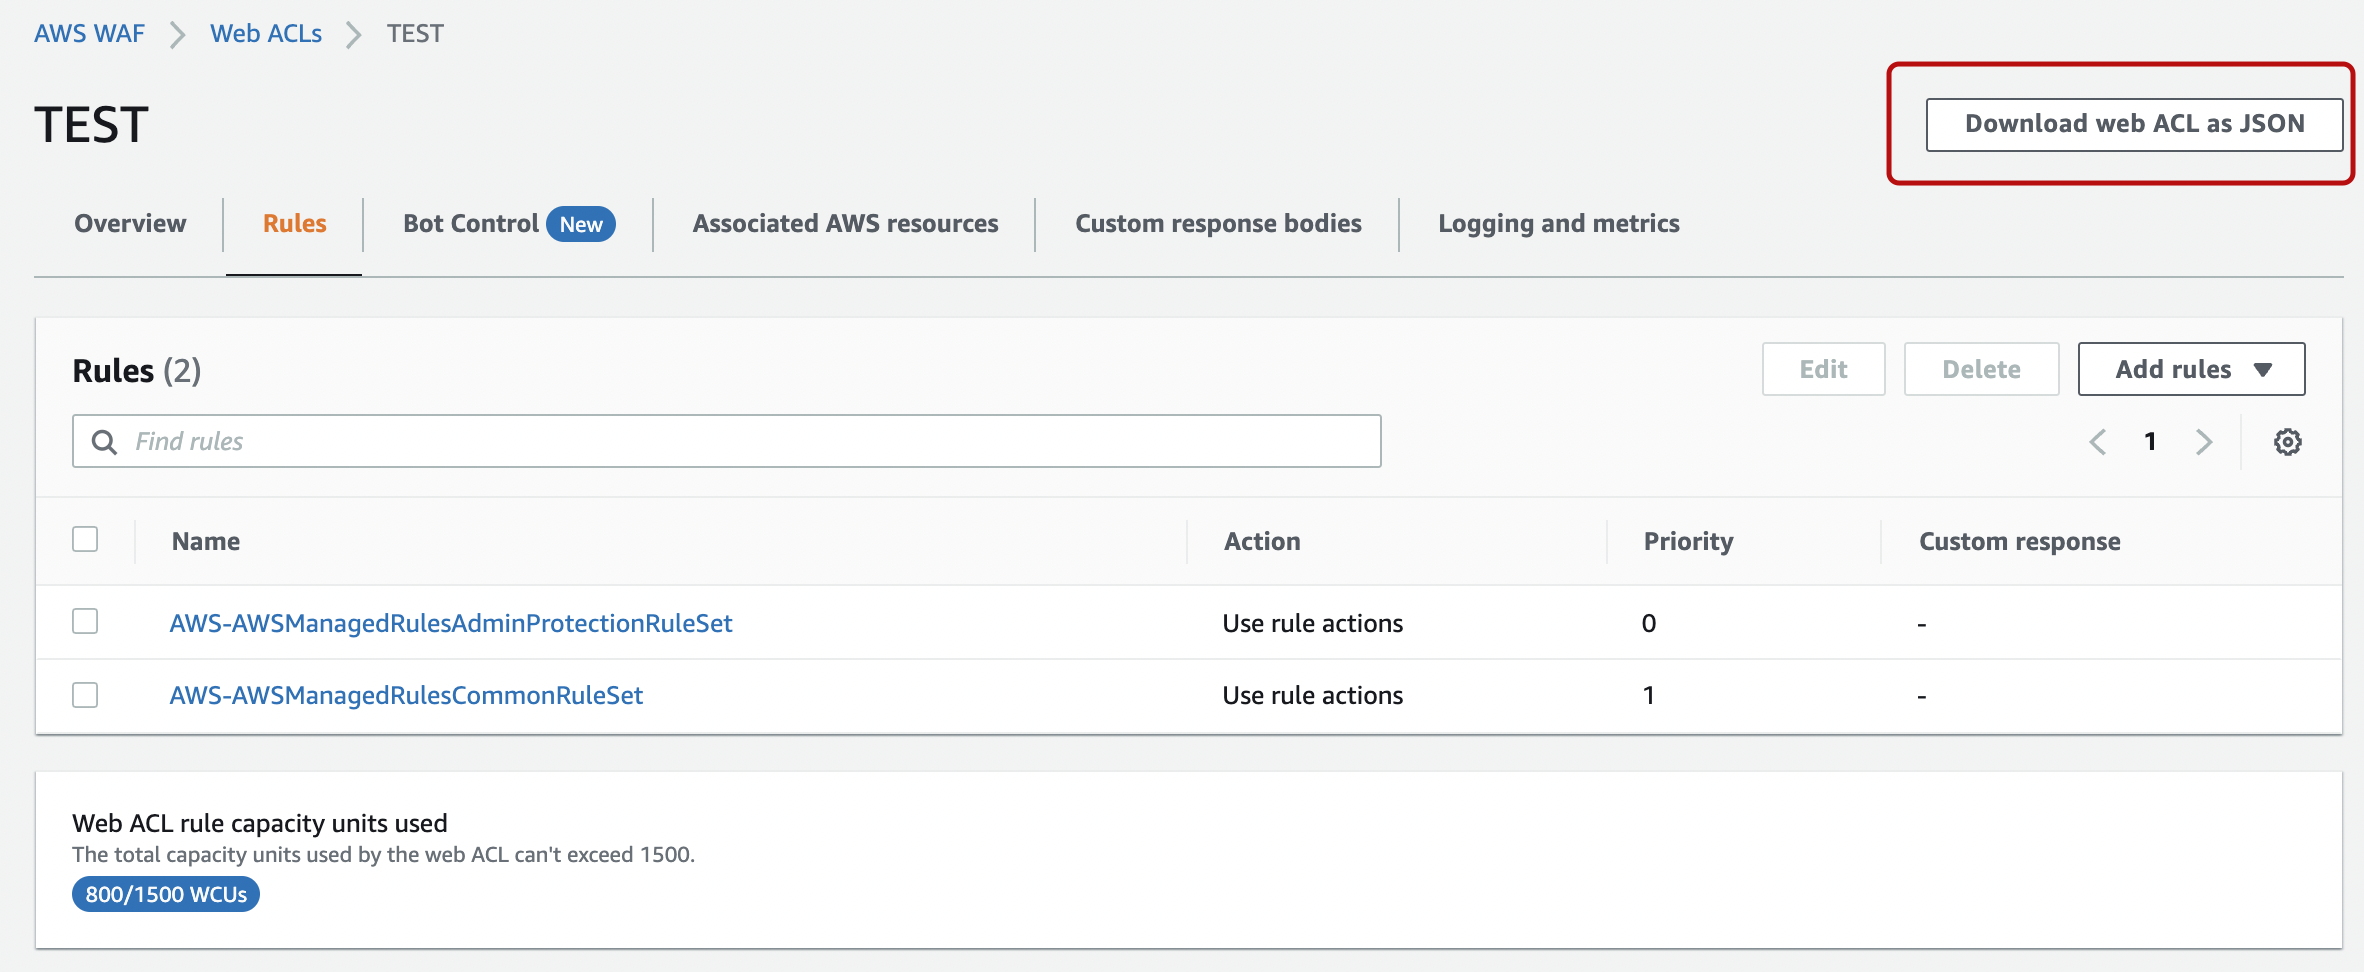
We will change several target rules and look at them in JSON format.
Select the appropriate ruleset and click the "Download web ACL as JSON" button on the upper right corner.
{
    "Name": "test",
    "Id": "XXXXXXXXXXXXXXXXXXXXXXXXXXXXXXXXXXXX",
    "ARN": "arn:aws:wafv2:ap-northeast-1:*************:regional/webacl/test/XXXXXXXXXXXXXXXXXXXXXXXXXXXXXXXXXXXX",
    "DefaultAction": {
        "Allow": {}
    },
    "Description": "",
    "Rules": [
        {
            "Name": "AWS-AWSManagedRulesAdminProtectionRuleSet",
            "Priority": 0,
            "Statement": {
                "ManagedRuleGroupStatement": {
                    "VendorName": "AWS",
                    "Name": "AWSManagedRulesAdminProtectionRuleSet",
                    "ExcludedRules": [
                        {
                            "Name": "AdminProtection_URIPATH"
                        }
                    ]
                }
            },
            "OverrideAction": {
                "None": {}
            },
            "VisibilityConfig": {
                "SampledRequestsEnabled": true,
                "CloudWatchMetricsEnabled": true,
                "MetricName": "AWS-AWSManagedRulesAdminProtectionRuleSet"
            }
        },
        {
            "Name": "AWS-AWSManagedRulesCommonRuleSet",
            "Priority": 1,
            "Statement": {
                "ManagedRuleGroupStatement": {
                    "VendorName": "AWS",
                    "Name": "AWSManagedRulesCommonRuleSet",
                    "ExcludedRules": [
                        {
                            "Name": "UserAgent_BadBots_HEADER"
                        },
                        {
                            "Name": "SizeRestrictions_URIPATH"
                        },
                        {
                            "Name": "EC2MetaDataSSRF_URIPATH"
                        }
                    ]
                }
            },
            "OverrideAction": {
                "None": {}
            },
            "VisibilityConfig": {
                "SampledRequestsEnabled": true,
                "CloudWatchMetricsEnabled": true,
                "MetricName": "AWS-AWSManagedRulesCommonRuleSet"
            }
        }
    ],
    "VisibilityConfig": {
        "SampledRequestsEnabled": true,
        "CloudWatchMetricsEnabled": true,
        "MetricName": "test"
    },
    "Capacity": 800
}
"ExcludedRules" confirms that it is excluded.
6. Conclusion
The work was done in less than an hour because we just had to choose a managed rule and attach it. The requirement to change specific rules within the managed rules will arise as you continue to operate. The ON and OFF settings on the screen are easy to understand, so you can respond in case of an emergency like false positves.