Table of Contents
- 1. Introduction
- 2. What is AssumeRole?
- 3. What is Credential Store?
- 4. Required IAM Policy
- 5. Creating a role
- 6. Registering a credential and updating trust policy
- 7. About Credential Store in Web Site Config
1. Introduction
We released Credential Store feature on 03/23/2023 (JST).
You can now use AssumeRole to give permissions to WafCharm in addition to the access key/secret key method we've been providing.
In this blog post, we will take a look at how to configure using AssumeRole.
*With this release, the access key/secret key method is no longer recommended. We recommend using AssumeRole from now on, so please consider using AssumeRole if you are starting to use WafCharm.
2. What is AssumeRole?
AssumeRole publishes a temporary credential to give permissions to AWS resources.
You can provide access permissions without giving out the access key/secret key.
AssumeRole - AWS Security Token Service
3. What is Credential Store?
Credential Store is a WafCharm feature to register credential information such as the ARN of the role to perform AssumeRole and access key/secret key.
Apart from the list of registered credential information, you can also see which Web ACL Config/Web Site Config is using which credential information.
4. Required IAM Policy
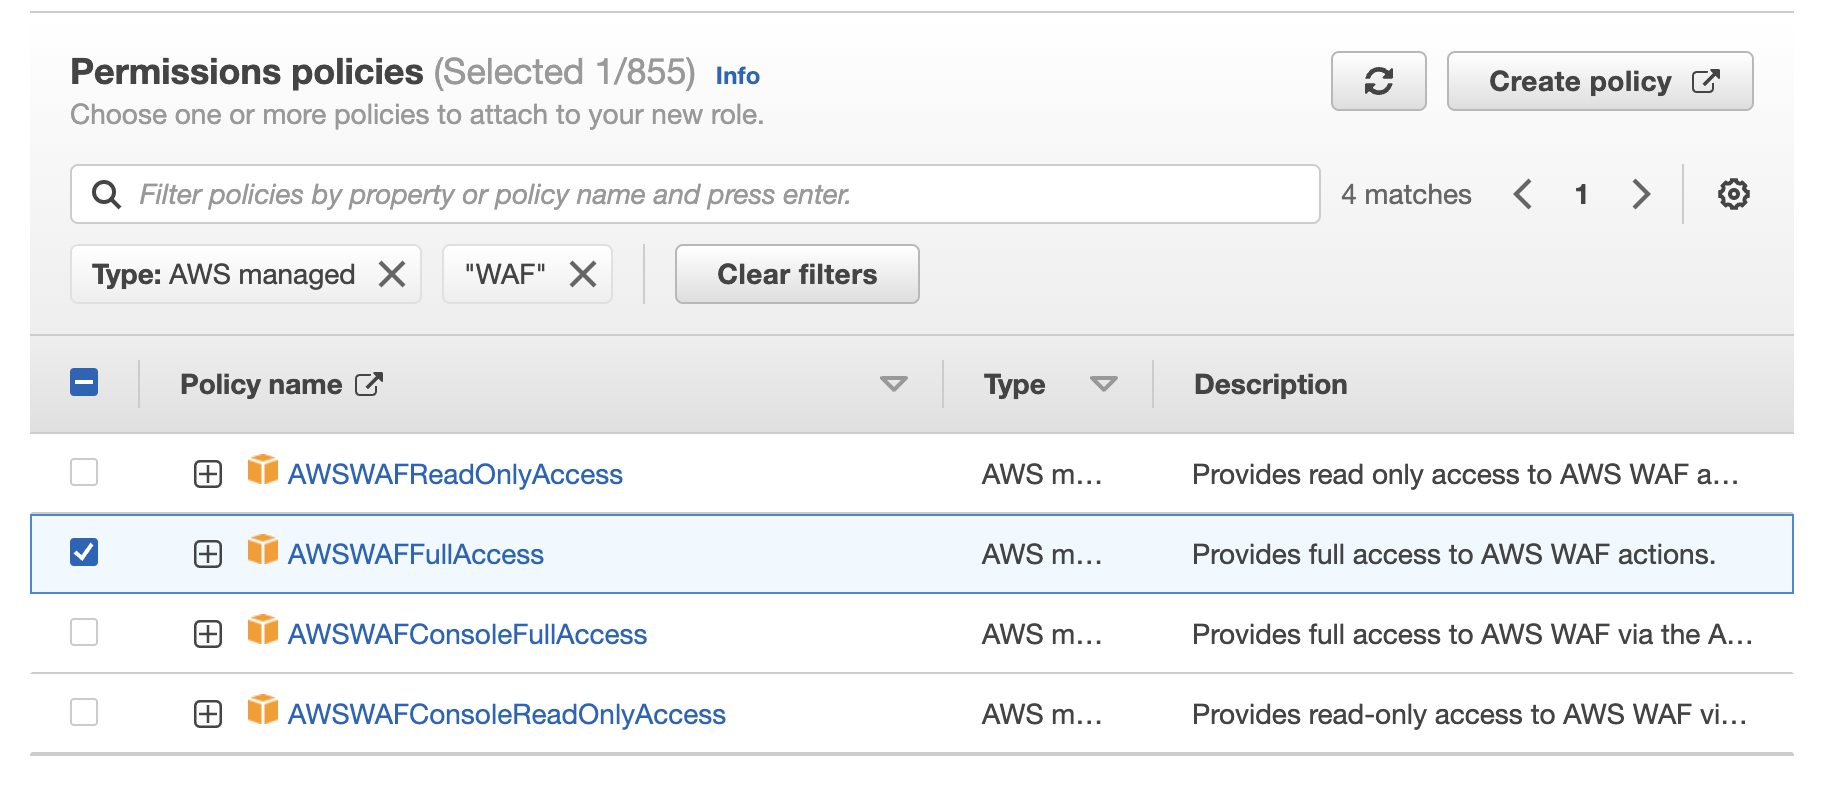
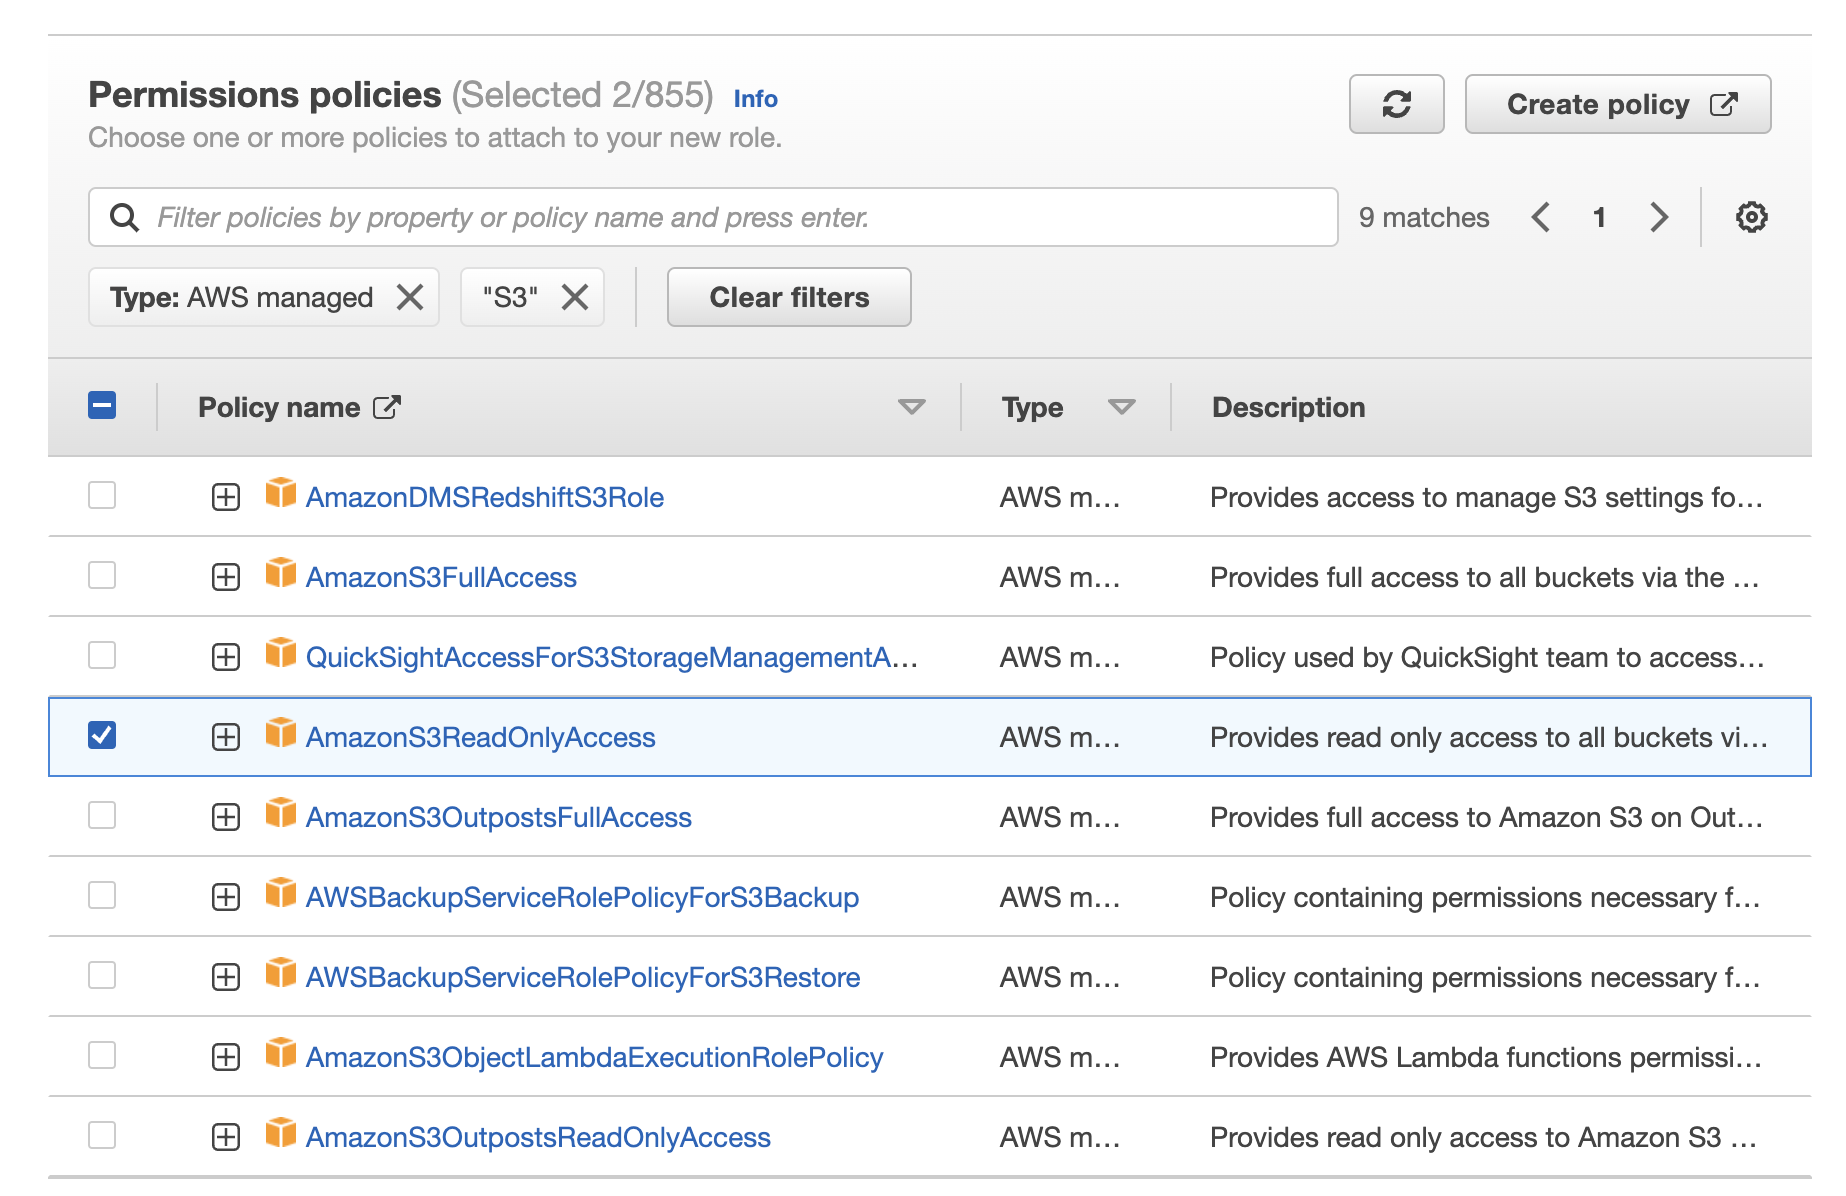
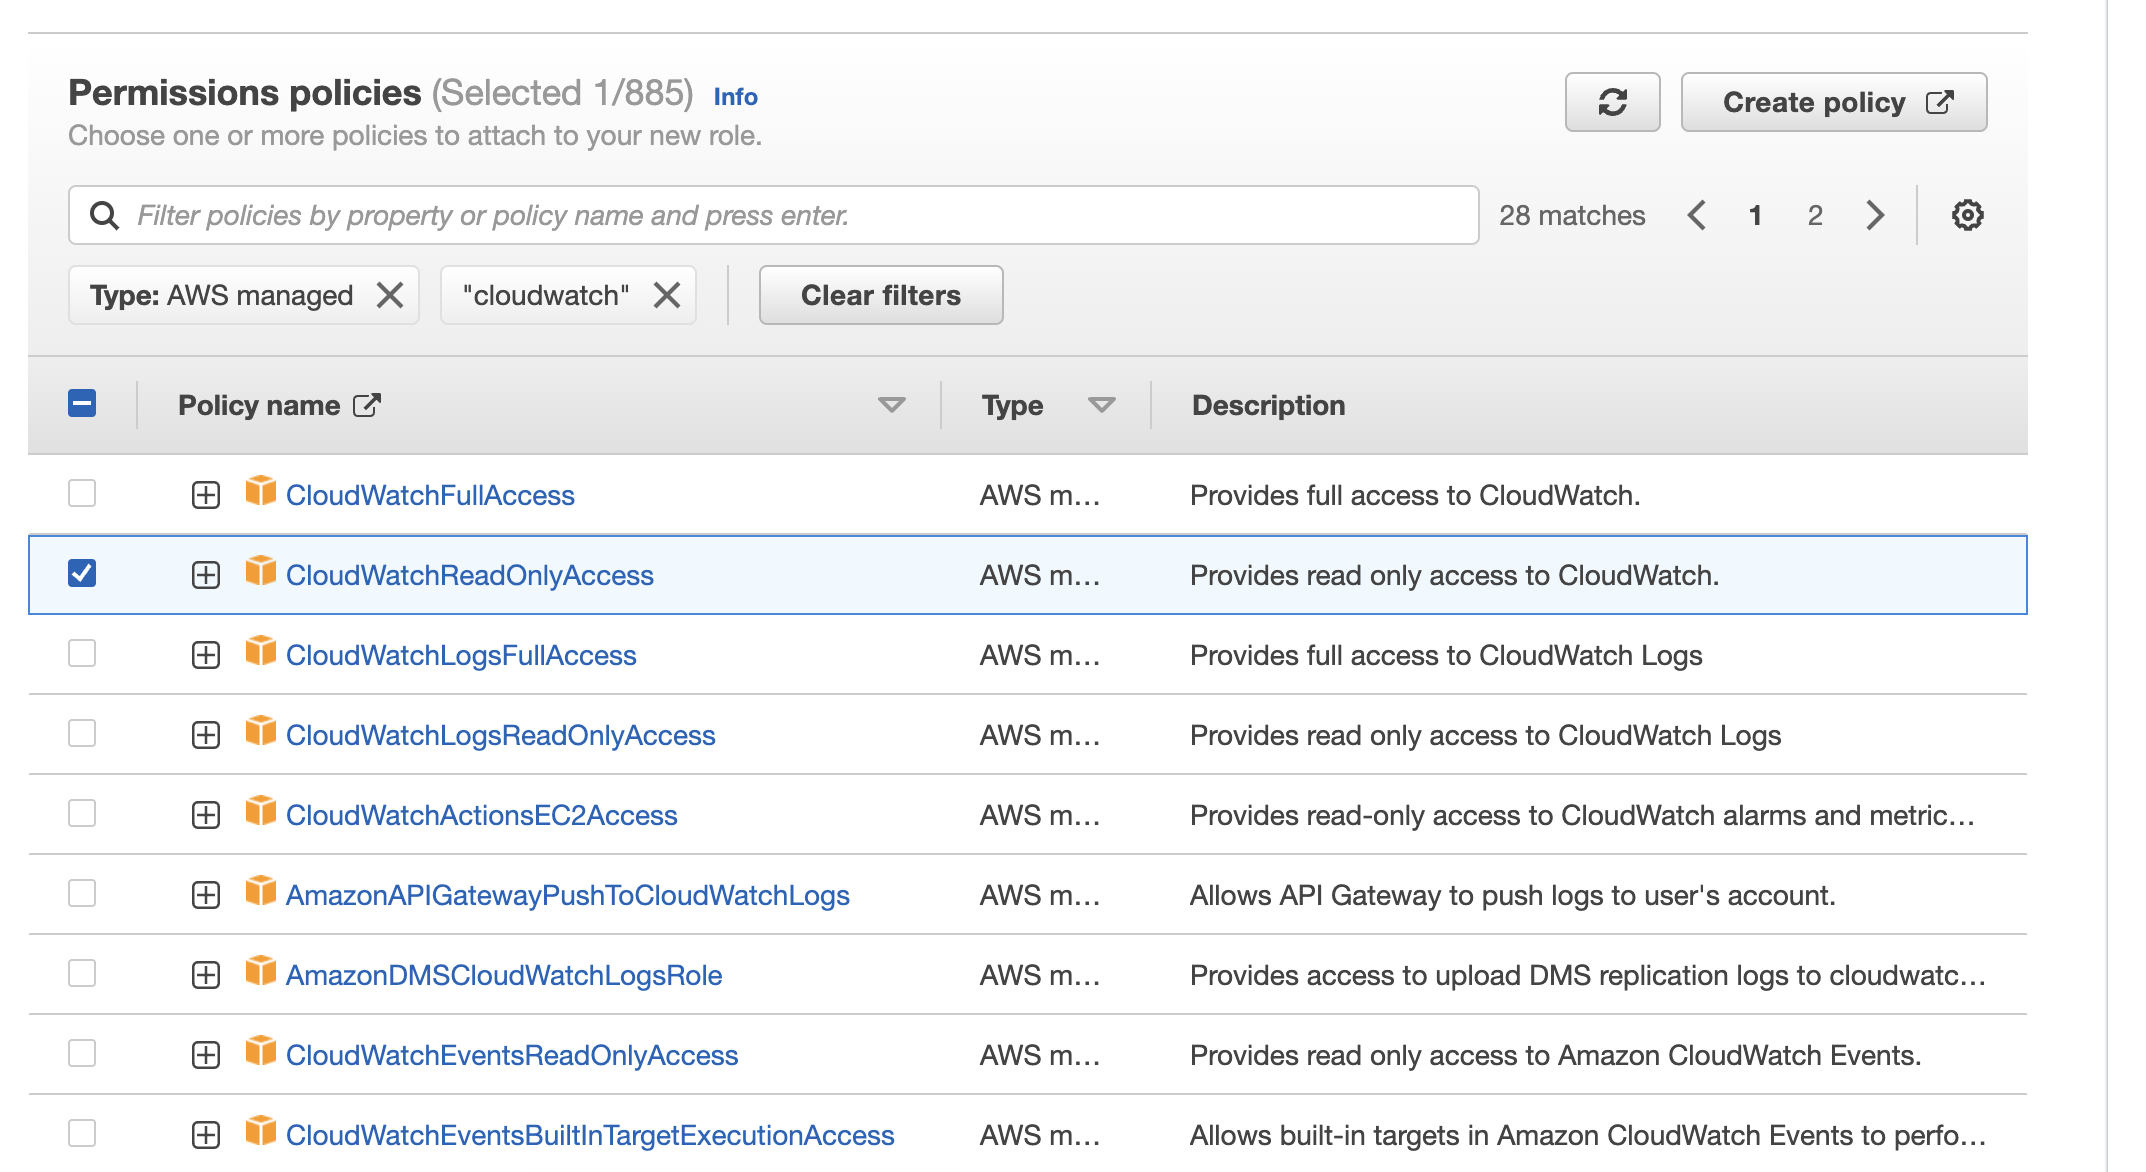
Please set "AWSWAFFullAccess," "AmazonS3ReadOnlyAccess," and "CloudWatchReadOnlyAccess" to use WafCharm.
In order to complete the configuration, the IAM user that operates the AWS management console must have permission like IAMFullAccess which allows the creation and editing of roles and trust policies.
Reference: IAM policies required to use WafCharm
5. Creating a role
You need to create a role in the AWS management console, register the role's ARN in the WafCharm dashboard, and update the trust policy of the role to use AssumeRole.
You will be going back and forth between the AWS management console and the WafCharm dashboard, so we recommend for you to have both pages opened until you complete all of the procedures.
First, we will take a look at the procedures to create a role in the AWS management console.
1. Log in to the AWS management console.
2. Open the IAM dashboard.
3. Click "Roles" on the left menu.
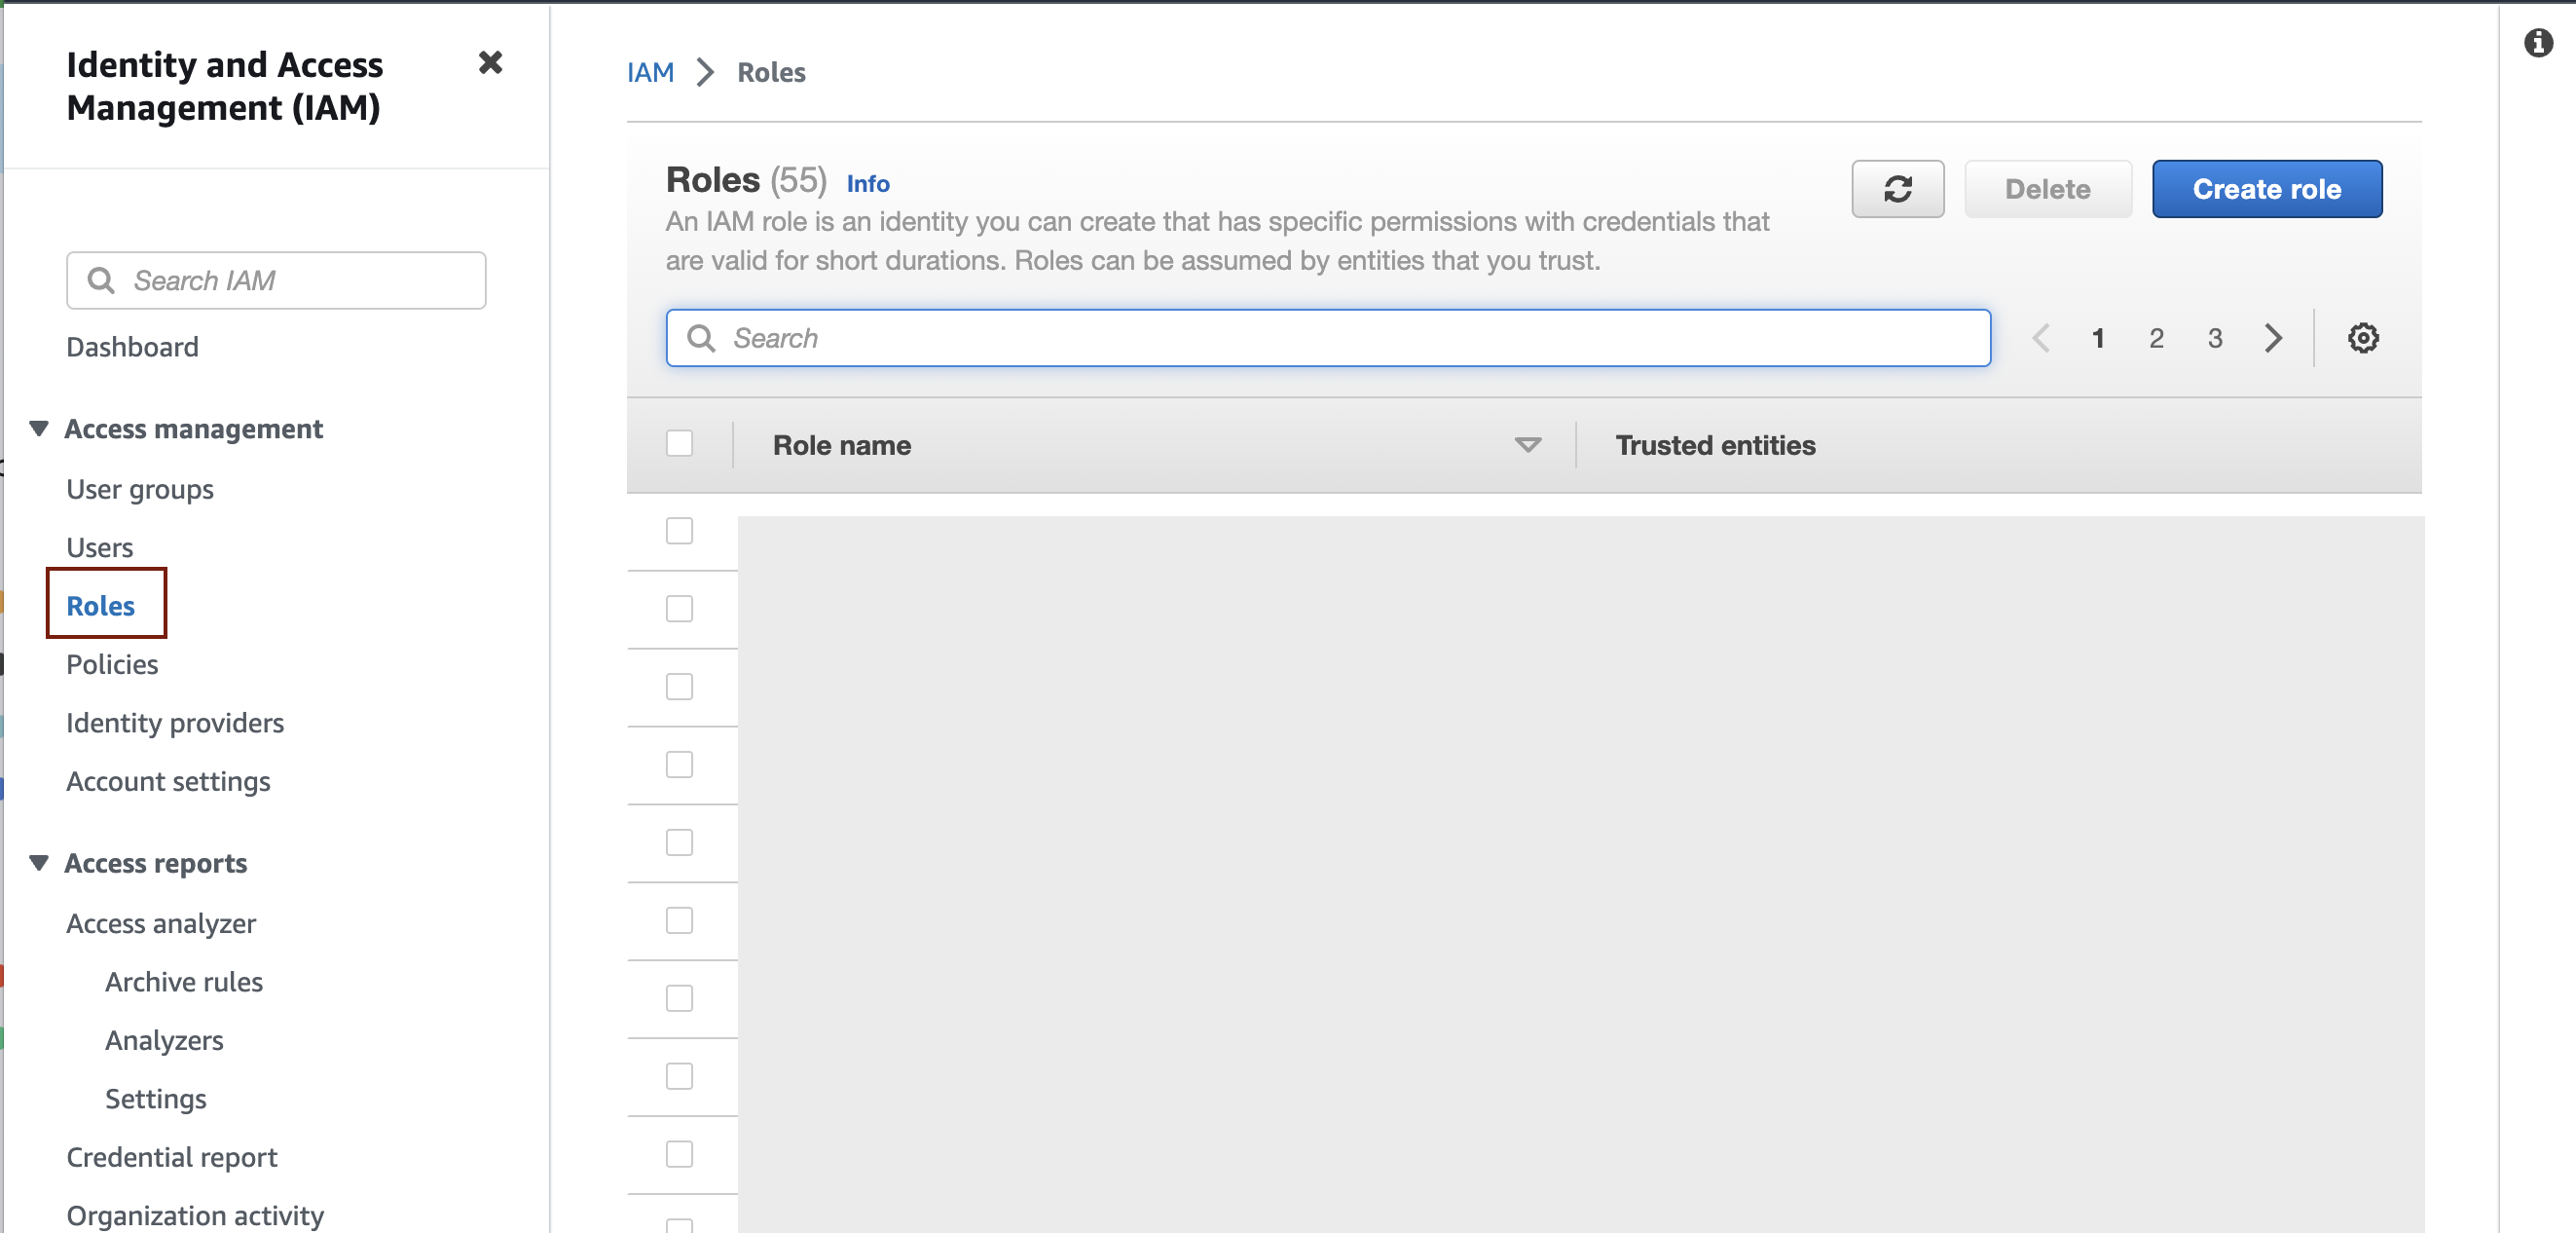
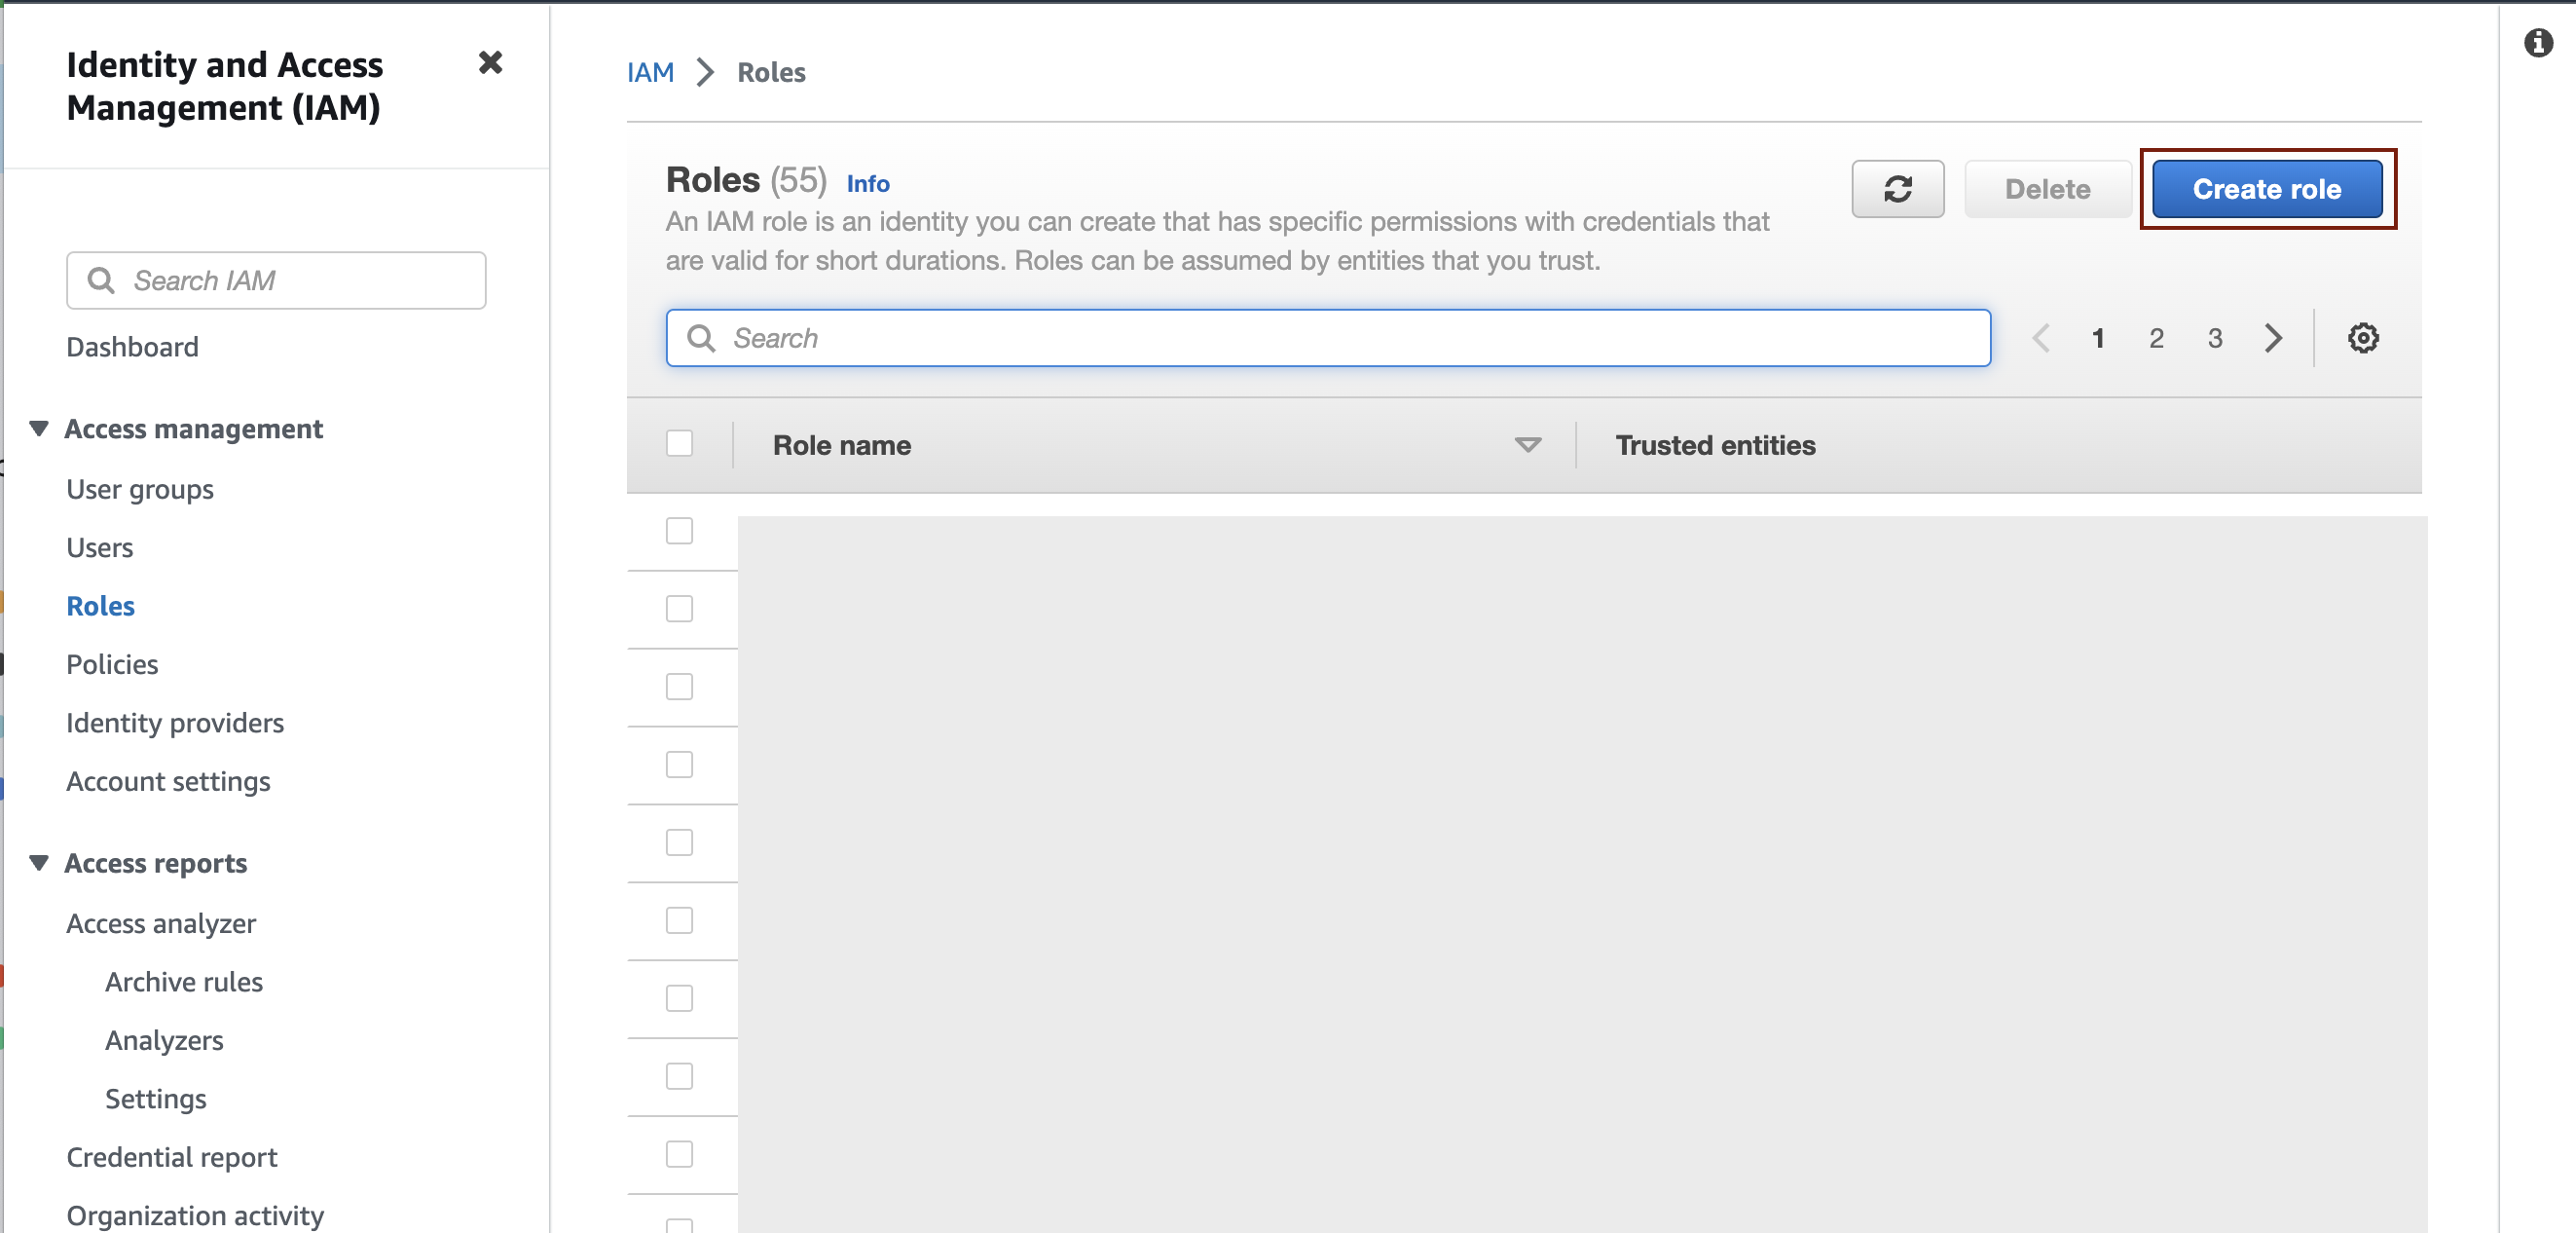
4. Once you've opened the Roles page, click the "Create role" button on the upper right corner to create a role.
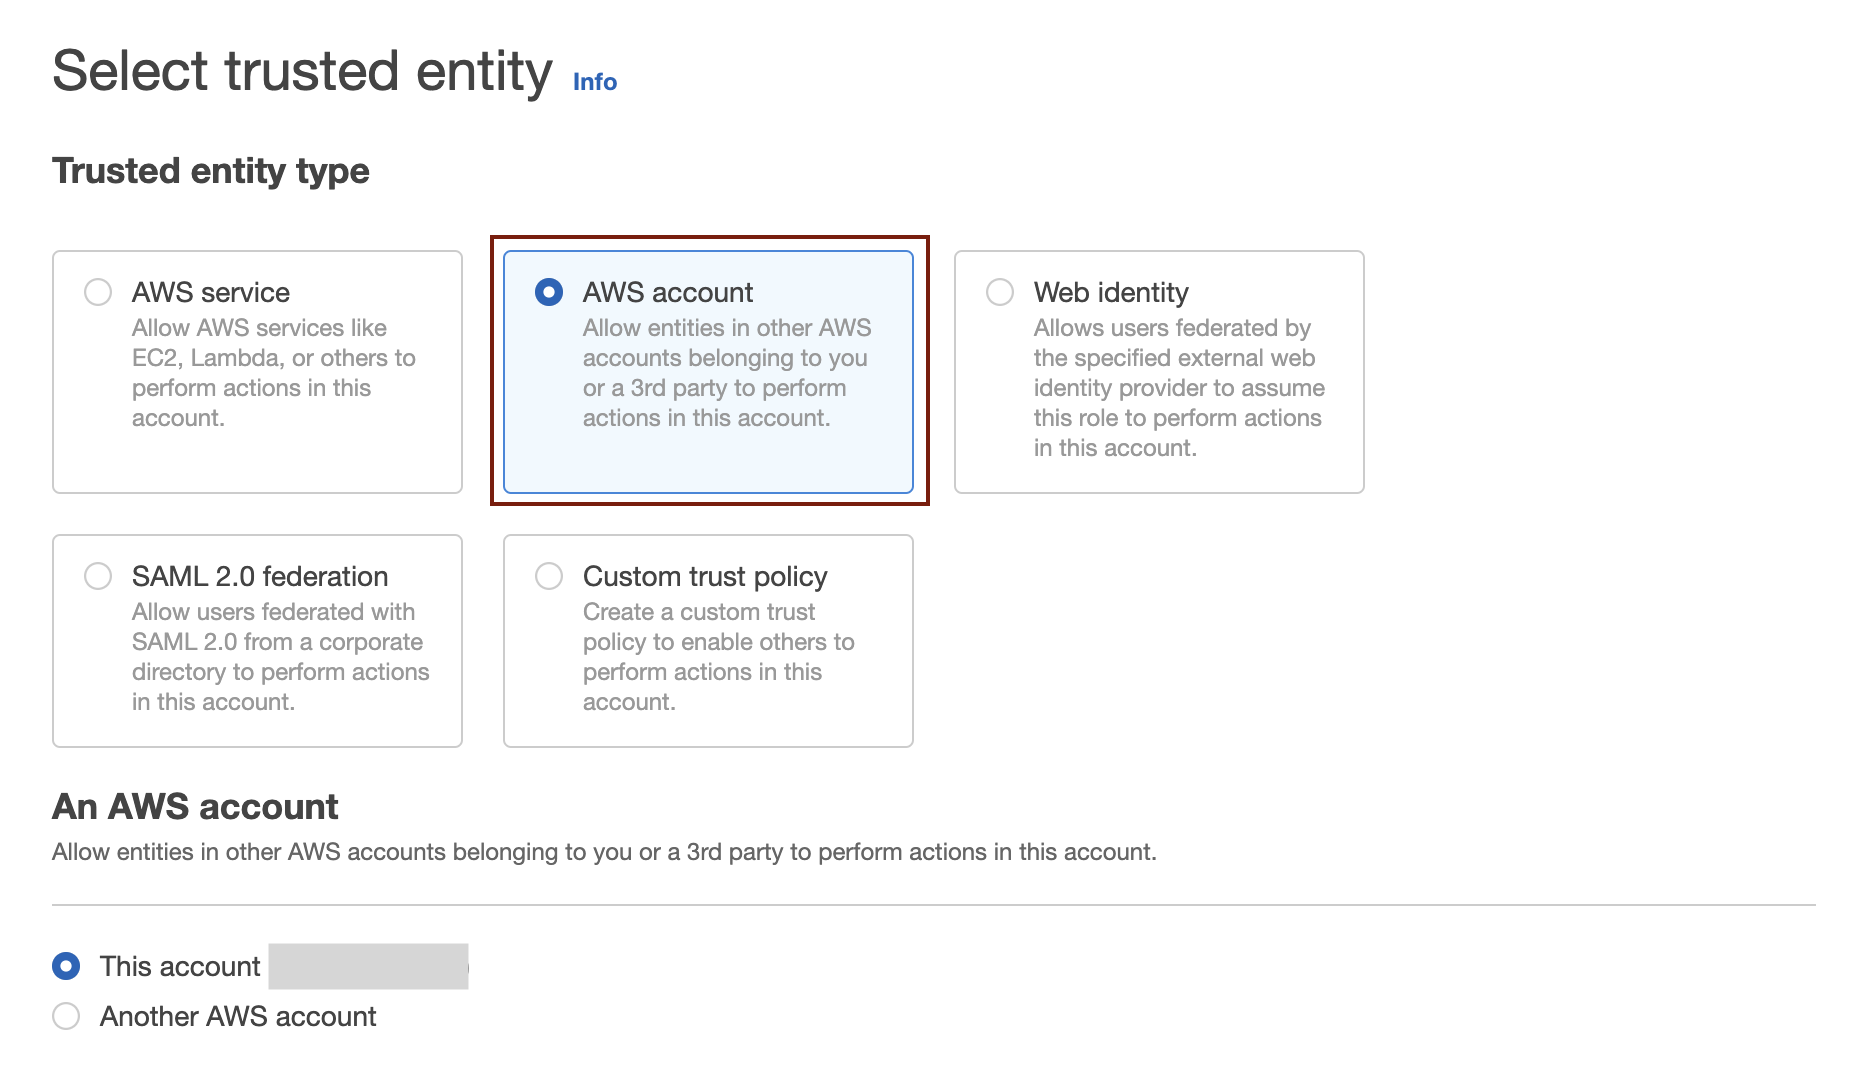
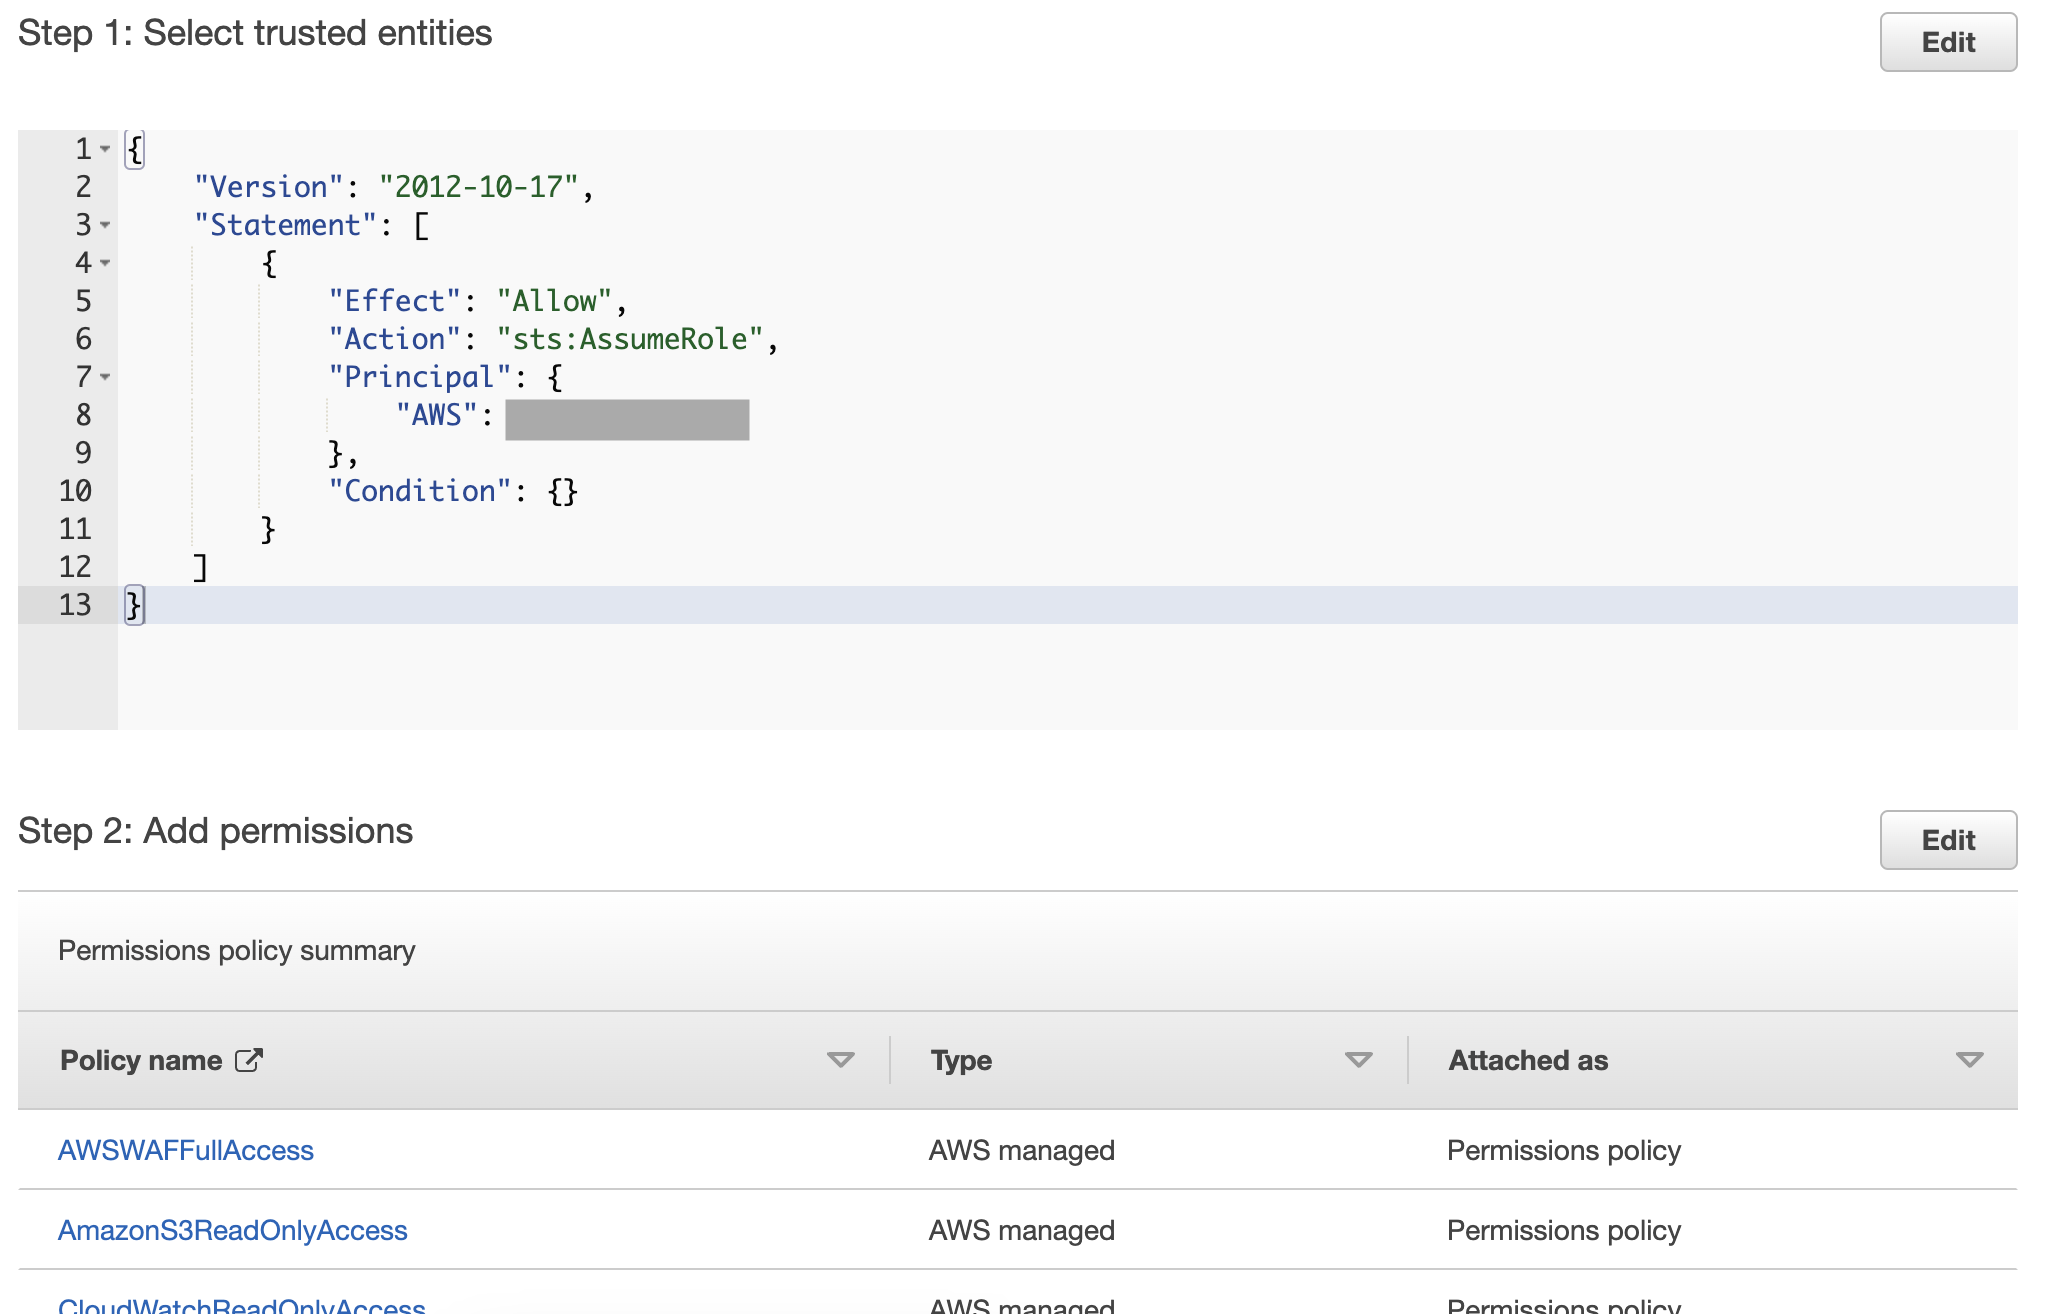
5. Select "AWS account" under "Select trusted entity."
In the "An AWS Account" section, select the "This account (account ID)" option. You do not have to change settings under the Option.
*The trusted account will be changed to an accurate account because the trust policy must be updated to the one provided by WafCharm after you've created the role.
6. Add "AWSWAFFullAccess," "AmazonS3ReadOnlyAccess," and "CloudWatchReadOnlyAccess" for Permissions policies.
*We recommend limiting the resources for S3 bucket permissions ("AmazonS3ReadOnlyAccess”). Refer to the blog post IAM policies required to use WafCharm for more details.
*For AWS WAF permissions ("AWSWAFFullAccess"), the system cannot accept limitations in resources.
7. Enter an arbitrary Role name, check the configurations and click the "Create role" button.
*We will be updating the trust policy in the latter step. The policy under "Step 1: Select trusted entities" can be set to your AWS account ID for now.
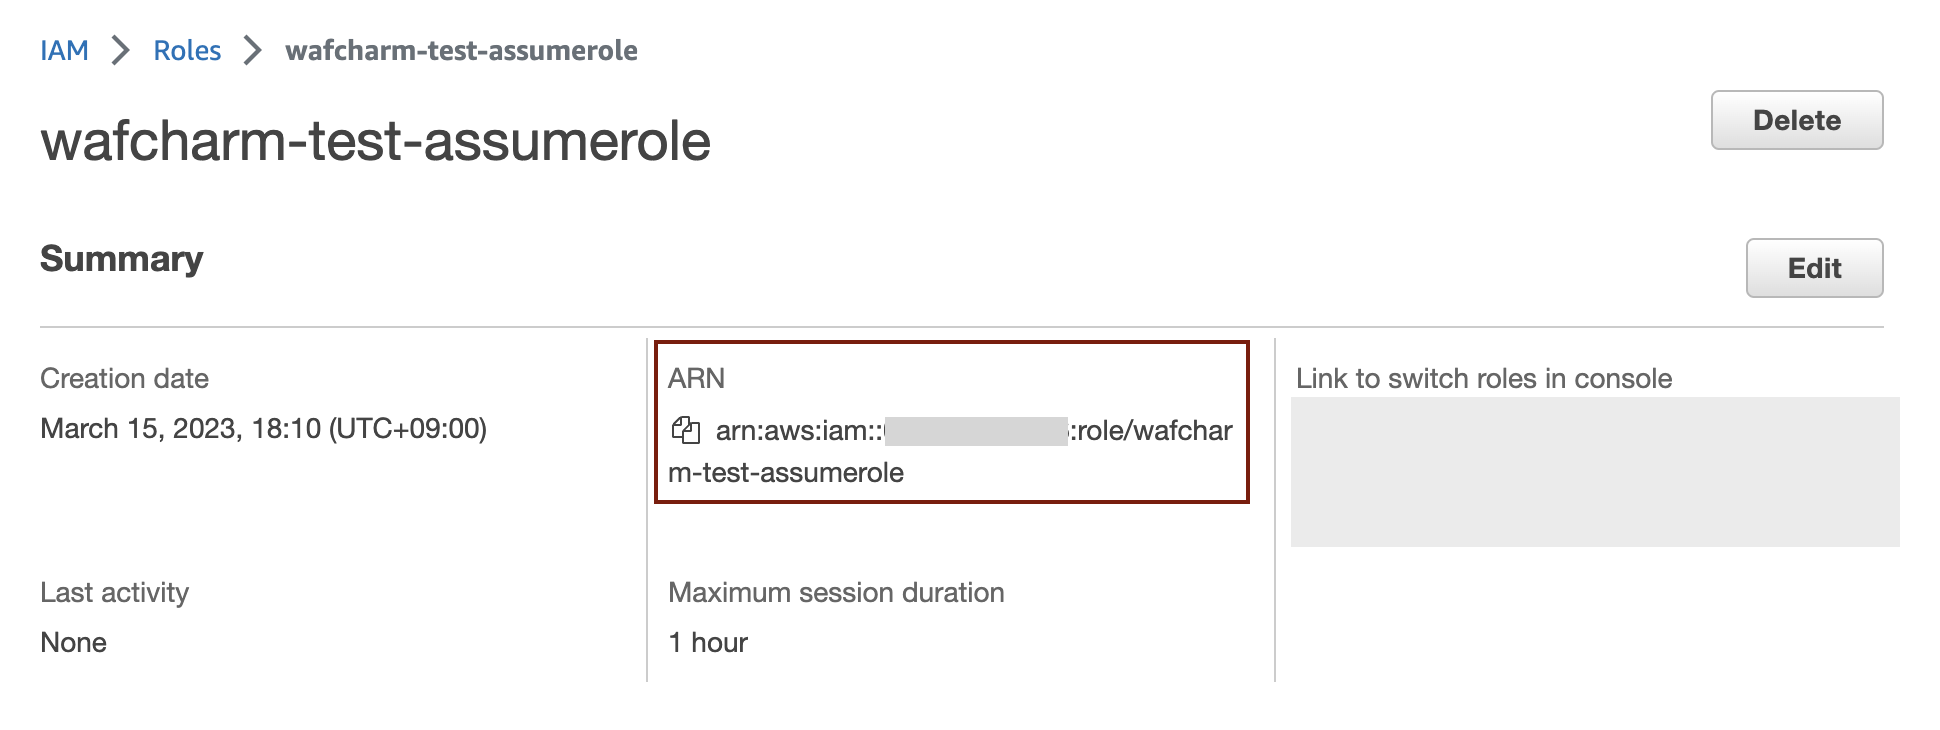
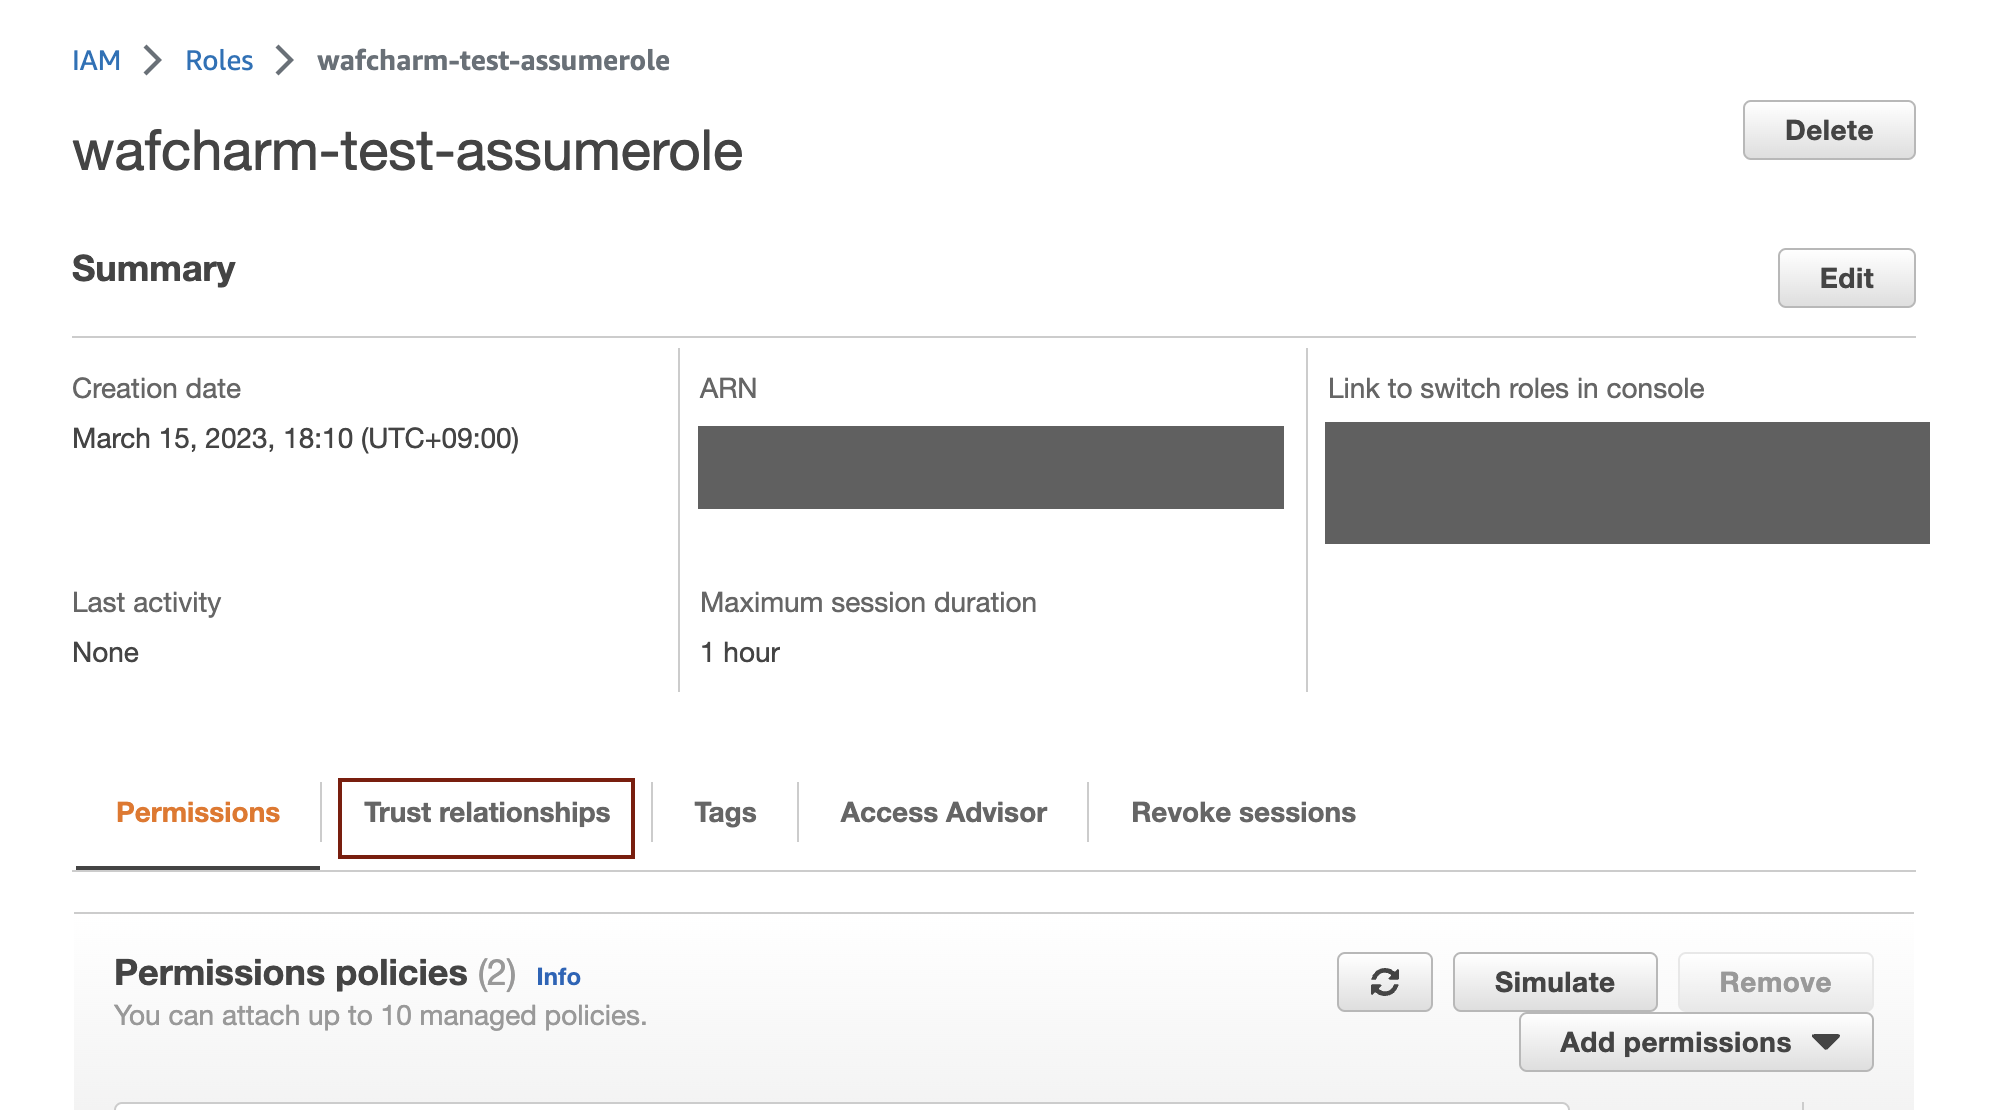
8. Once you are taken back to the Roles page, click the created role name to open the detail page and copy the ARN.
This ARN will be used to register Credential Store in the WafCharm dashboard.
6. Registering a credential and updating trust policy
Once you've created a role, you can register the credential information in the WafCharm dashboard.
You will need an External ID issued by WafCharm to update the trust policy in the AWS management console.
In this section, we will take a look at how to register credential information when you are creating a new Web ACL Config. Refer to WafCharm Initial Setting Manual for details on creating Web ACL Config and Web Site Config.
If you just want to register credential information, you can do that on the Credential Store page.
Reference: About Credential Stores
1. Log in to the WafCharm dashboard.
2. Open the Add Web Site Config page.
Refer to the WafCharm Initial Setting Manual for details.
3. Click the Add button on the right side of the Credential Store.
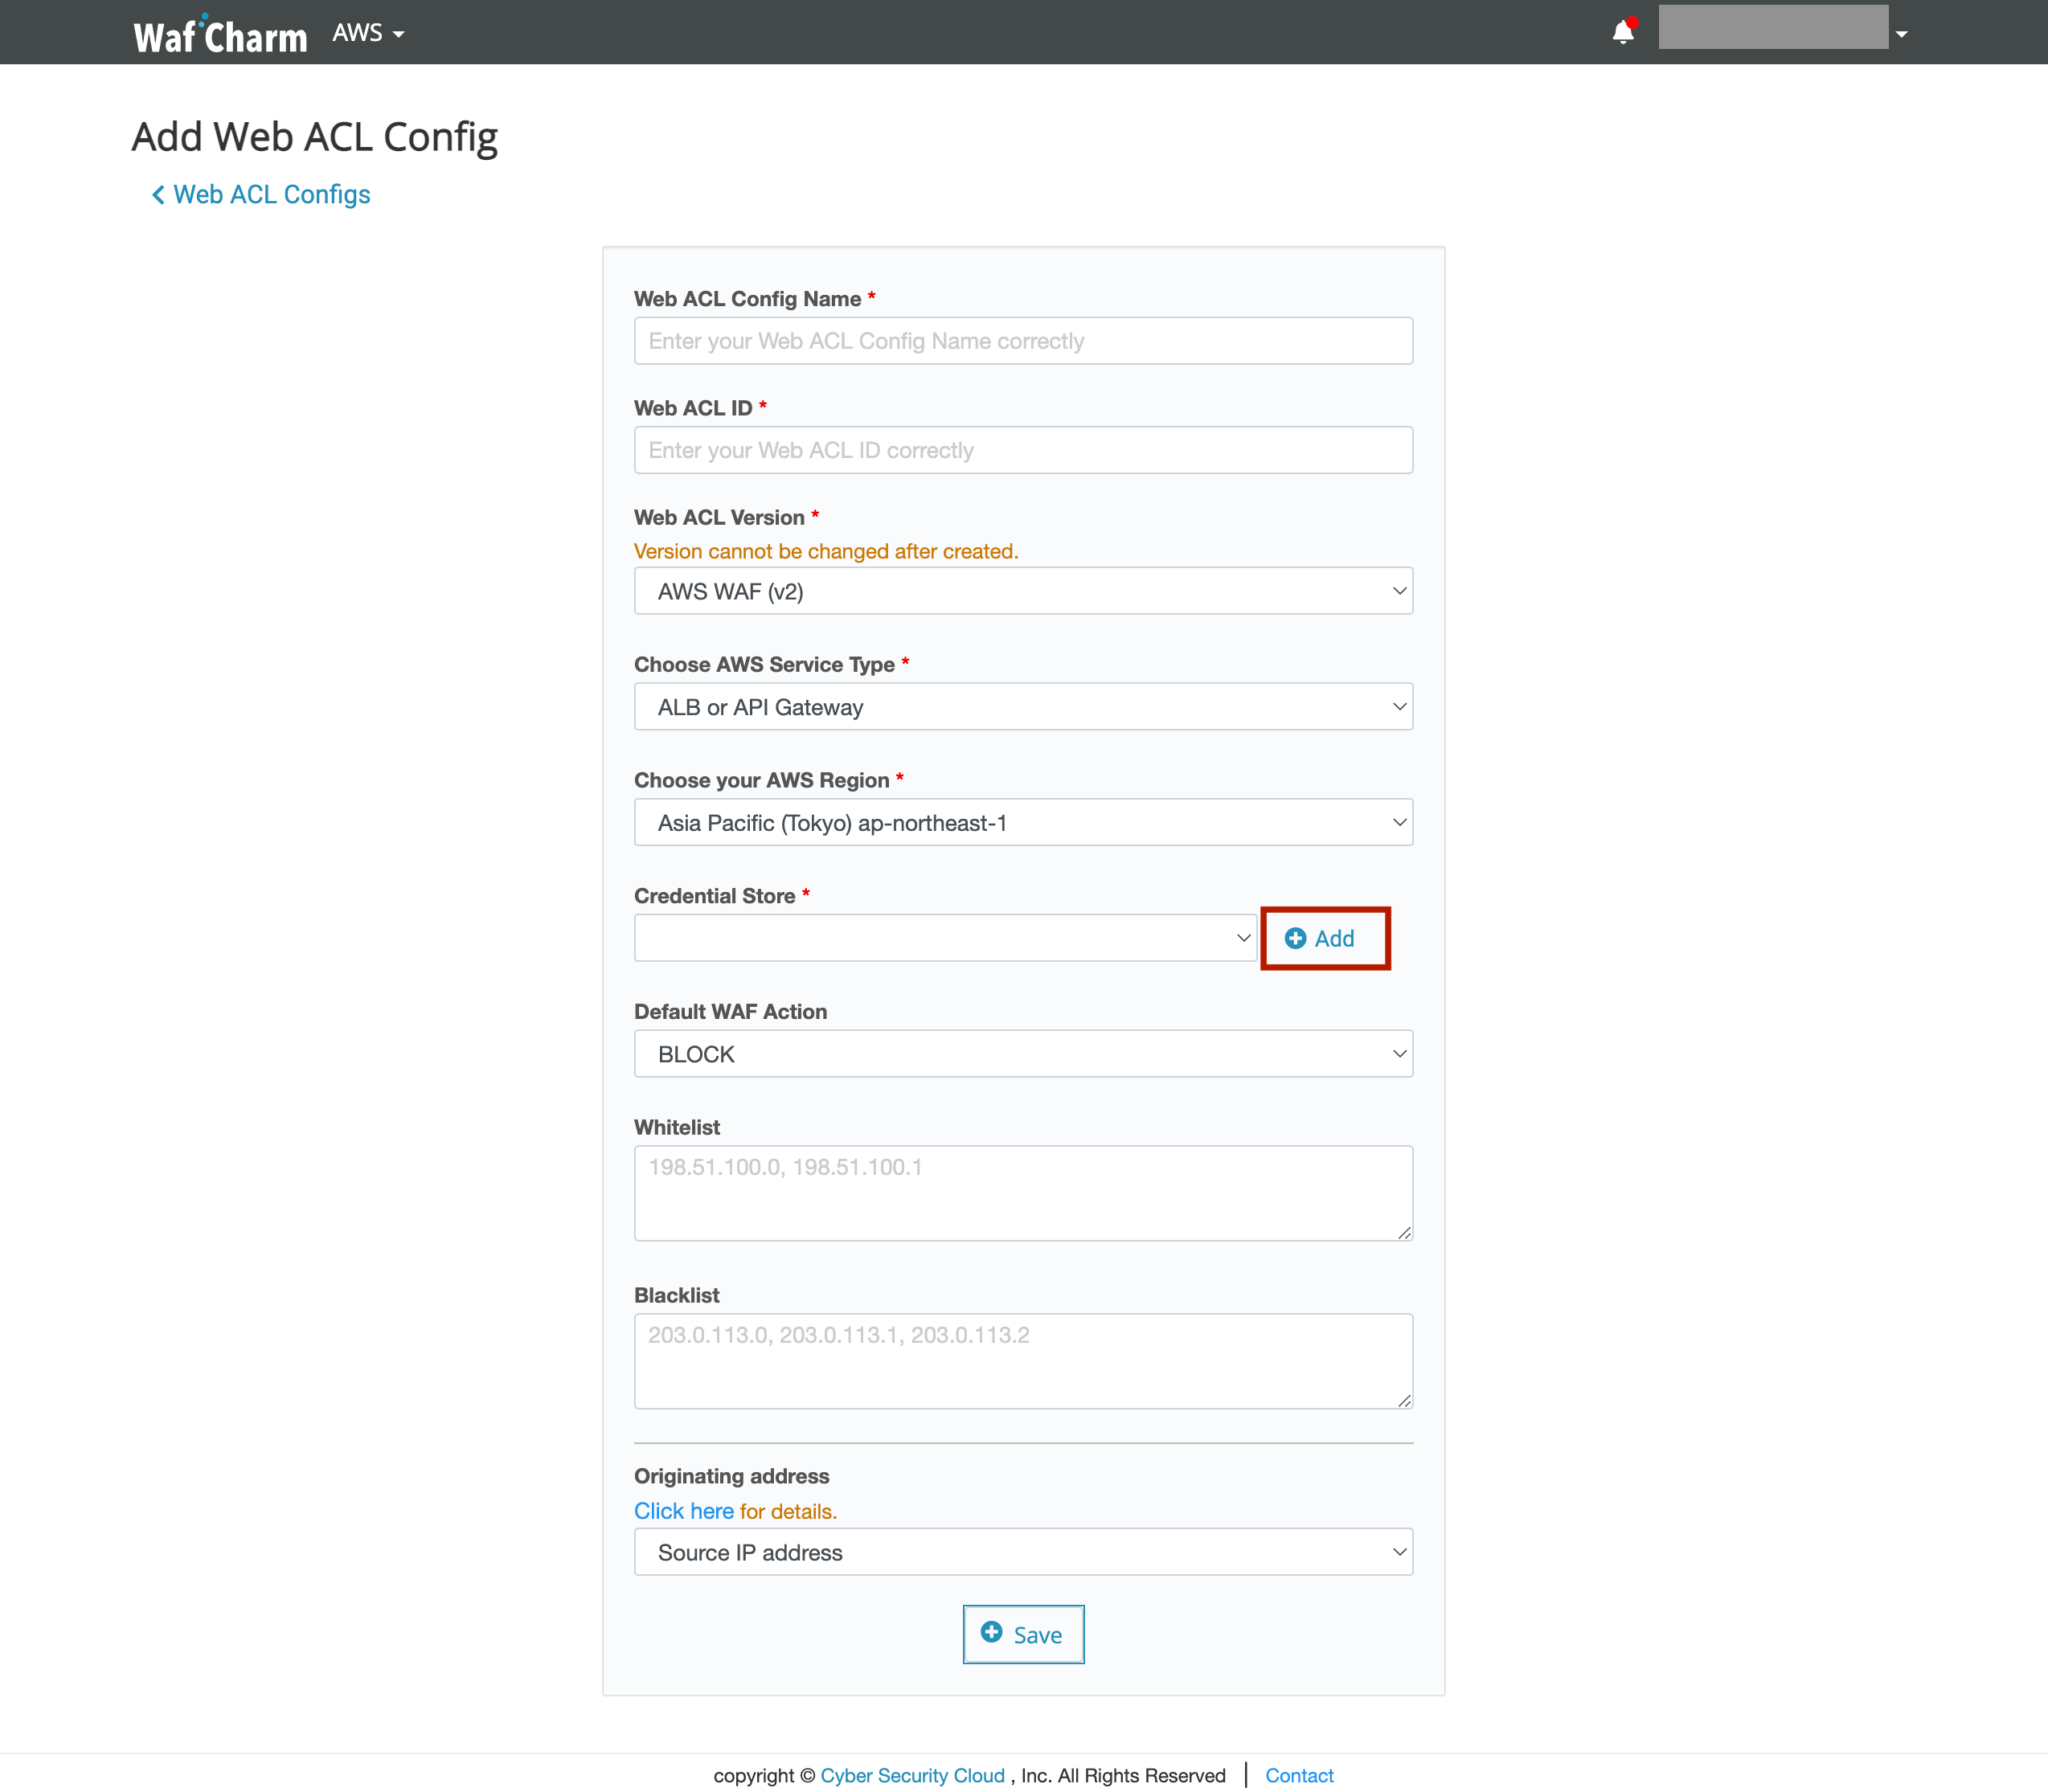
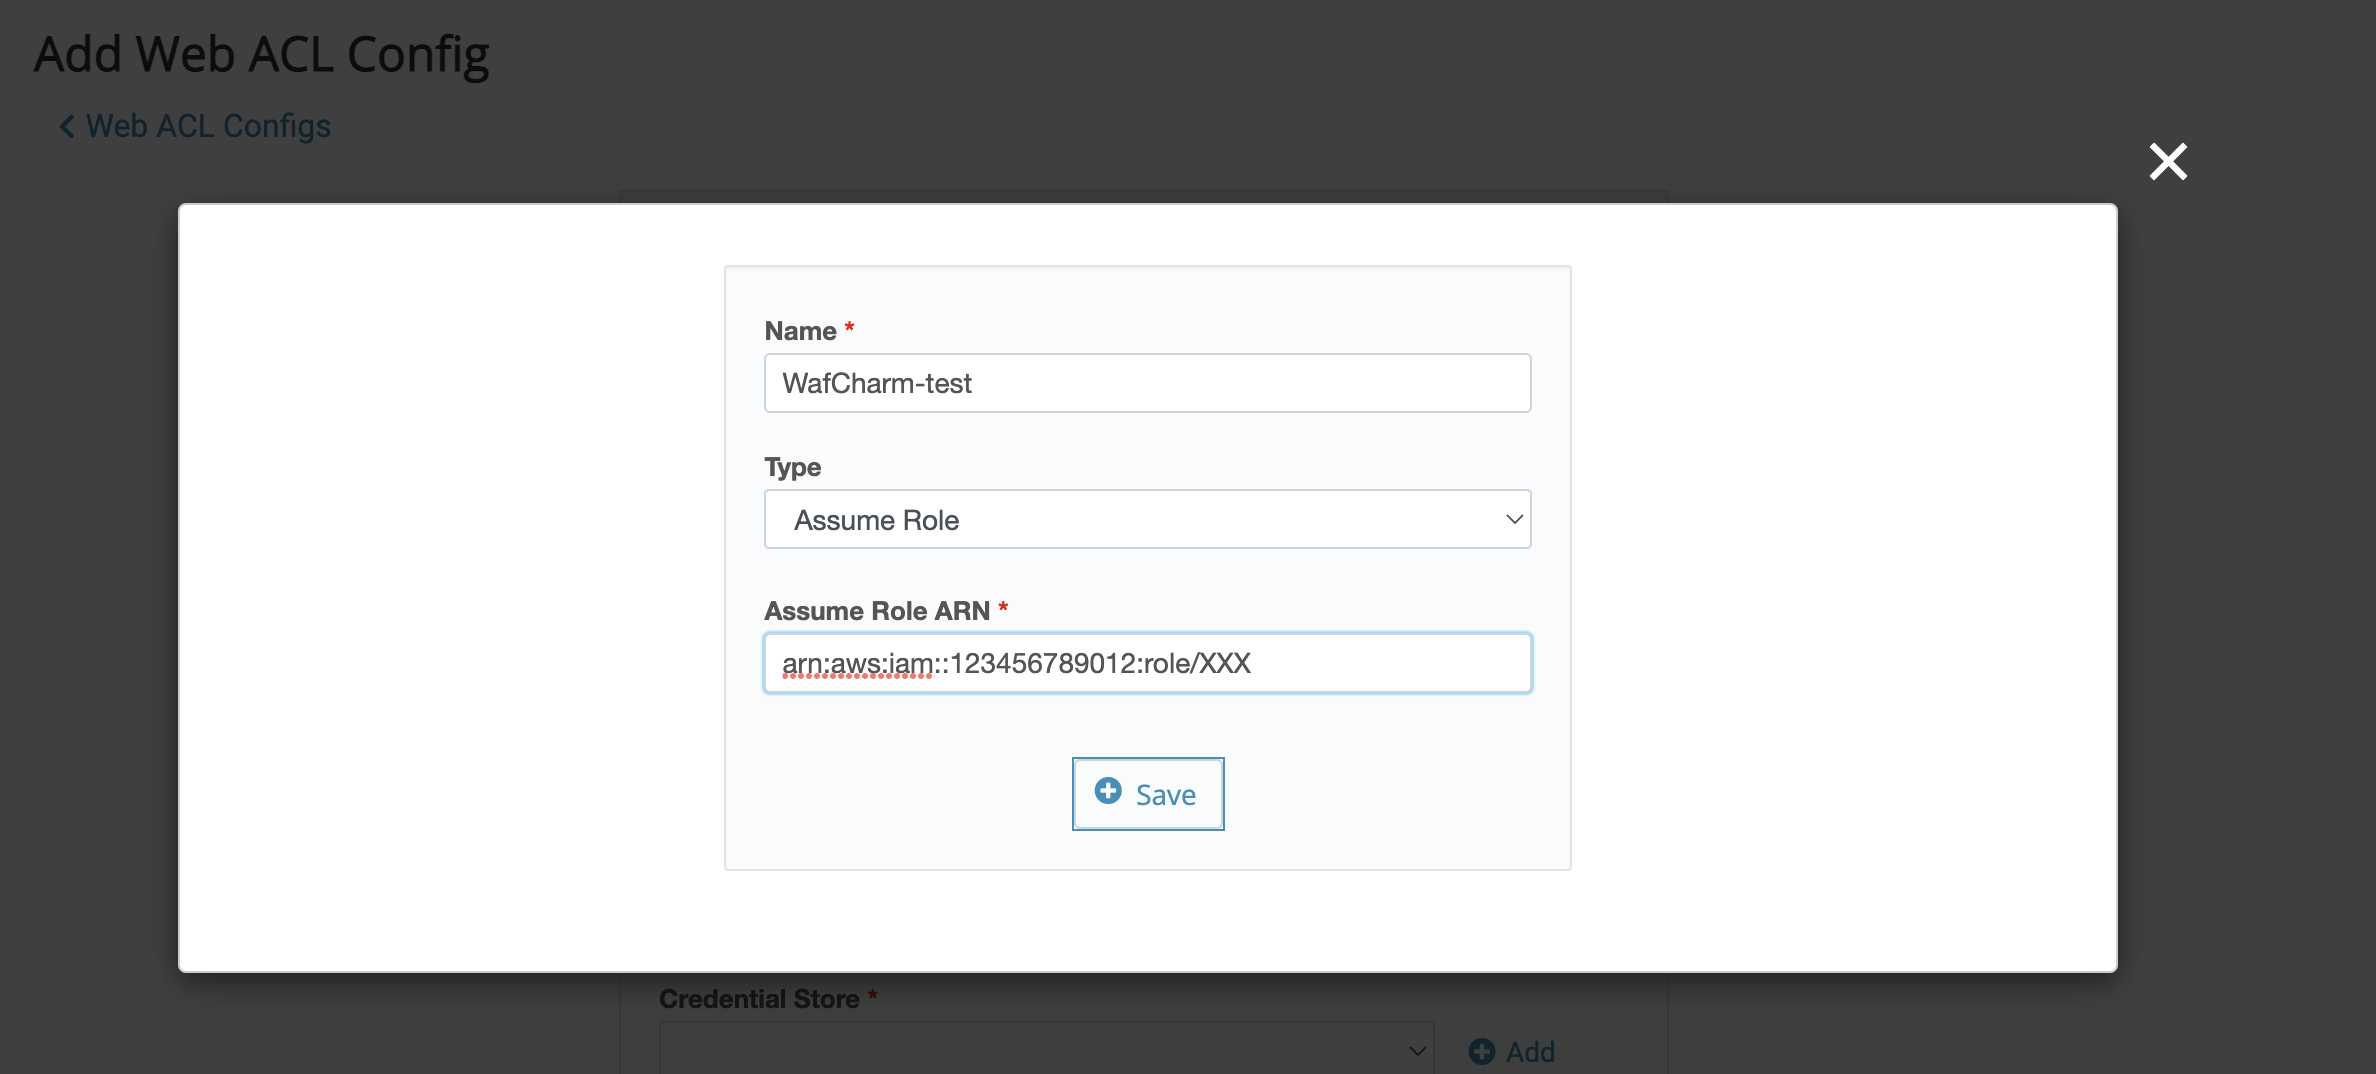
4. Pop-up will be shown. Enter the items below and click the Save button.
- Name: enter the name of the credential information (for management purposes)
- Type: select Assume Role
- Assume Role ARN: paste the ARN copied in Step 8 of section "5. Creating a role"
5. Copy the Trust Policy shown.
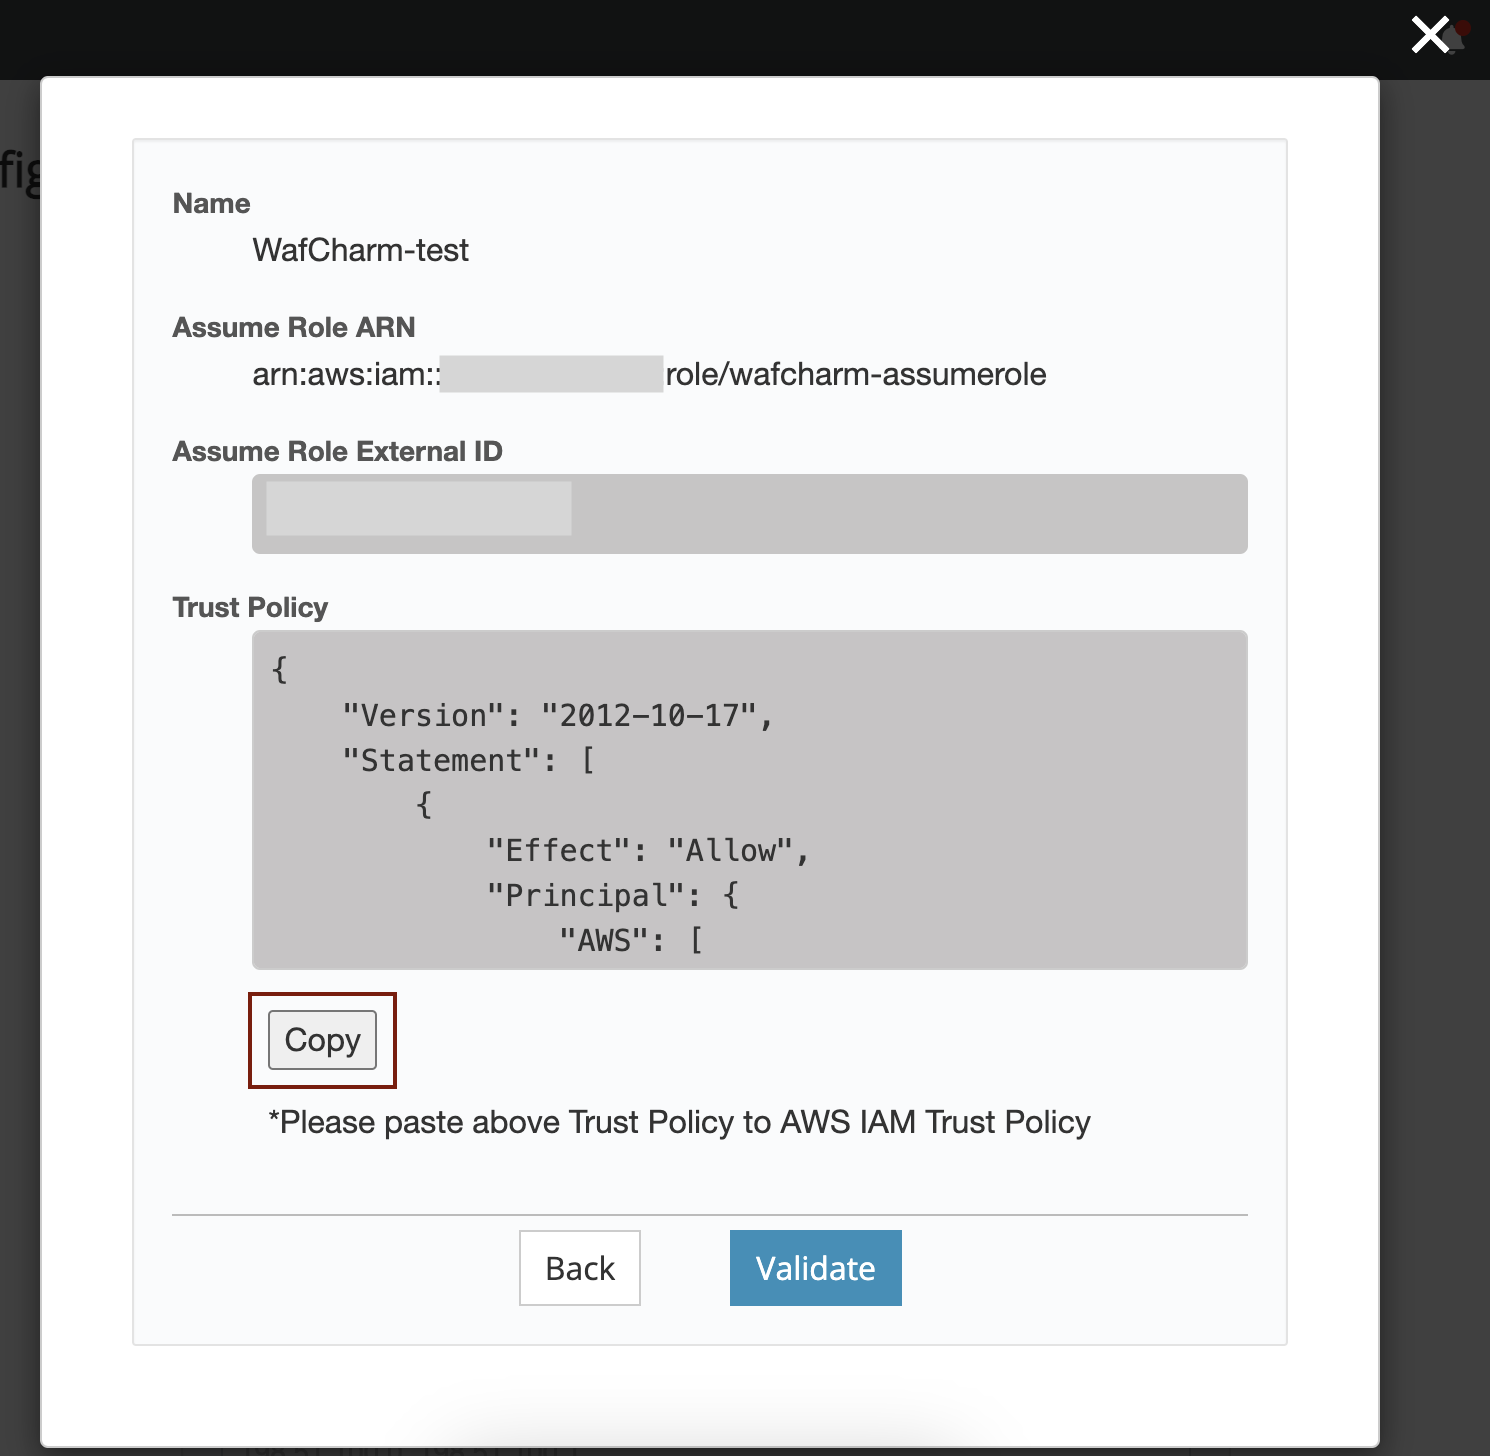
6. Open the role's detail page in the AWS management console and click the "Trust relationships" tab.
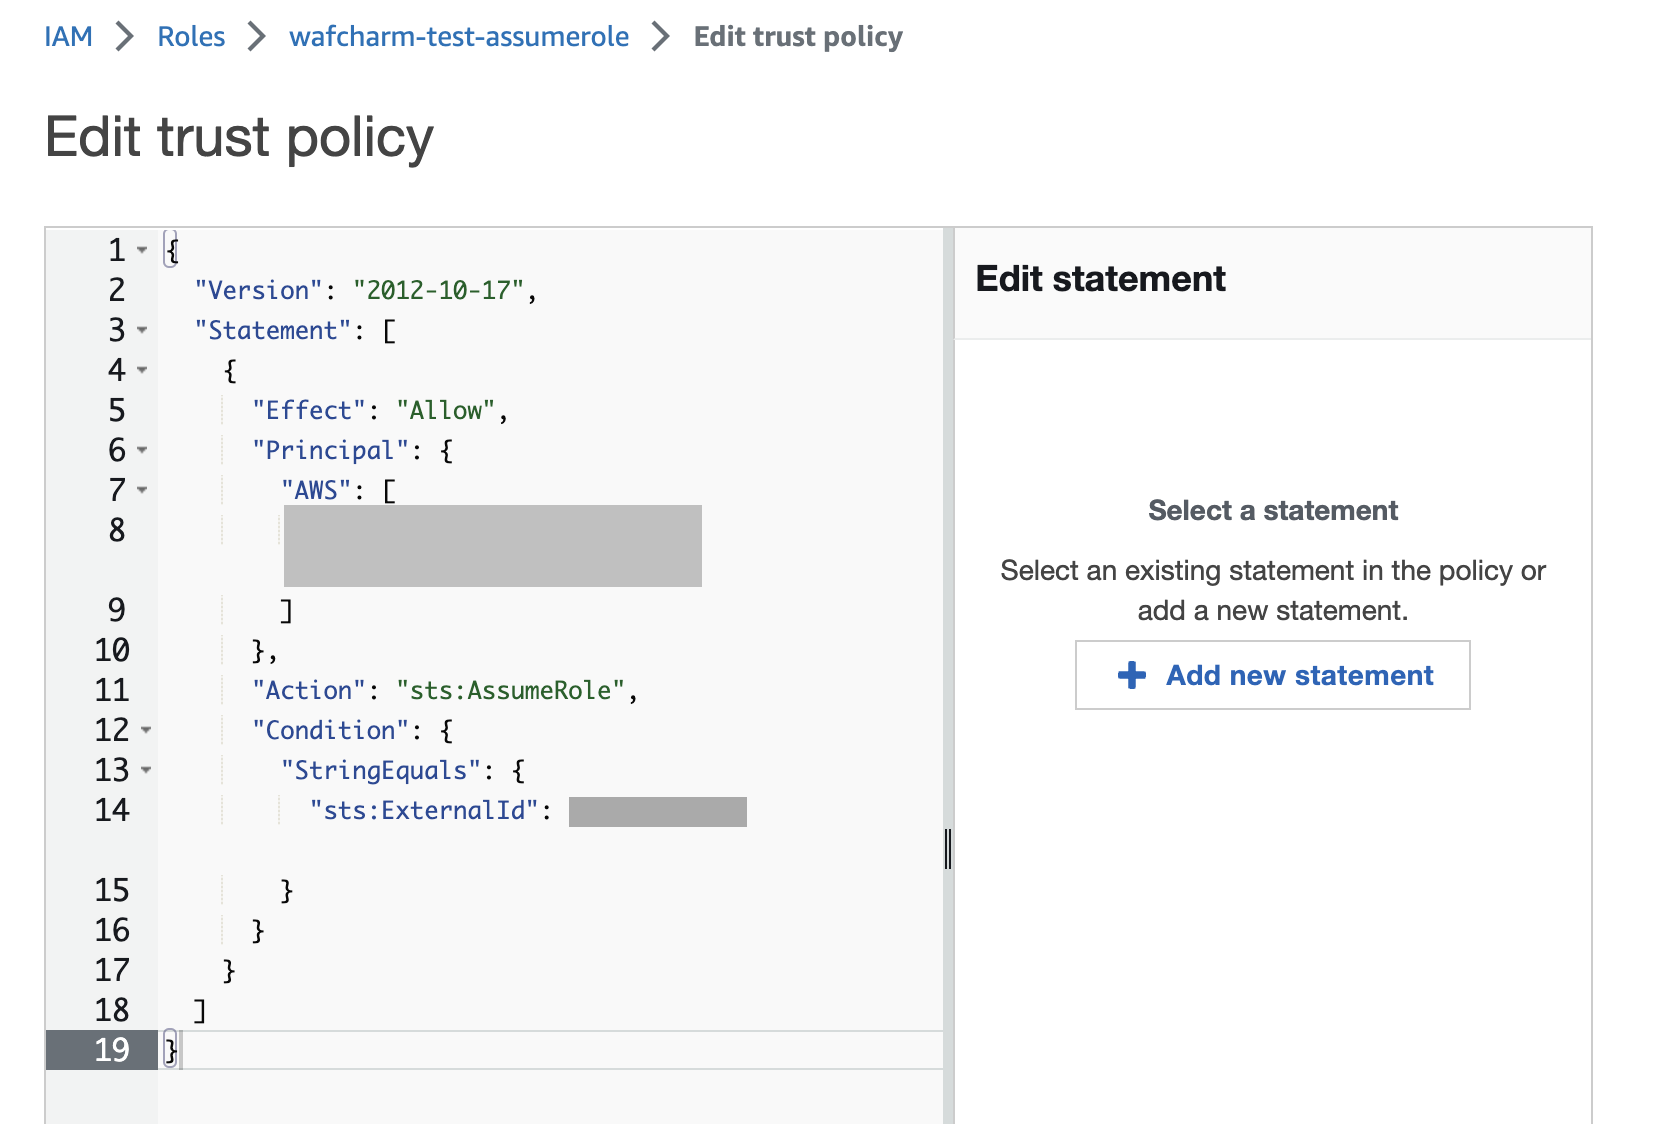
7. Click the "Edit trust policy" button.
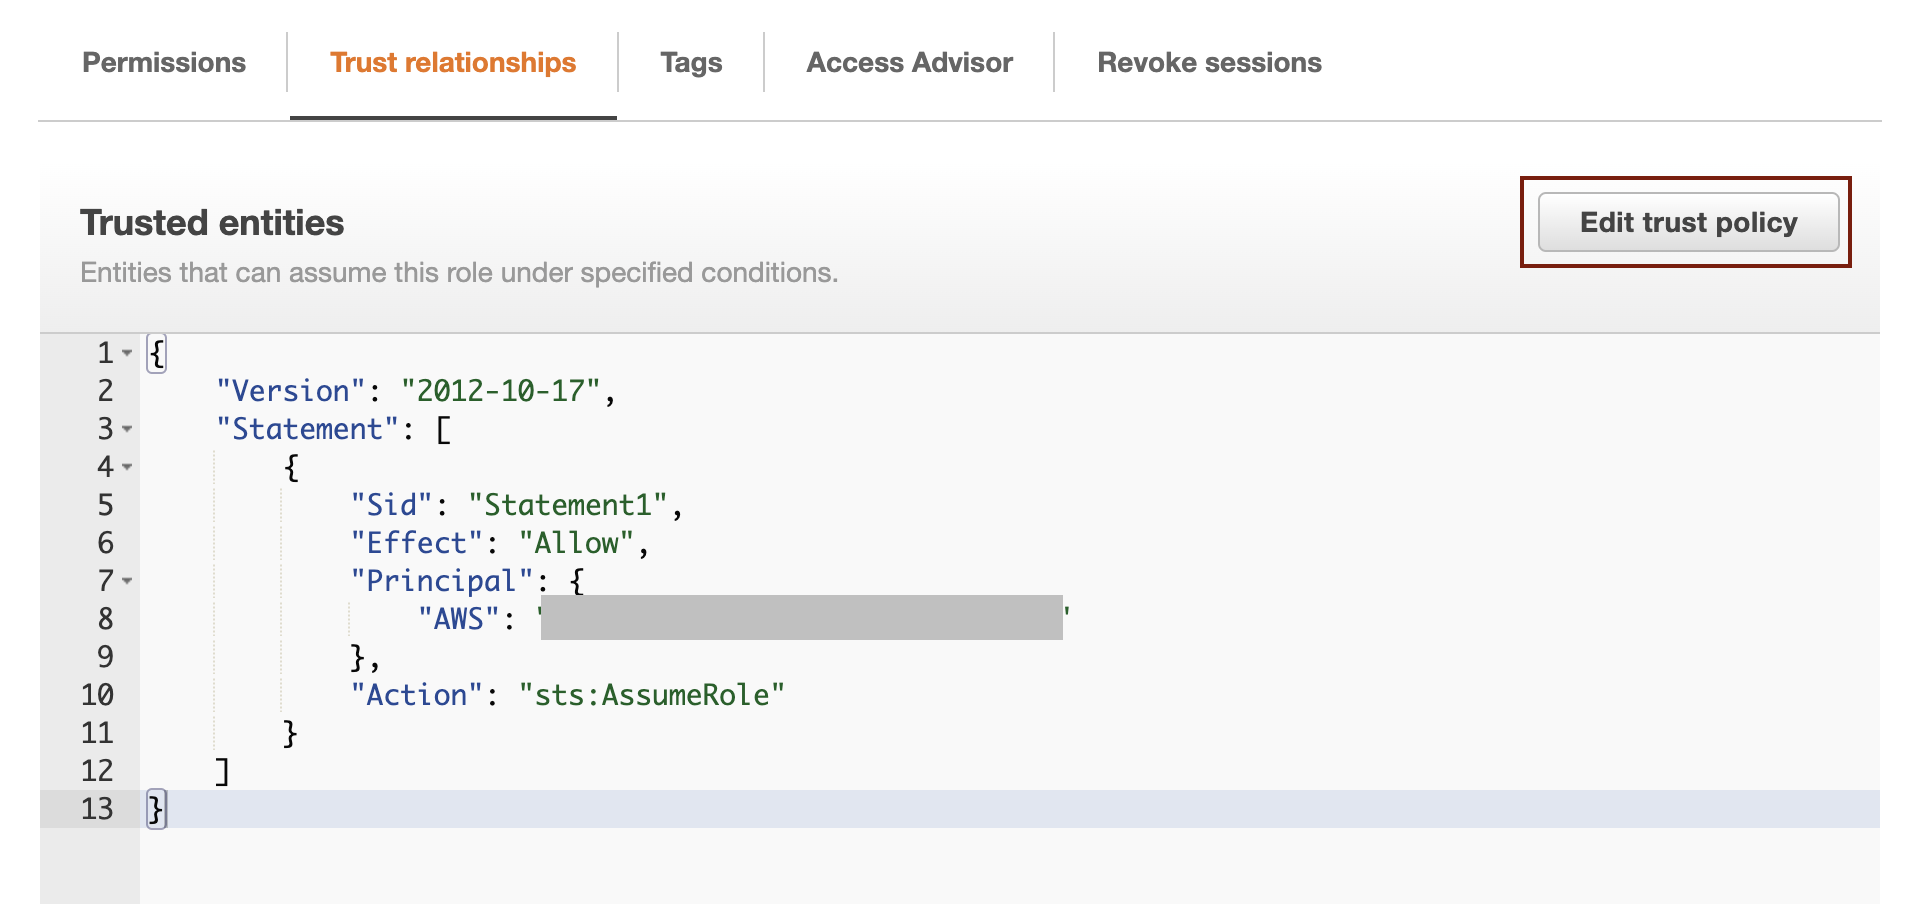
8. Paste the trust policy shown in the WafCharm dashboard under the "Edit trust policy" and click the "Update policy" button.
The trust policy must be updated to the one issued by WafCharm because WafCharm will not be able to update the rules.
The validation will fail in the next step if you do not update the trust policy beforehand.
After the trust policy has been issued, make sure to update the policy in the AWS management console first.
Please note that depending on the time it takes to reflect changes in the AWS management console, validation may fail even if you have updated the trust policy in AWS. In such a case, please wait for a little and then try validating again.
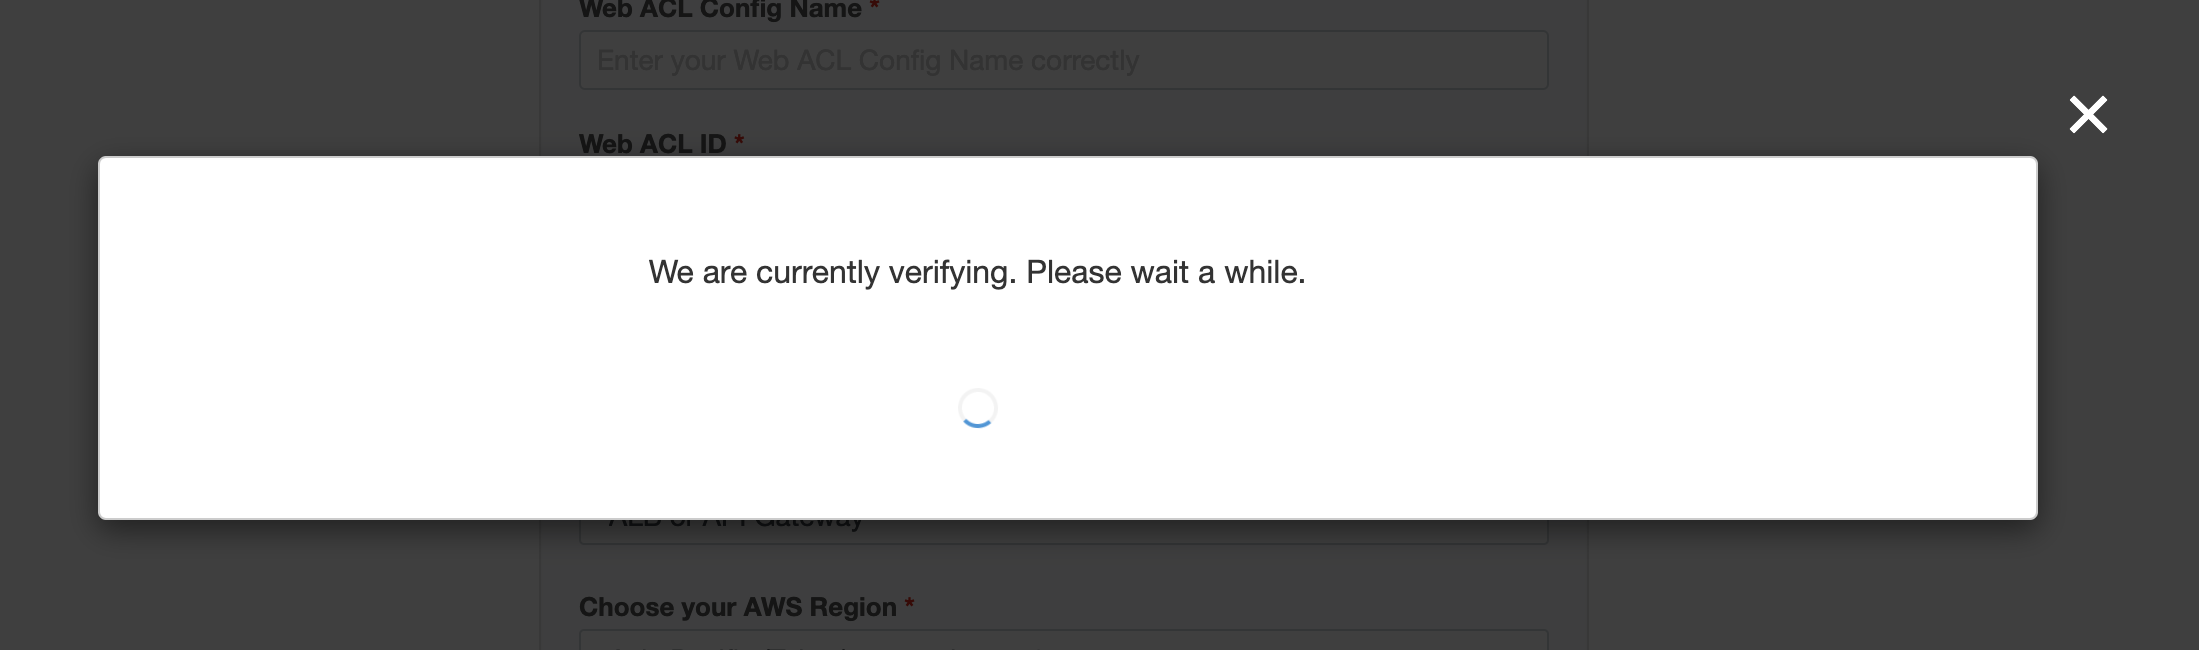
9. Go back to the WafCharm dashboard and click the "Validate" button.
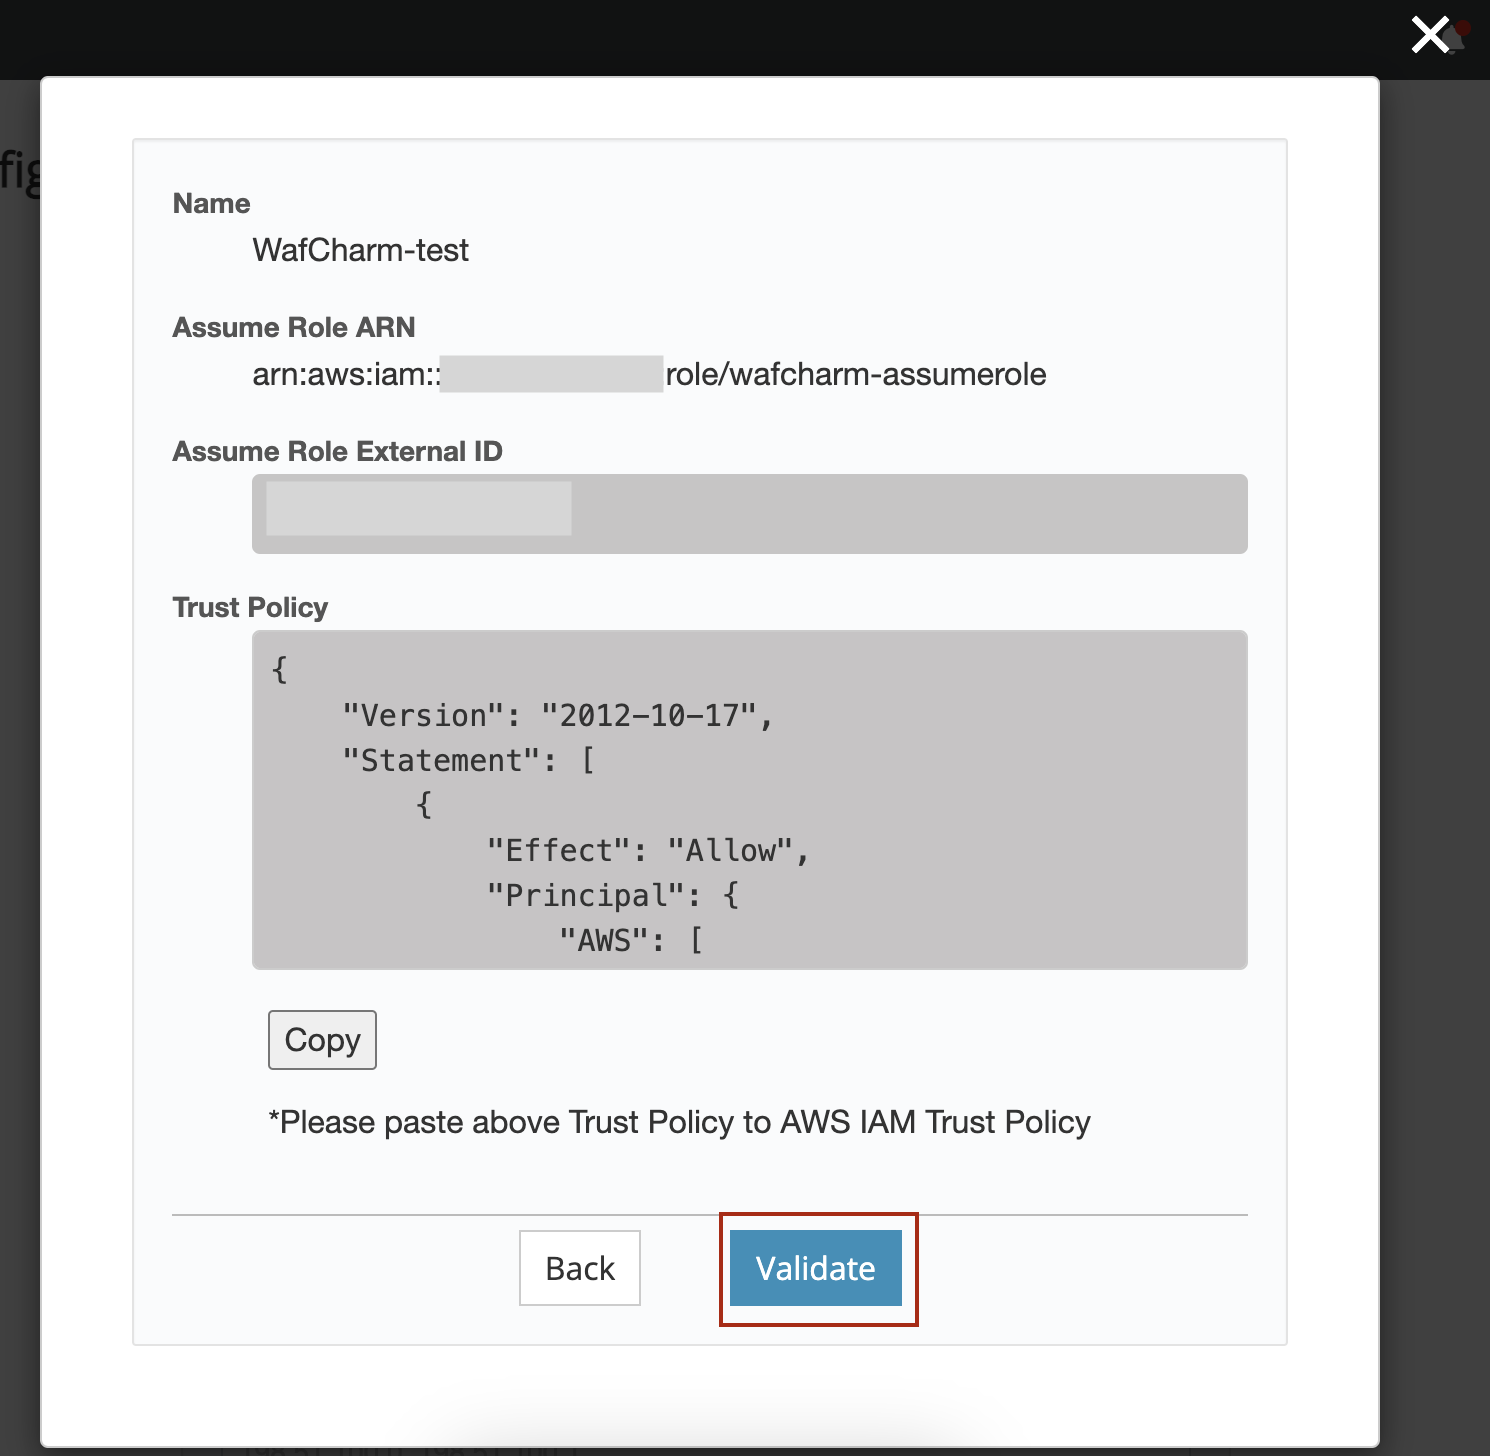
10. Validation is performed when the "Validate" button is clicked.
If the validation is successful, the message "Credential Store was successfully created" will be shown, so click the OK button.
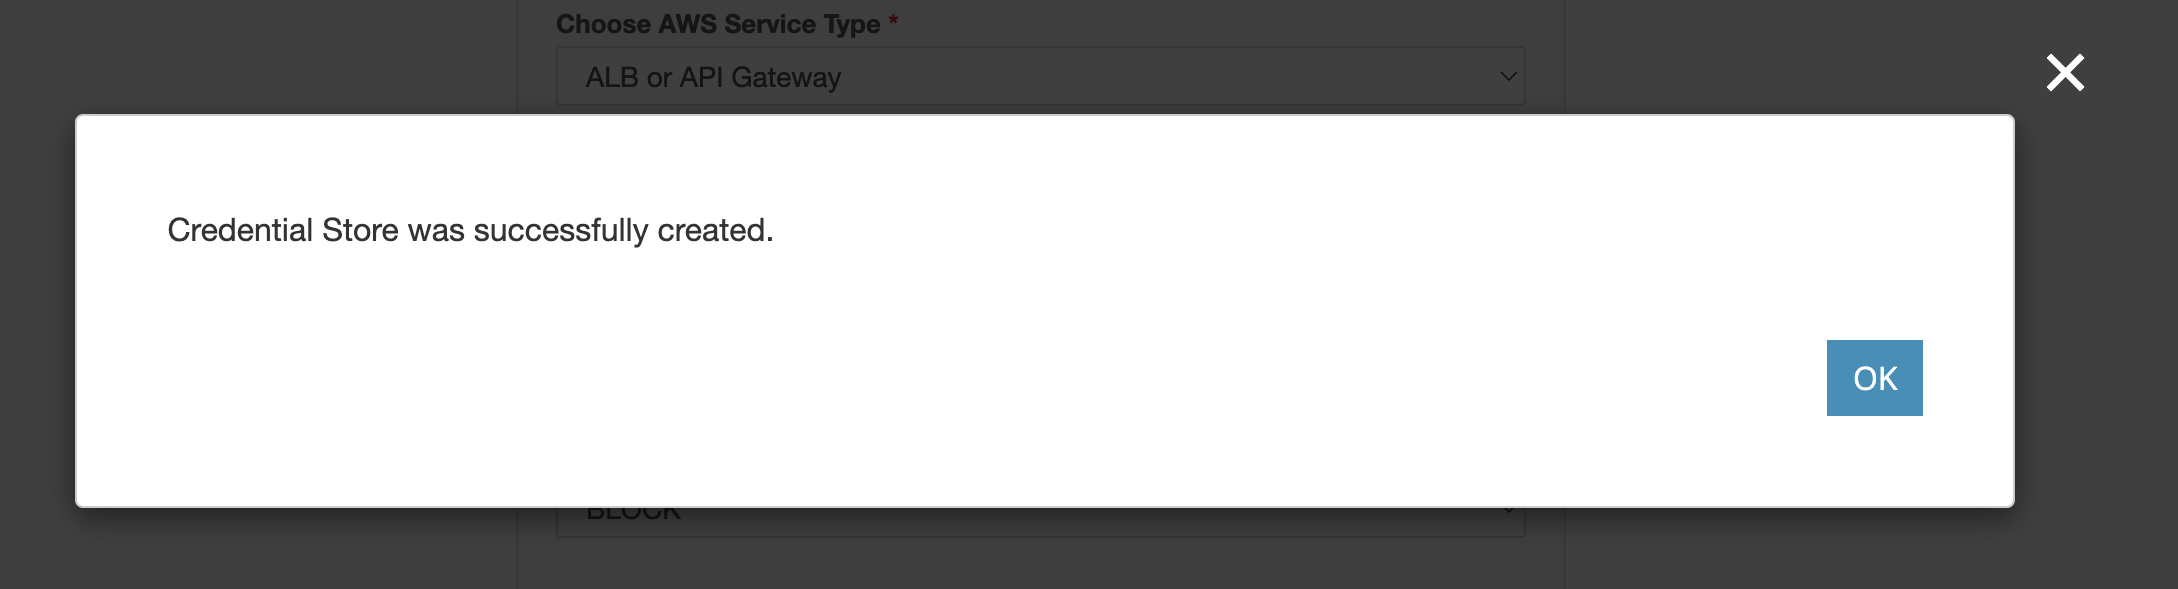
Please note that depending on the time it takes to reflect changes in the AWS management console, validation may fail even if you have updated the trust policy in AWS. In such a case, please wait for a little and then try validating again.
Credential information created up until this step will be saved in the Credential Store even if the validation fails. If there's an error, open the Credential Stores page from the menu above and revalidate by clicking on the Validate button on the detail page.
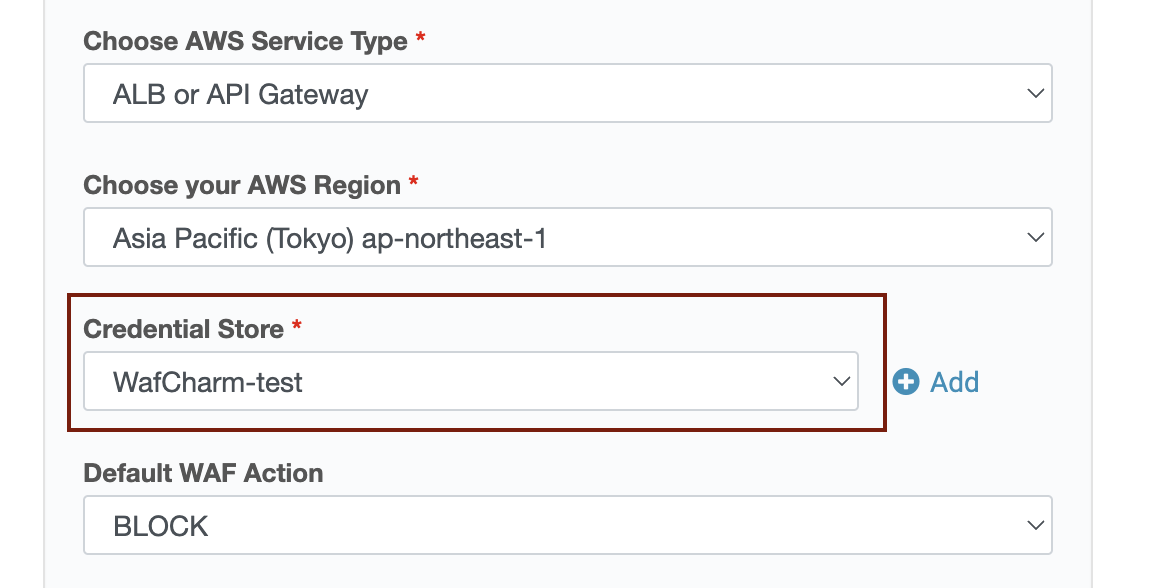
11. When the Credential Store name you've registered is shown in the dropdown menu, the registration of the credential information using AssumeRole is complete.
The next step will be to finish the Web ACL Config setting by following the information in the WafCharm Initial Setting Manual.
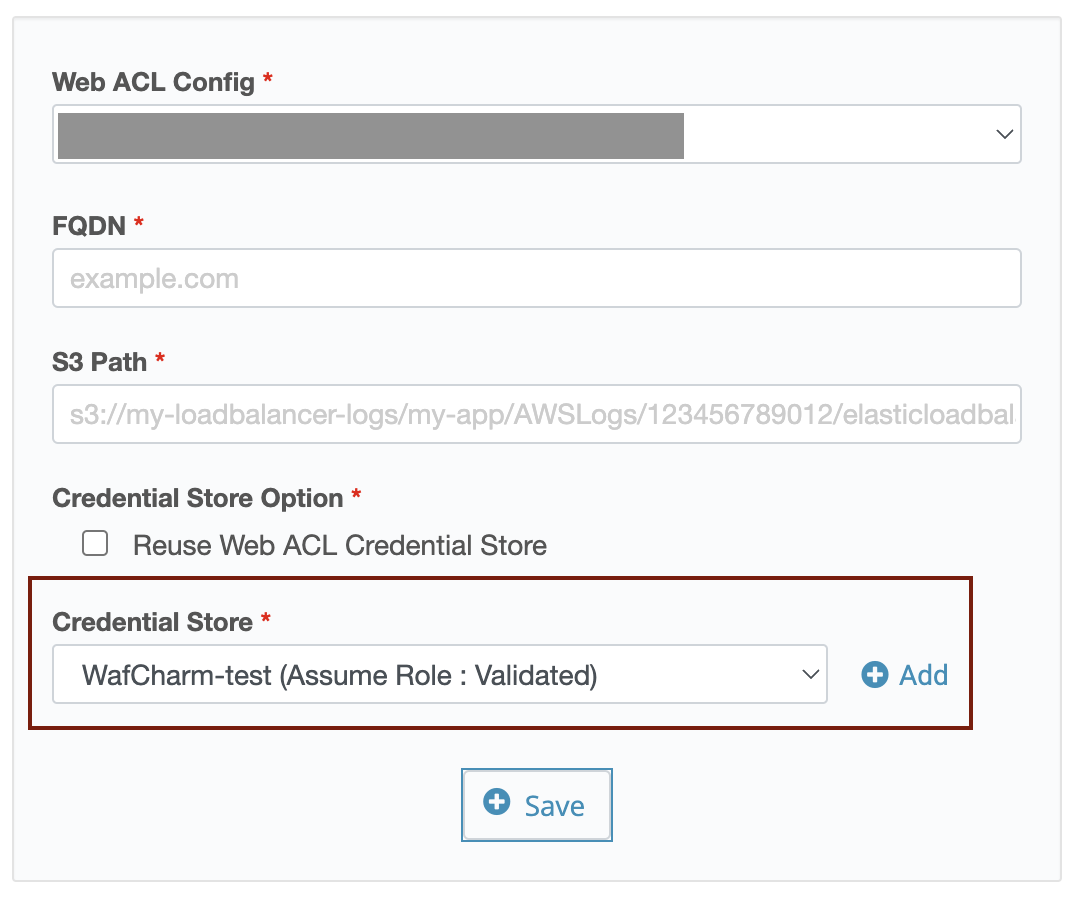
7. About Credential Store in Web Site Config
Credential registration is required for Web Site Config as well.
If you are going to use the same credential information as Web ACL Config, keep the “Reuse Web ACL Credential Store” checked and click the Save button.
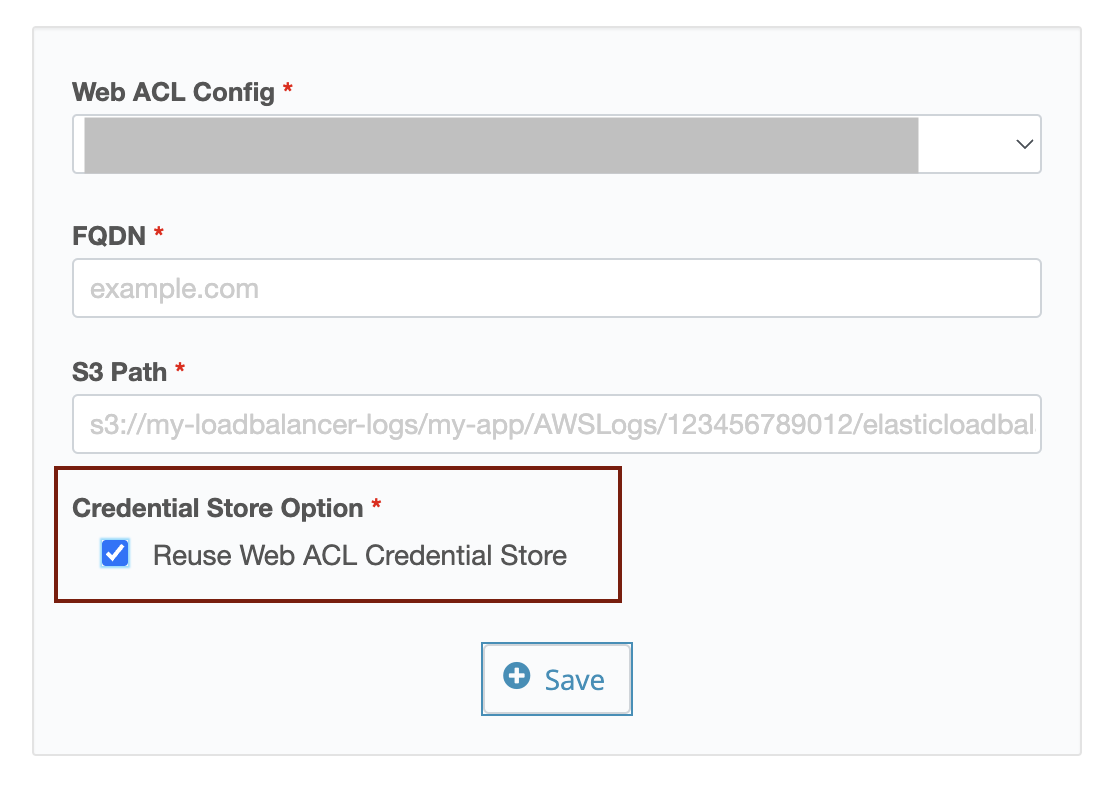
Uncheck the “Reuse Web ACL Credential Store” checkbox and select the name of the registered Credential Store in the dropdown menu to use different credential information.
If you want to register new credential information for Web Site Config, uncheck the “Reuse Web ACL Credential Store” checkbox, click the Add button next to the dropdown menu, and follow the same procedure provided above.