Updates from 06/01/2023
The content has been revised due to WafCharm update.
Updates from 03/23/2023
Due to the Credential Store feature release, the procedure has been updated.
We will introduce the flow of initial setting of WafCharm. To initialize WafCharm, you need to check the AWS WAF / IAM policy / CloudFront (or ALB) log settings in the AWS Management Console.
*WafCharm is compatible with ALB, CloudFront, and API Gateway.
-
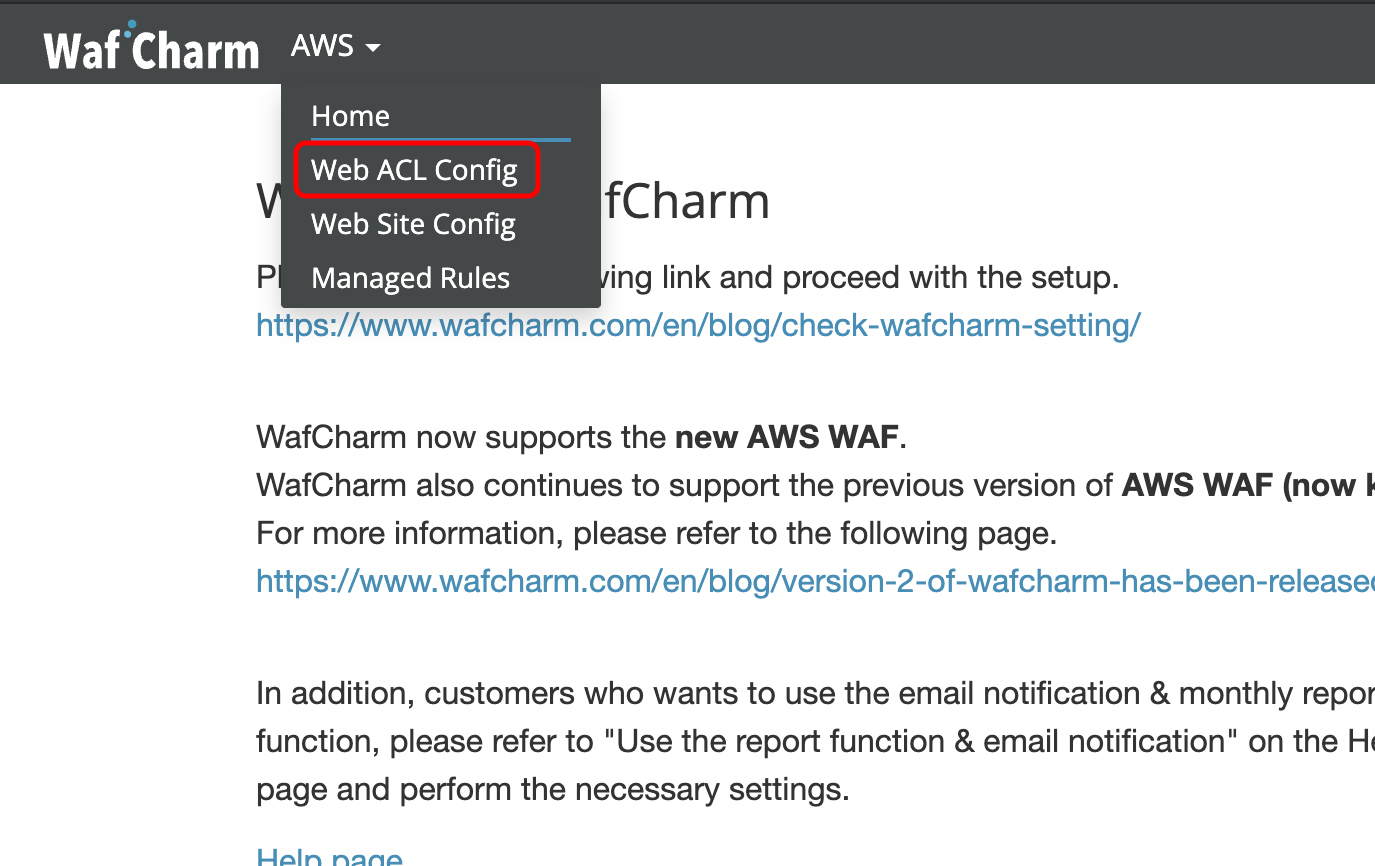
When you proceed to apply for a plan contract, you will be guided to the following page, so let's start by setting Web ACL Config.
-
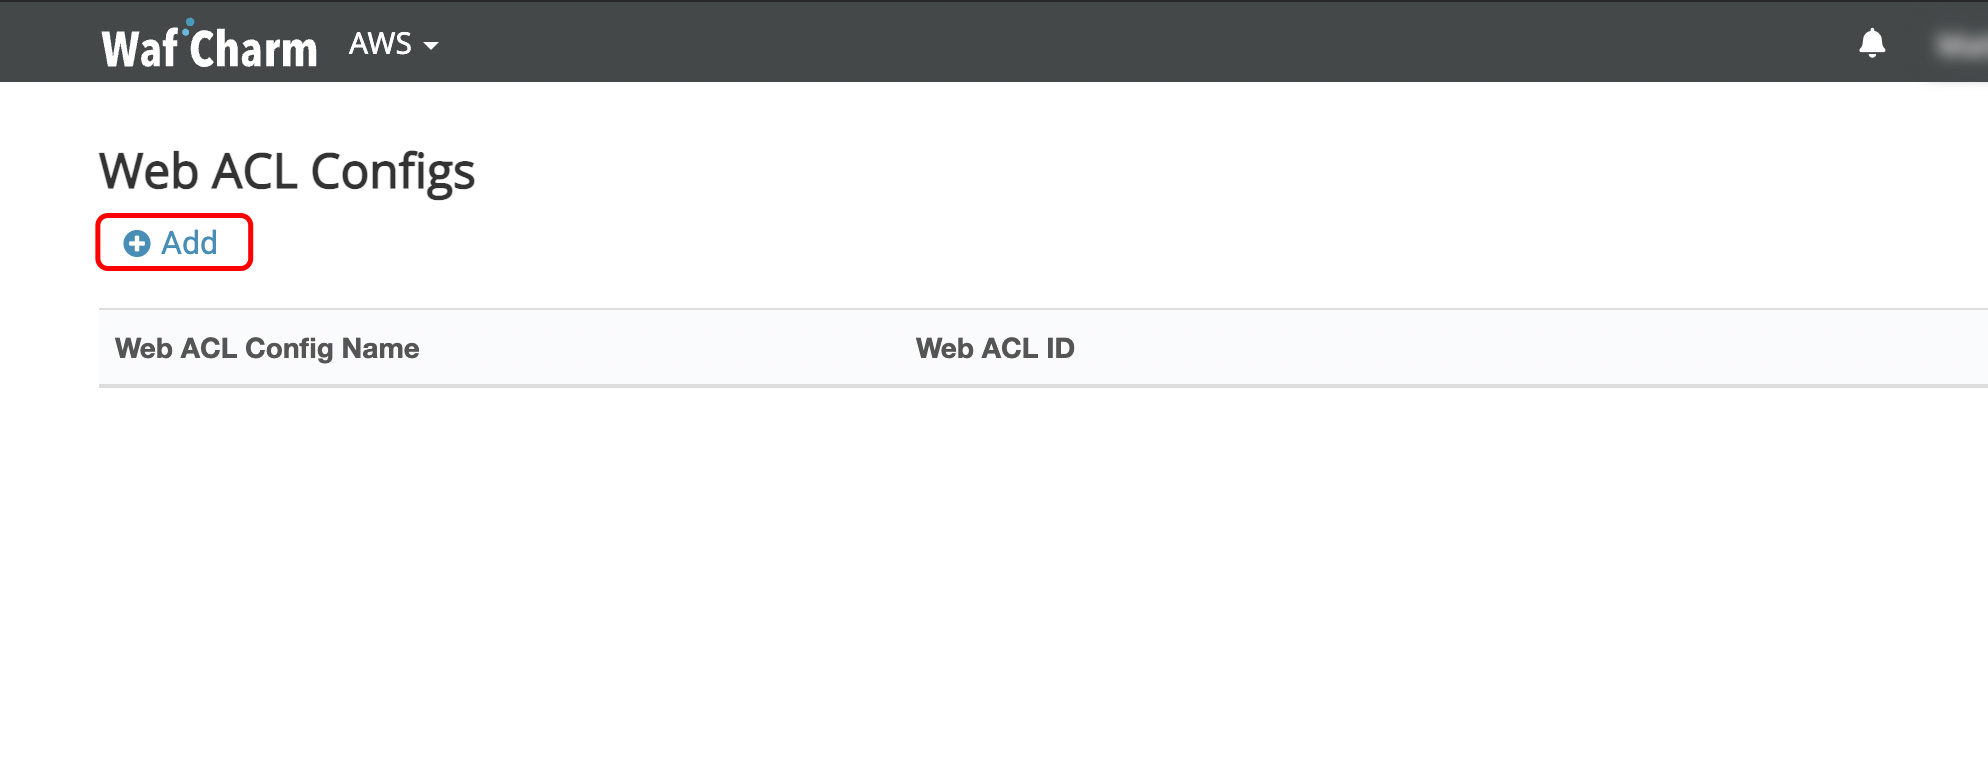
Click the "+ Add" button.
-
Enter the required information (① 〜 ⑩) and click "Save".
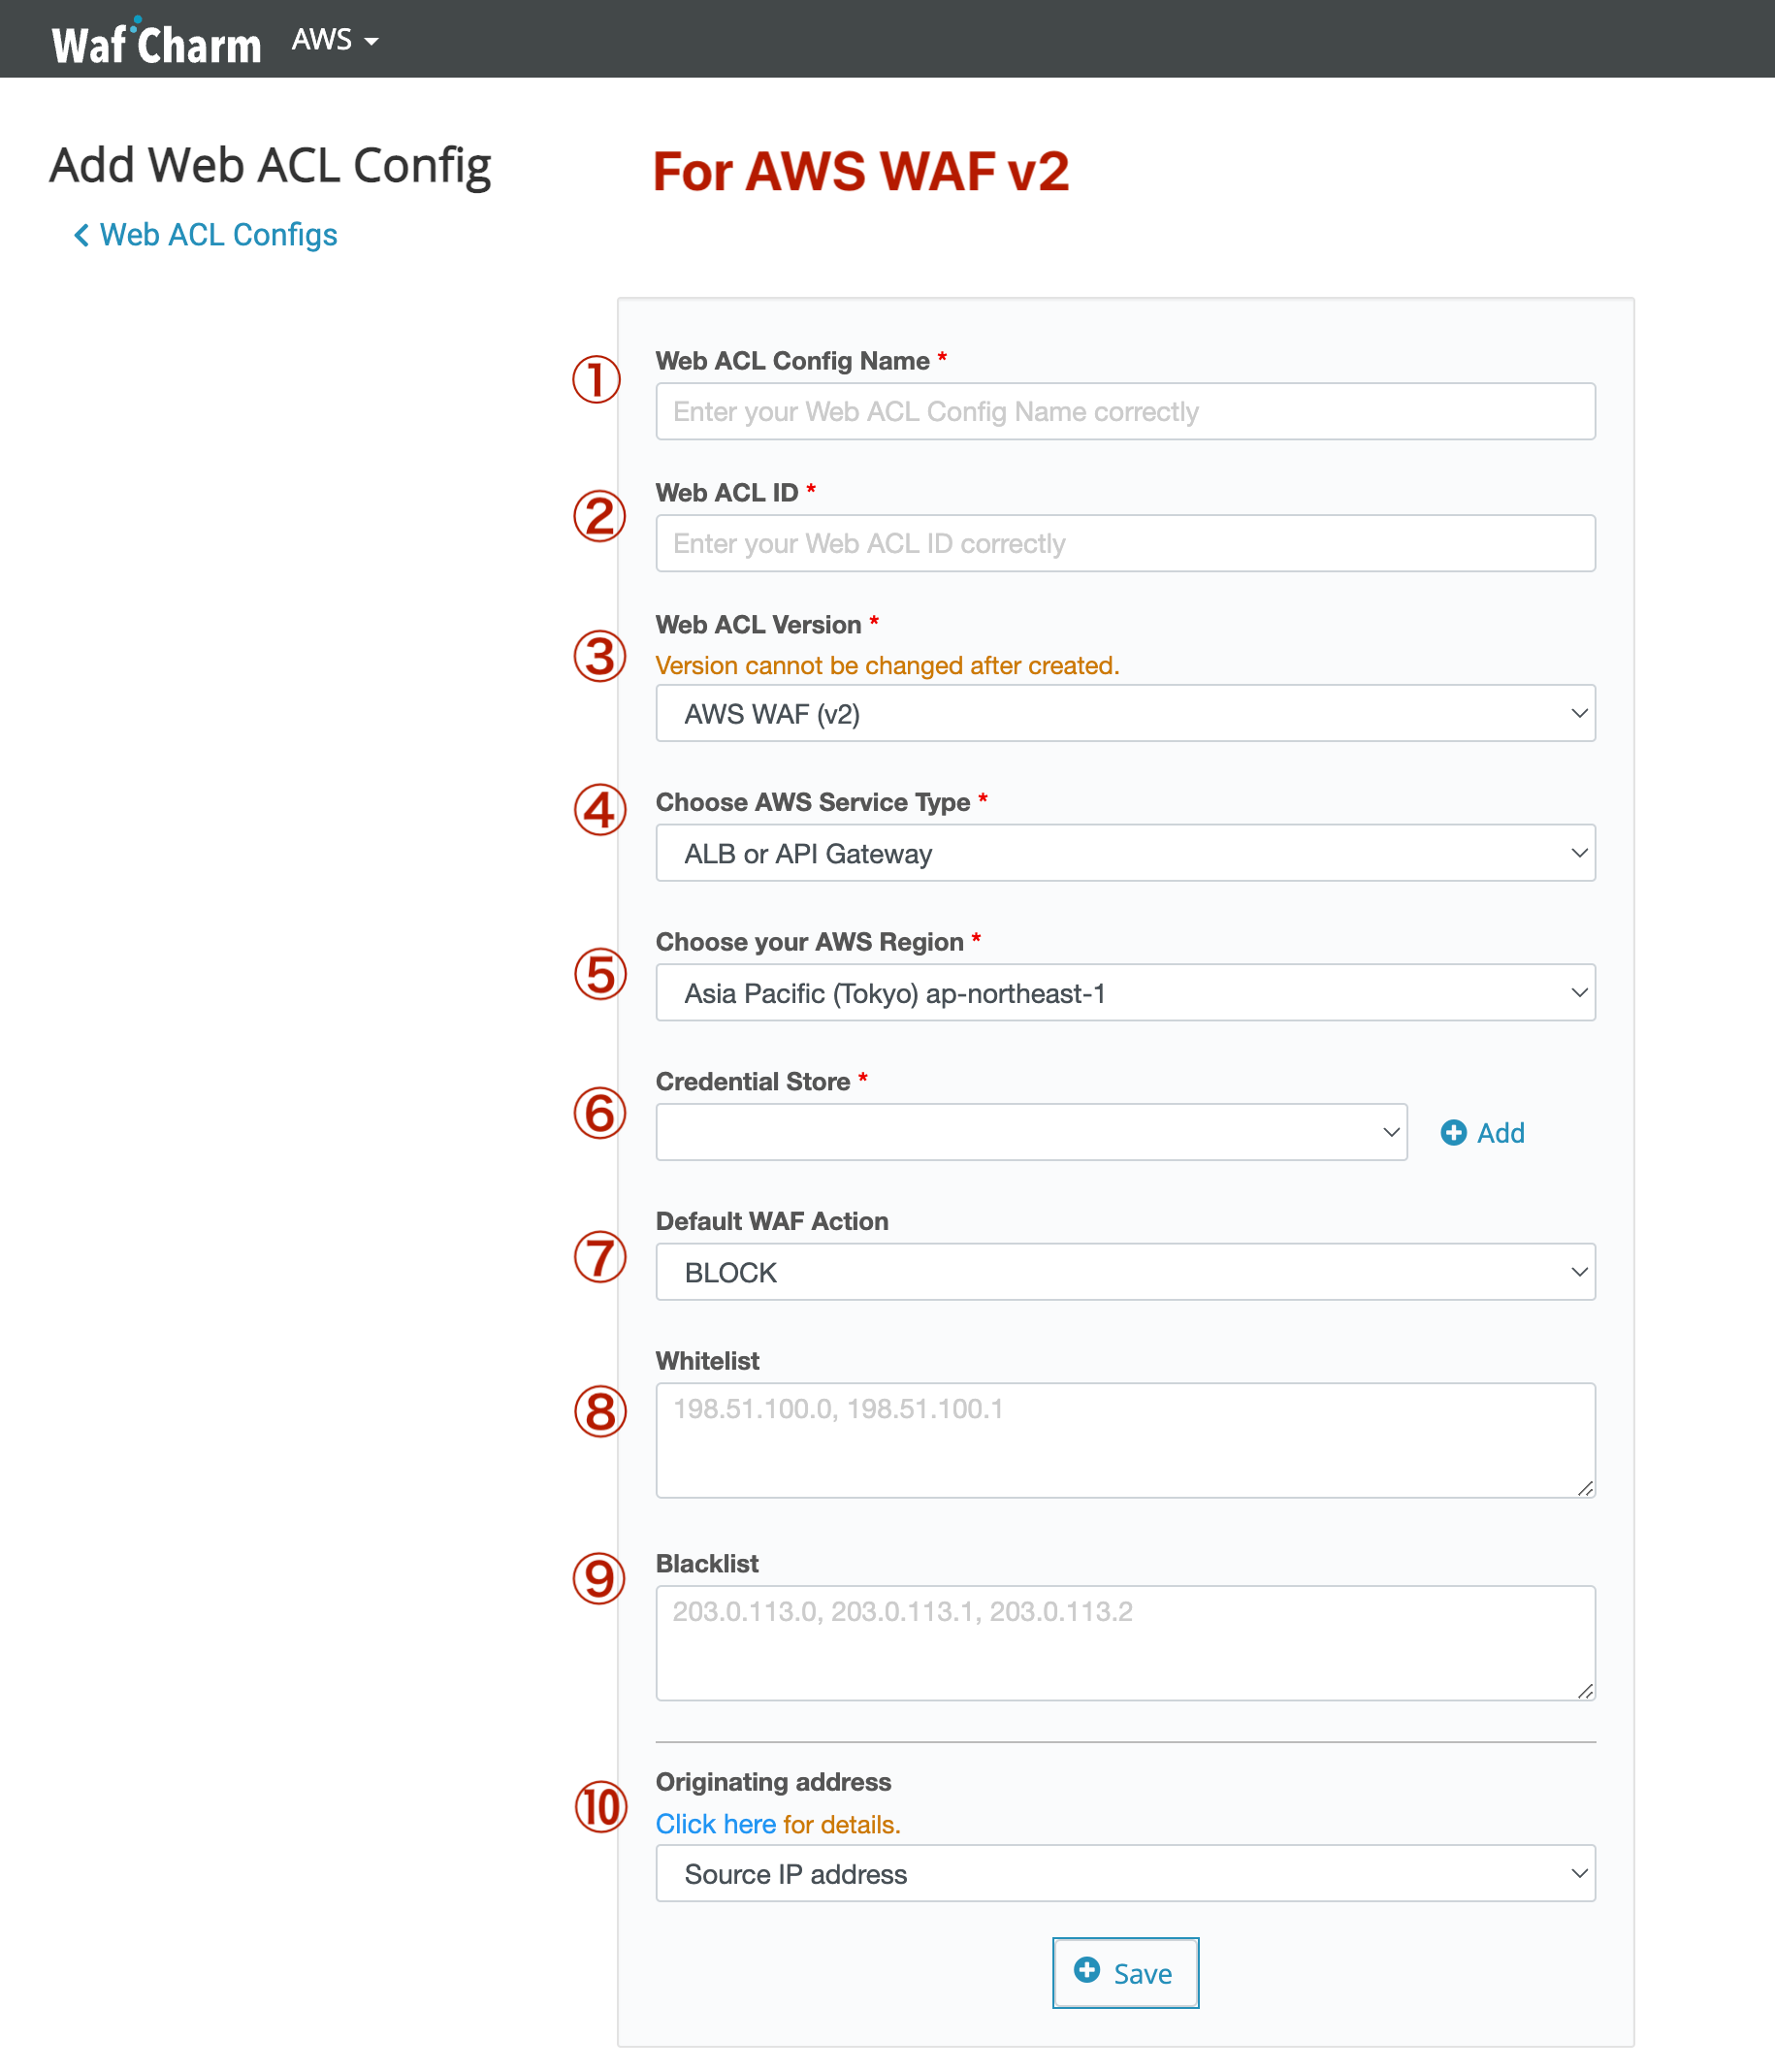
| ①Web ACL Name | Enter the Web ACL Name. It does not have to be the same as the name registered on the AWS console, but we recommend the same name. |
| ②Web ACL ID | AWS Management Console > WAF & Shield > Go to AWS WAF > Web ACLs
The ID enclosed in the red frame in the image below is the "Web ACL ID". |
| ③Web ACL version | AWS WAF v2 is selected. You do not have to adjust this option. |
| ④Choose AWS service type | Select the resource your Web ACL is attached to. *WafCharm is compatible with ALB, CloudFront, and API Gateway. |
| ⑤Choose your AWS region | Select the Web ACL and the region where the resource is created. |
| ⑥Credential Store |
Click the Add button to register your credential information.
To use AssumeRole
To use Access Key/Secret key (not recommended) |
| ⑦Default WAF Action | You can set the action when WafCharm applies a rule to the target Web ACL. * The action of the rule that has already been applied cannot be changed with this setting. |
| ⑧Whitelist | Enter if you want to create a white list at the initial setting stage. It is also possible to make additional settings later. |
| ⑨Blacklist | Enter if you want to create a blacklist at the initial setting stage. It is also possible to make additional settings later. |
| ⑩Originating address | You can set up to use the XFF header option. If your environment uses CloudFront before ALB or other similar structures, consider using the option. Refer to the “XFF header options” section of the Help page of WafCharm Dashboard. |

*WafCharm needs 1,100 WCUs to apply rules. If you already have your own rules applied to your web ACL and want to keep the used WCUs under 1,500 WCUs, adjust the WCU usage before configuring WafCharm.
- After performing step 3, you will be taken to the page for setting around S3. Enter the required information here as well, and click Save.
WafCharm "Web Site Config" setting screen
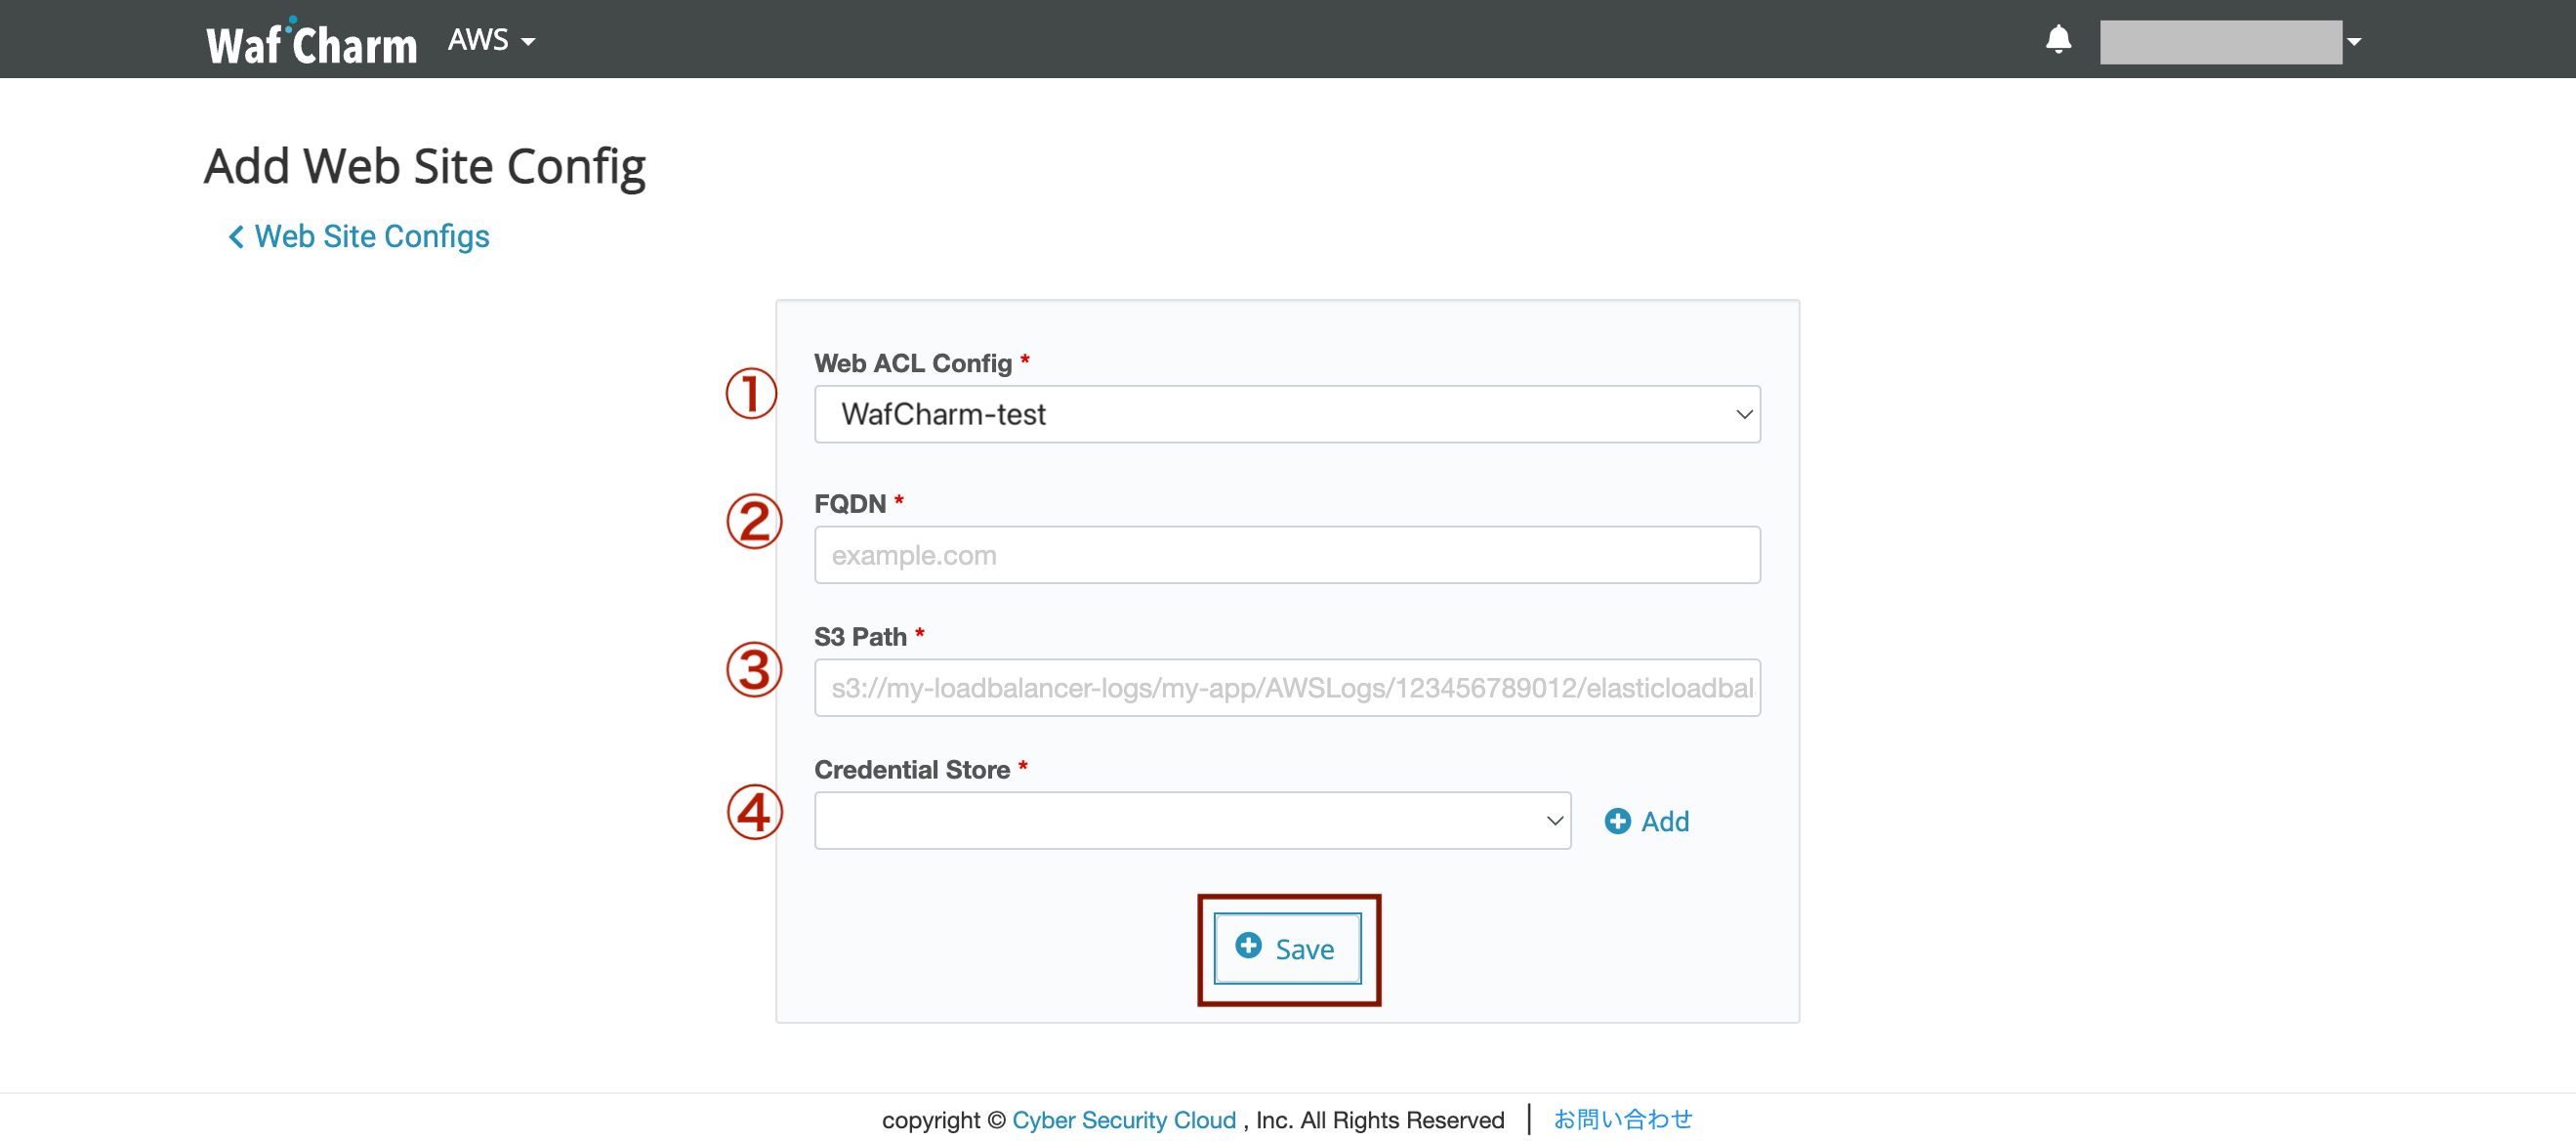
Web Site Config is a setting to register the output destination of the access log used for analysis by WafCharm. (It is not a setting to register the WAF protection target.)
* When using with API Gateway, it is not necessary to set Web Site Config.
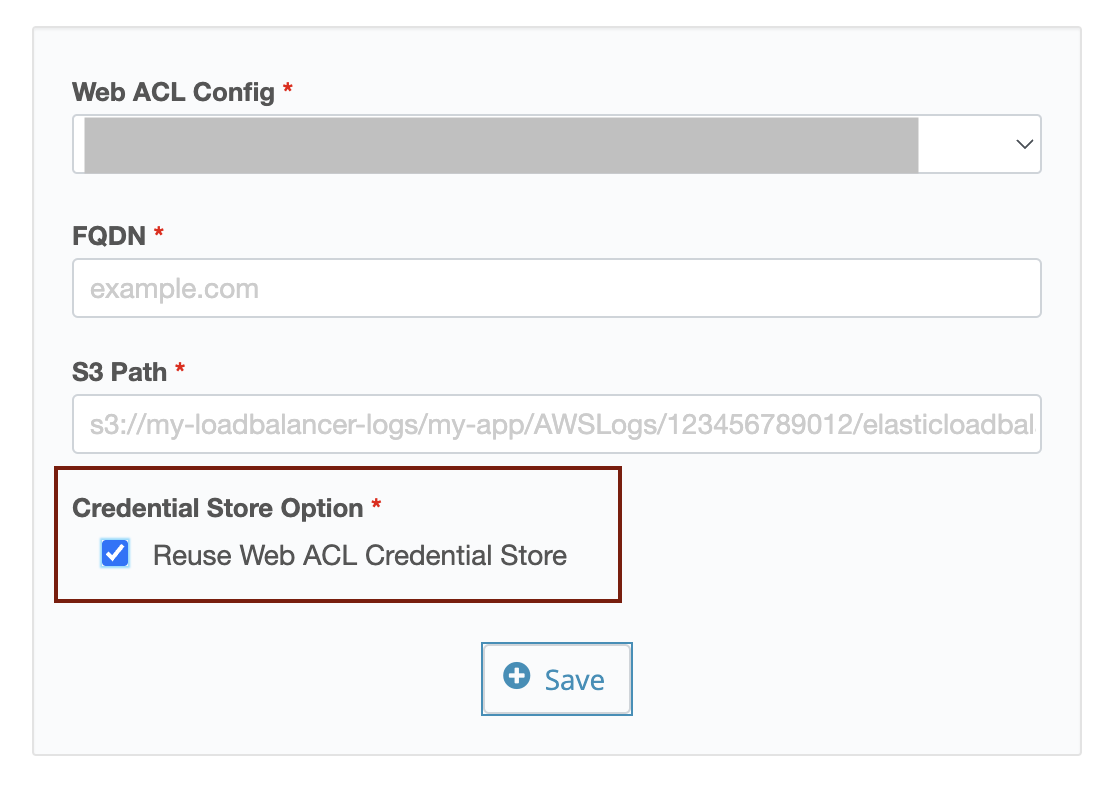
| ①Web ACL Config | Select the target Web ACL Config. * Those who have created Web ACL Config for the first time have already been selected. |
| ②FQDN |
Enter the FQDN of the target web application. * If the input contents of the following procedure (③ S3 Path) are the same, register one FQDN as a representative in Web Site Conifg even if there are multiple FQDNs. (Since WAF operates in units of resources (ALB / CloudFront etc.), there is no effect on WAF due to the difference in the registered FQDN.) |
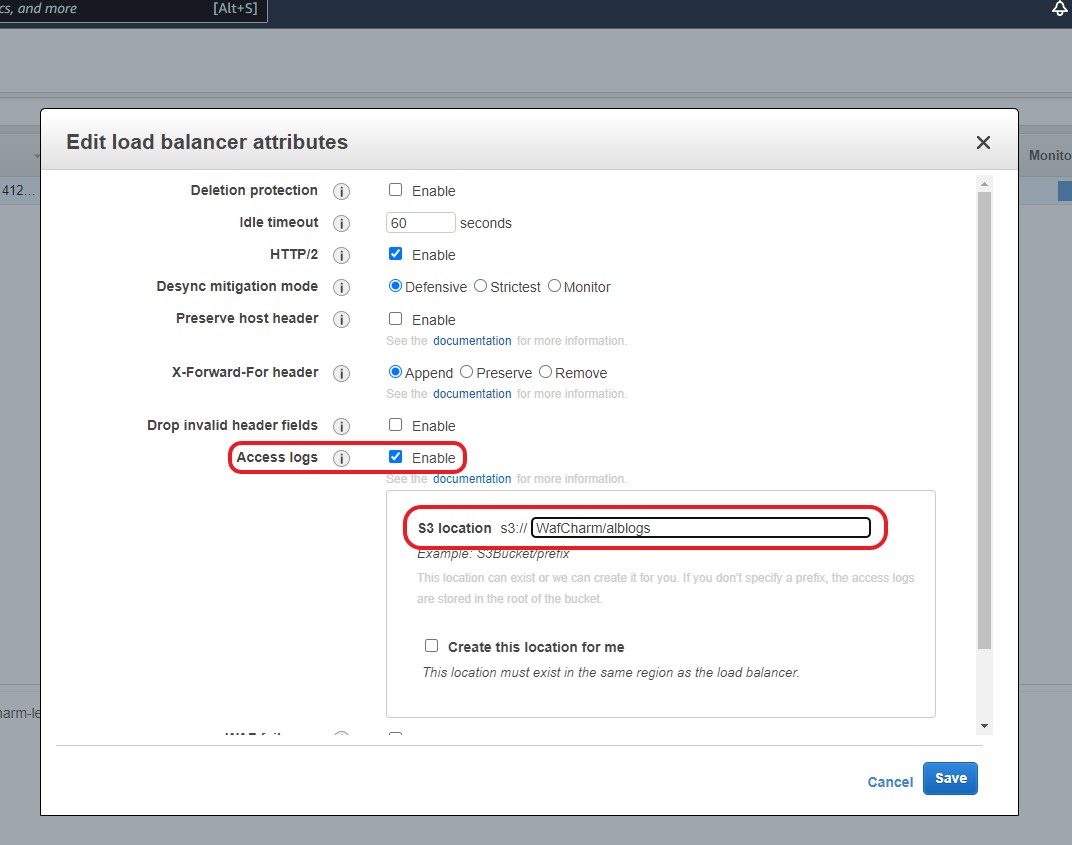
| ③S3 Path | Set the path to output the access log of your resource. Check the log output destination of CloudFront AWS Management Console > CloudFront > Check Target CloudFront and click Distribution Setting > Click Edit > Check the part surrounded by the red frame below. In the case of the red frame below, the S3 Path registered in WafCharm is "wafcharm-lecture02.s3.amazonaws.com" 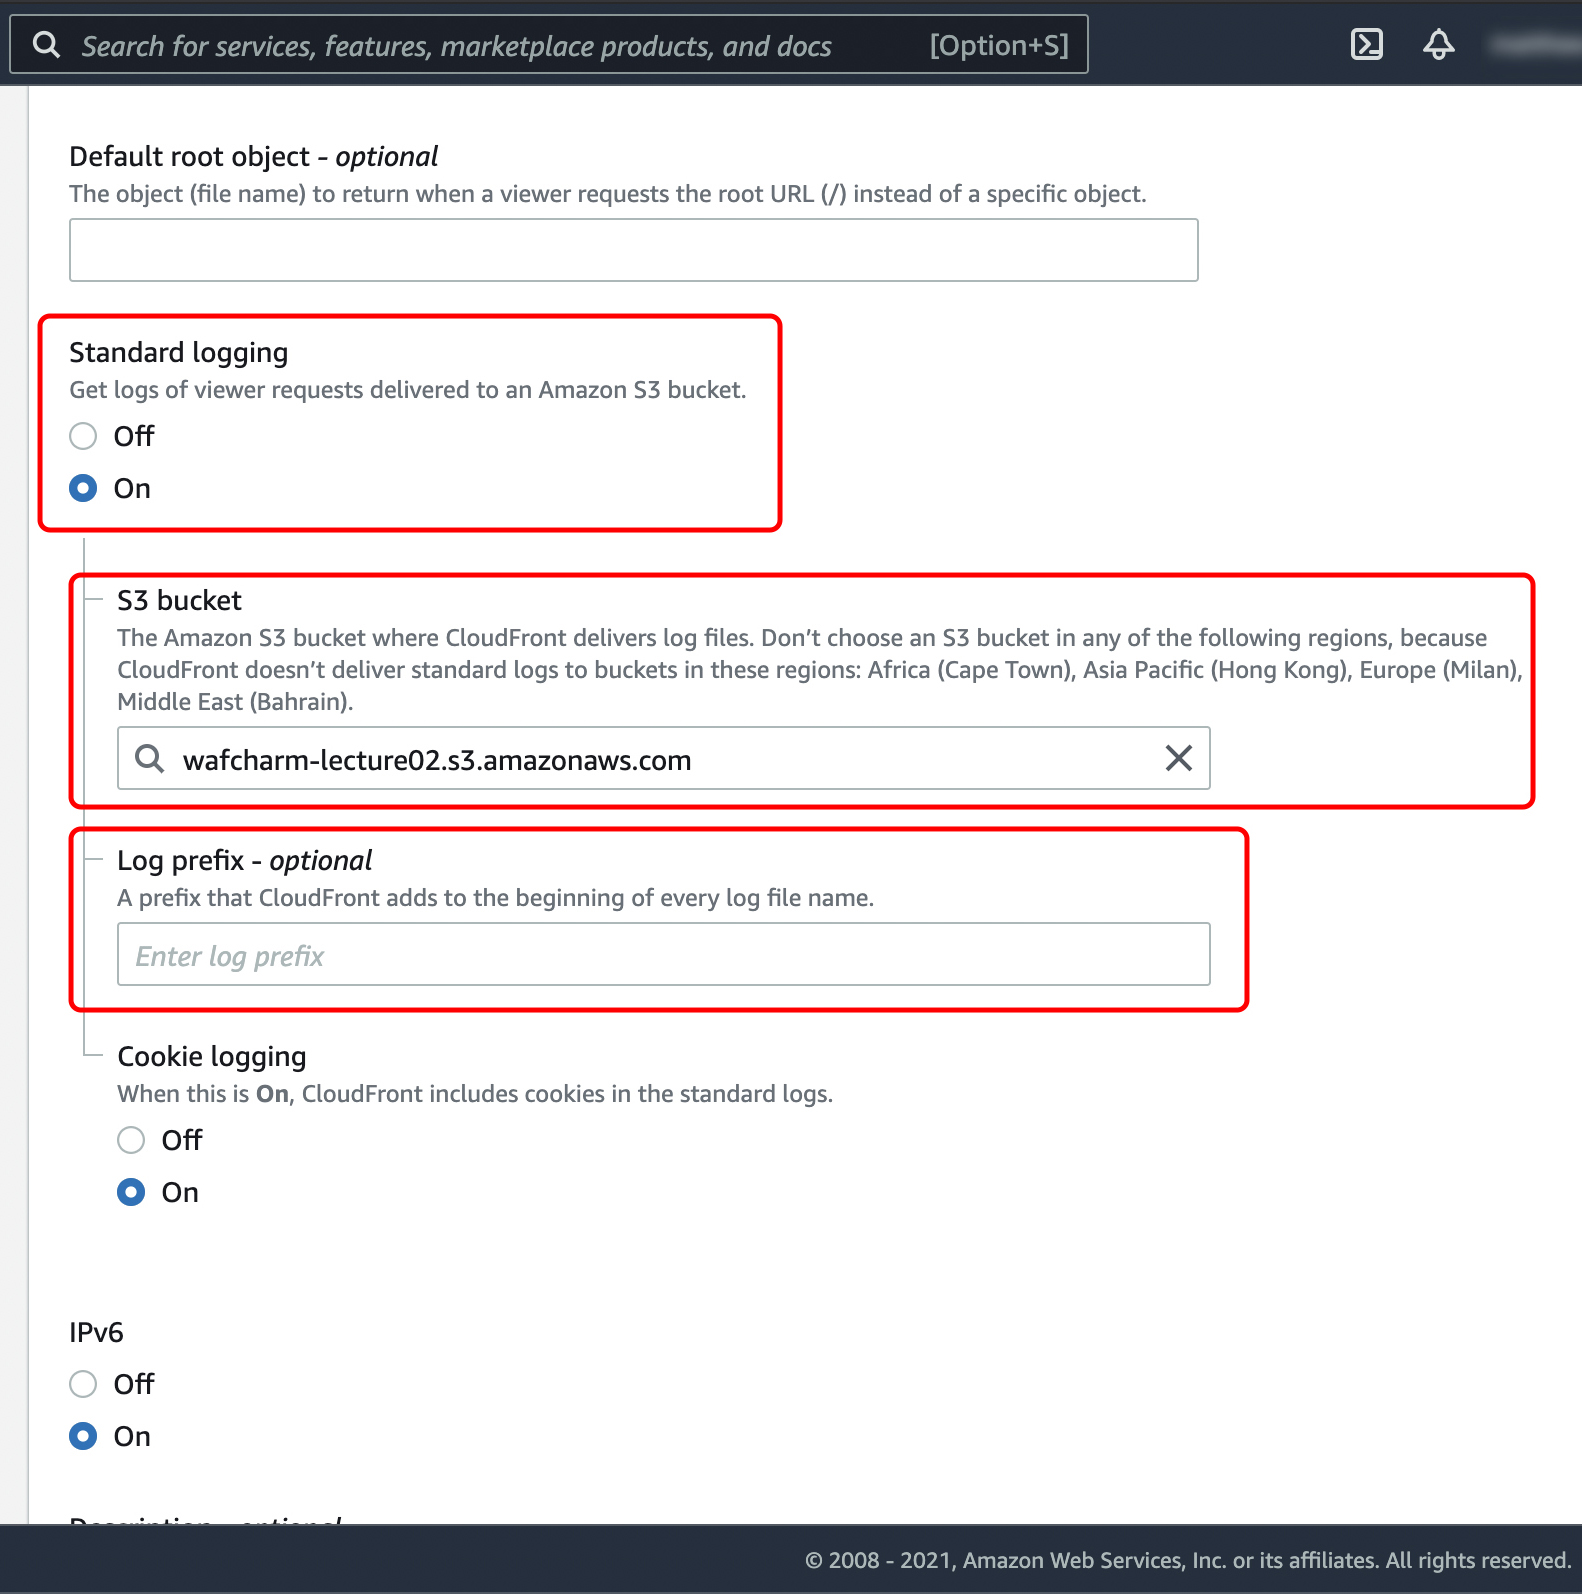 CloudFront log output destination confirmation screen * Please do not output access logs of multiple CloudFront Distributions to the relevant S3 Path. * The real-time log function of CloudFront is not supported. Confirm ALB log output destination ALB log output destination confirmation screen |
| ④Credential Store |
You need credential information of the role or IAM user that has the IAM policy "AmazonS3ReadOnlyAccess" and "CloudWatchReadOnlyAccess" attached.
*We do not recommend using Access key/Secret key.
To use Access key/Secret key: To use different credential information from Web ACL Config, uncheck the “Reuse Web ACL Credential Store” checkbox and select an item from the dropdown menu, or click the Add button to add new credential information.
Note |
By registering the above settings correctly, you can use WafCharm.
Please be aware that there is some information that needs to be confirmed on the AWS Management Console.