Table of Contents
- 1. Introduction
- 2. What is Credential Store?
- 3. How to Register Credential Store
- 4. Register with AssumeRole
- 5. Register with Access Key / Secret Key
1. Introduction
We released Credential Store feature on 03/23/2023 (JST).
You can now use AssumeRole to give permissions to WafCharm in addition to the access key/secret key method we've been providing.
In this blog, we will take a look at the Credential Store feature.
*With this release, the use of an access key and secret key is no longer recommended. We recommend using AssumeRole from now on, so please consider using it if you are going to start using WafCharm.
2. What is Credential Store?
The Credential Store is a WafCharm feature to register credential information such as the ARN of the role that performs AssumeRole or access key/secret key.
Apart from the list of registered credential information, you can also see which Web ACL Config/Web Site Config is using which credential information.
3. How to Register Credential Store
You can register credential information from Credential Store, Web ACL Config, and Web Site Config page on WafCharm dashboard.
*You must prepare role ARN or access key/secret key beforehand.
1. Log in to WafCharm dashboard
2. Click "AWS" at the top of the screen and click "Credential Store"

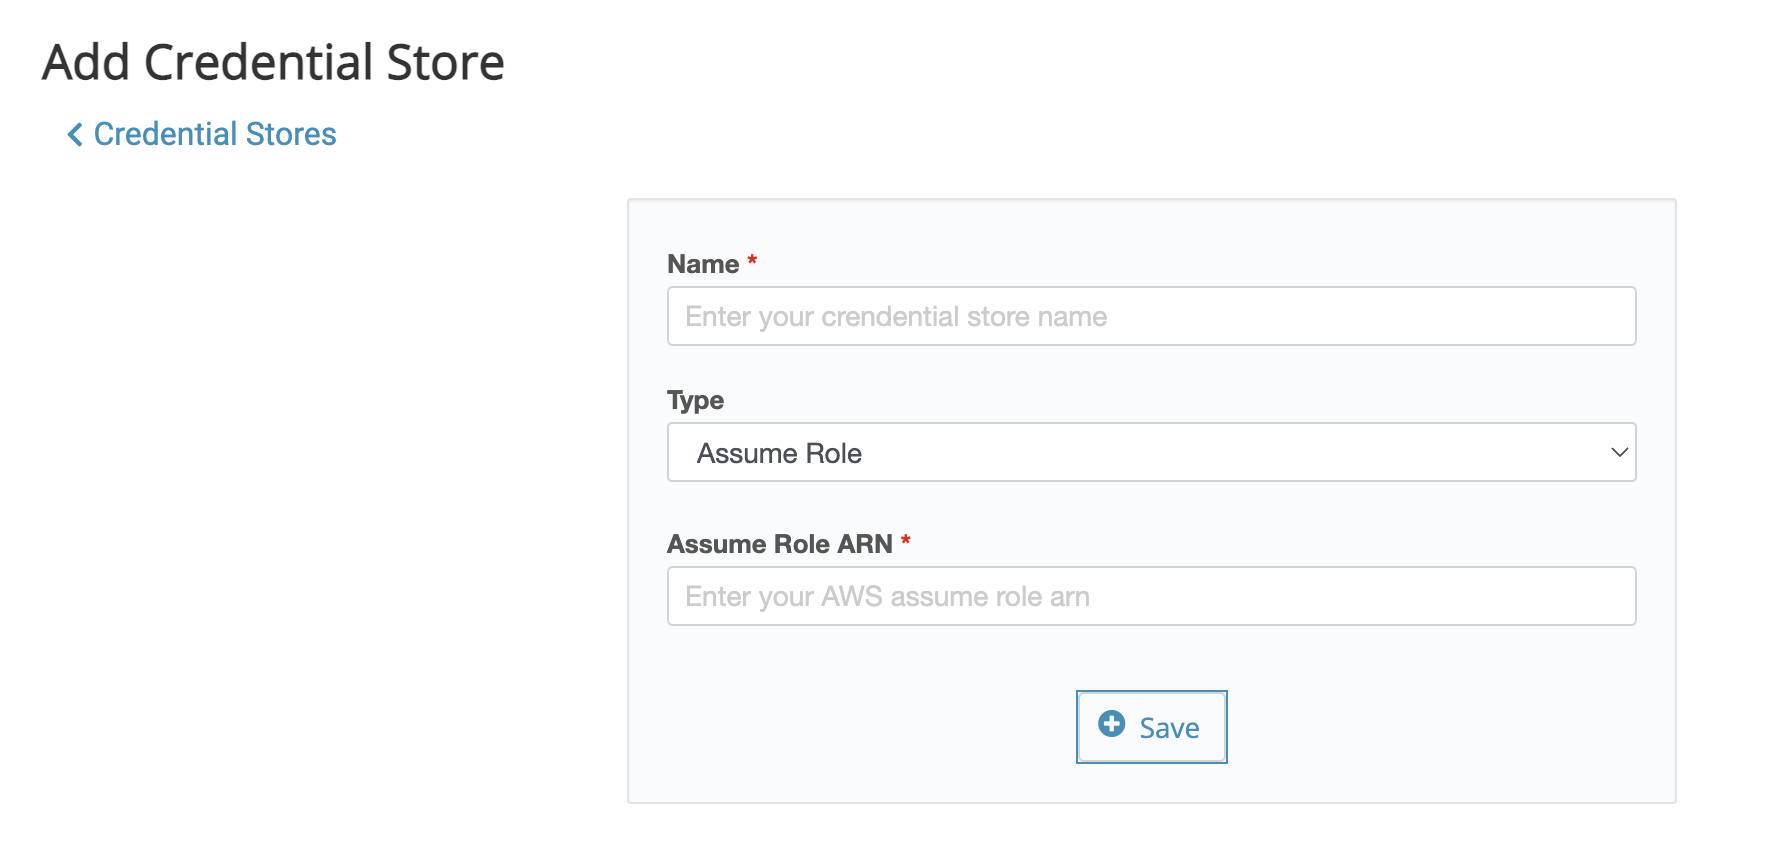
3. Click "Add" in the upper left corner

4. An input screen will be displayed, so enter the required information and click the "Save" button
We’ll explain how to register with AssumeRole or access key/secret key in the following sections.
4. Register with AssumeRole
The procedure for using AssumeRole is as below.
For detailed information on how to create AssumeRole on AWS Management Console, please refer to the blog post below.
About AssumeRole configuration and IAM policy
*The blog post above is based on creating a new Web ACL Config, but the overall steps are the same.
1. Create a role in the AWS Management Console
2. Register the ARN of the created role in WafCharm dashboard
Below is the information to enter in the dashboard.
- Name: enter the name of the credential information (for management purposes)
- Type: select Assume Role
- Assume Role ARN: paste the ARN of the created role
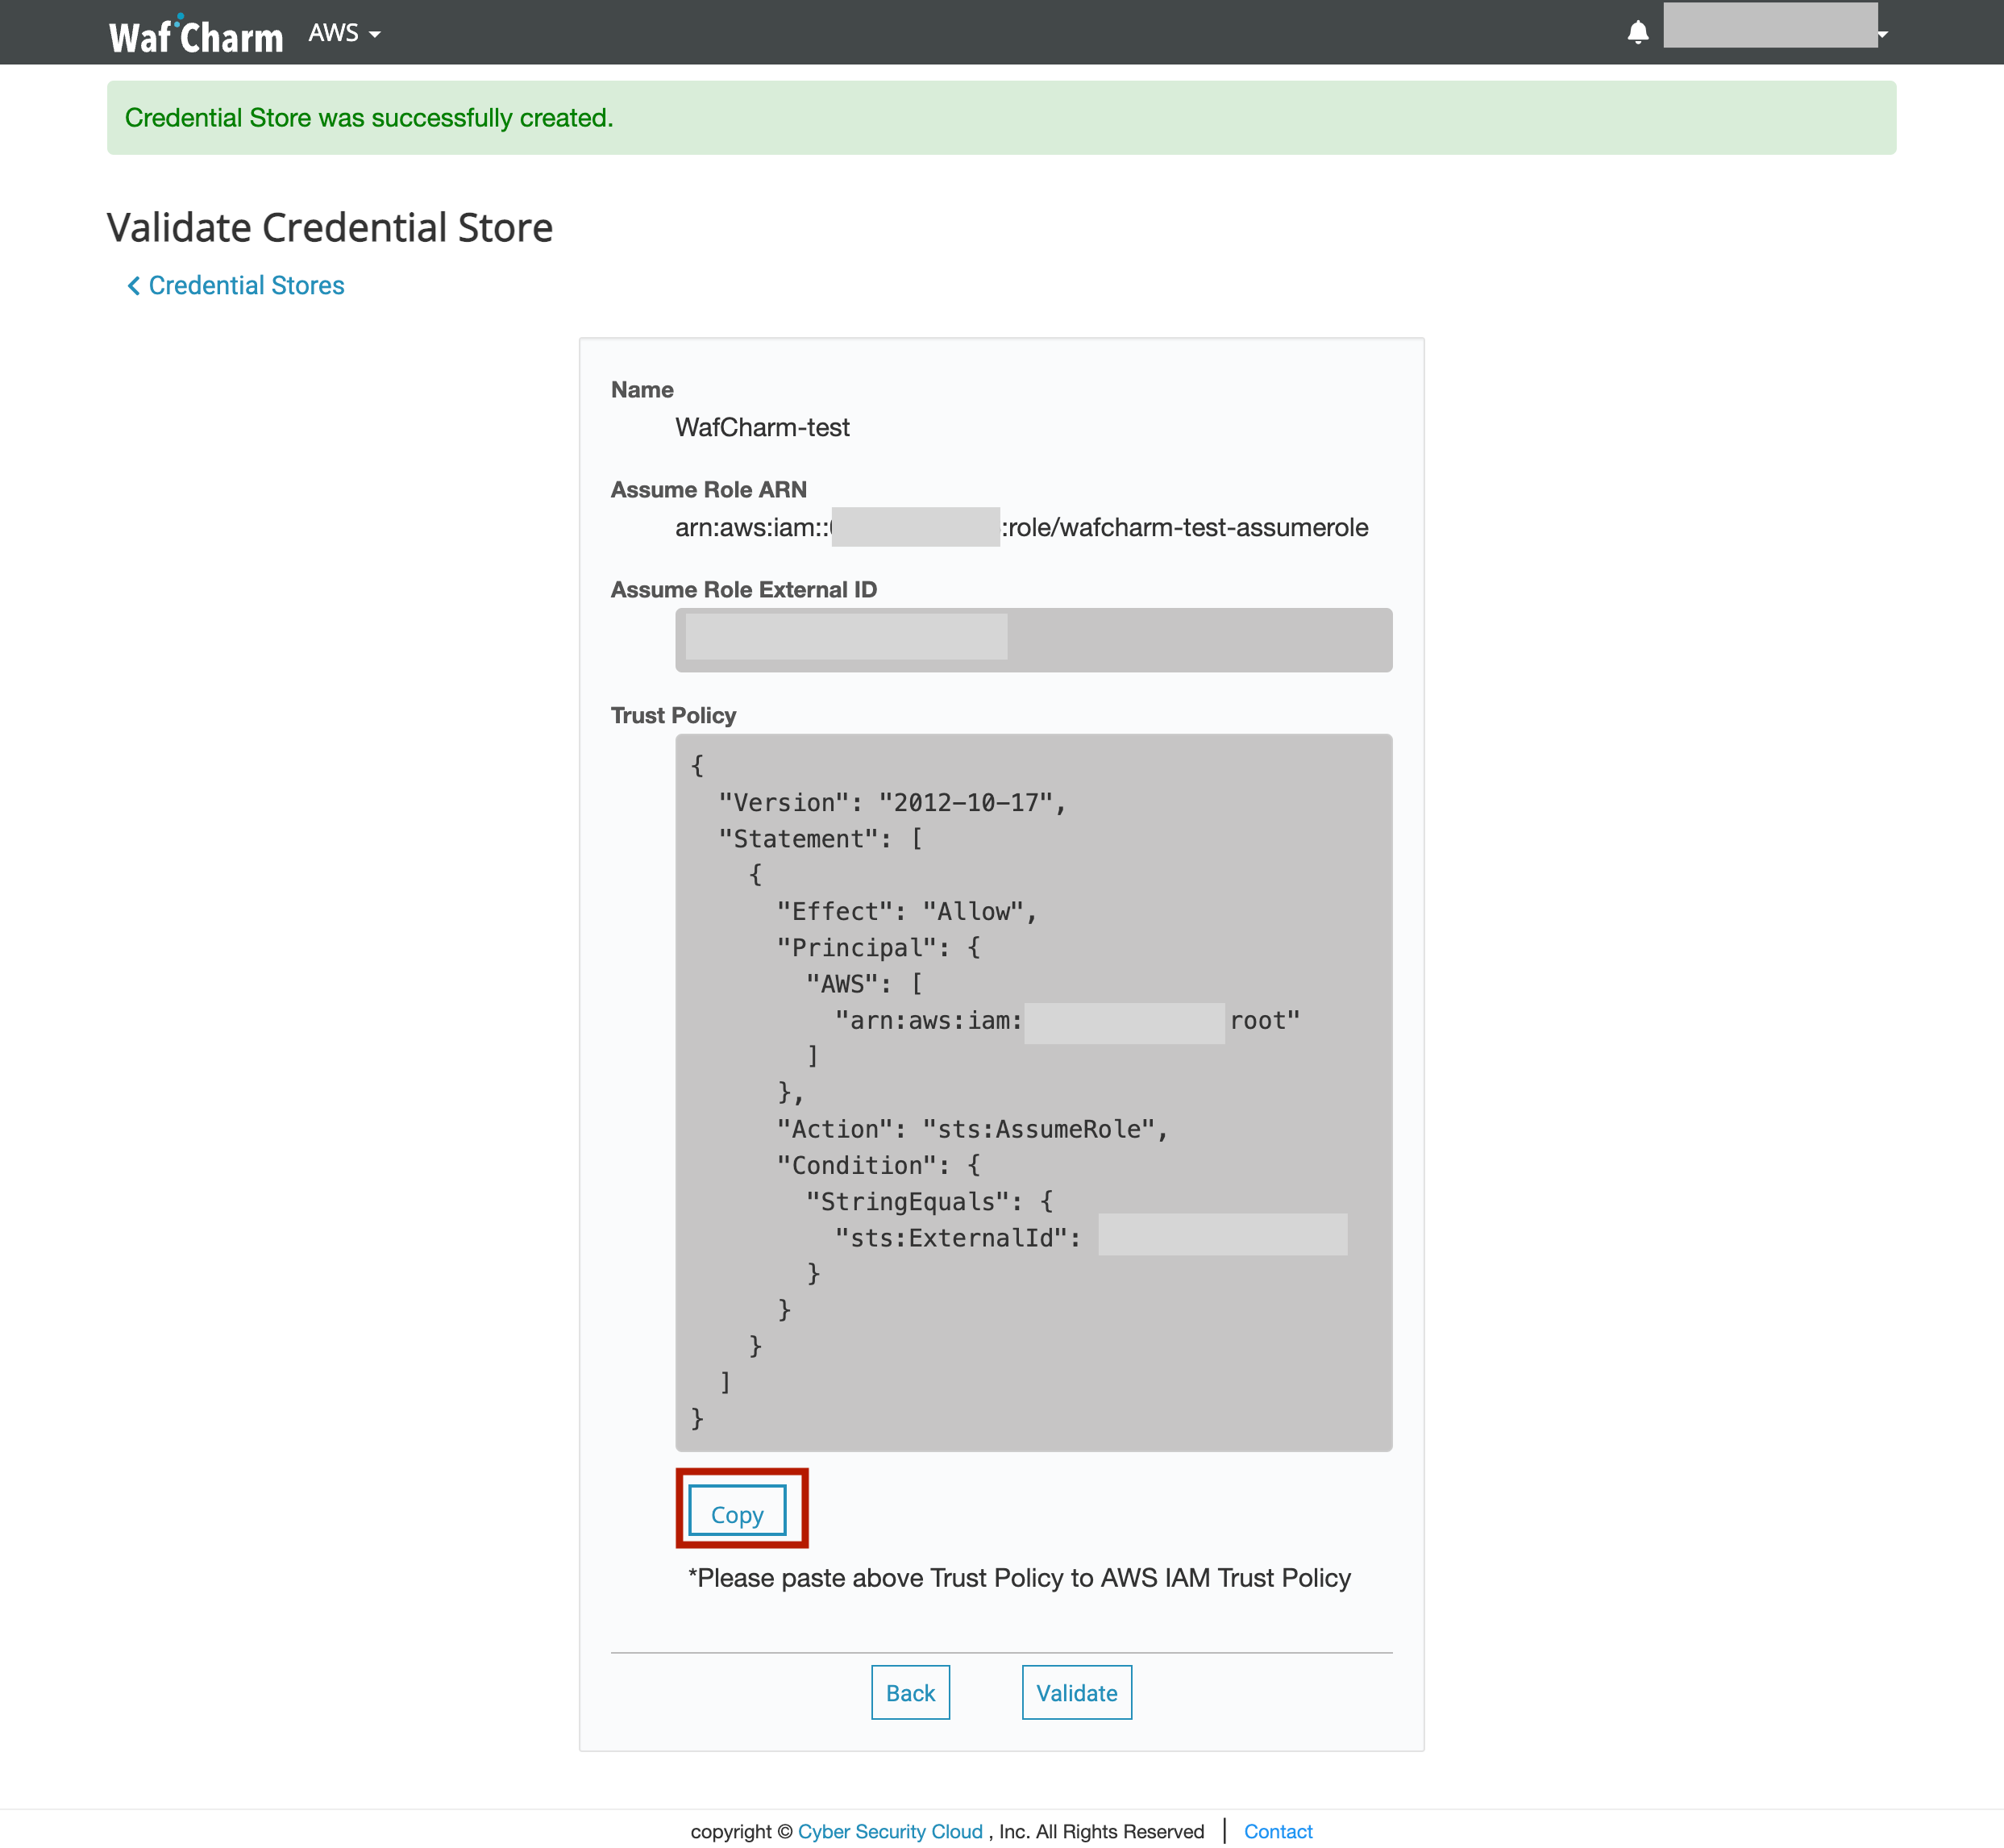
3. Copy the Trust Policy issued in WafCharm dashboard and update the trust policy of the relevant role in the AWS Management Console
You can copy the JSON format Trust Policy provided by WafCharm by clicking on the Copy button.
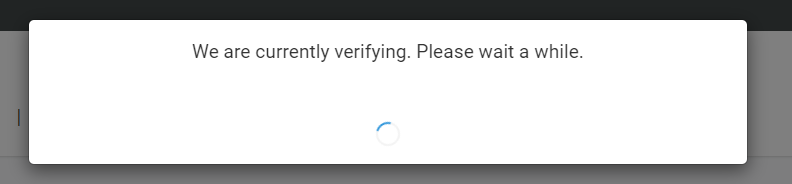
4. Validate on WafCharm dashboard
After updating the trust policy on AWS Management Console, verify the credentials on WafCharm dashboard.
The validation will fail if the trust policy in the AWS management console is not updated and WafCharm will not be able to apply the rules.
Please note that depending on the time it takes to reflect changes in the AWS management console, validation may fail even if you have updated the trust policy in AWS. In such a case, please wait for a little and then try validating again.
You will be taken back to the Credential Store page when you fail validation. If you want to revalidate your credential information, click the Validate button on the detail page of your Credential Store record.
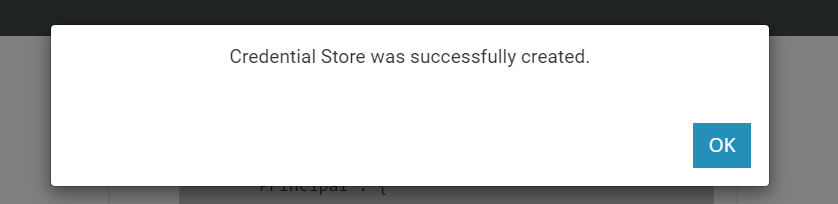
5. Click "OK" to return to the Credential Store page.
If the name of the added credential information is displayed and the State is "Validated," the configuration is successful. The authentication can be performed by selecting the registered credential (in this case, "WafCharm-test" in the screenshot) when setting up Web ACL Config and Web Site Config.

5. Register with Access Key / Secret Key
The procedure for using the access key/secret key is as below.
The blog post WafCharm Access Key / Secret Key Setup Manual explains how to obtain the keys on AWS Management Console in detail.
1. Create an IAM user on AWS Management Console.
2. Obtain the access key and secret key information of the created IAM user.
3. Register the access key and secret key on WafCharm dashboard.
Below is the information to enter in the dashboard.
- Name: enter the name of the credential information (for management purposes)
- Type: select Access Key / Secret Key
- Access Key: Enter the obtained access key
- Secret Key: Enter the obtained secret key
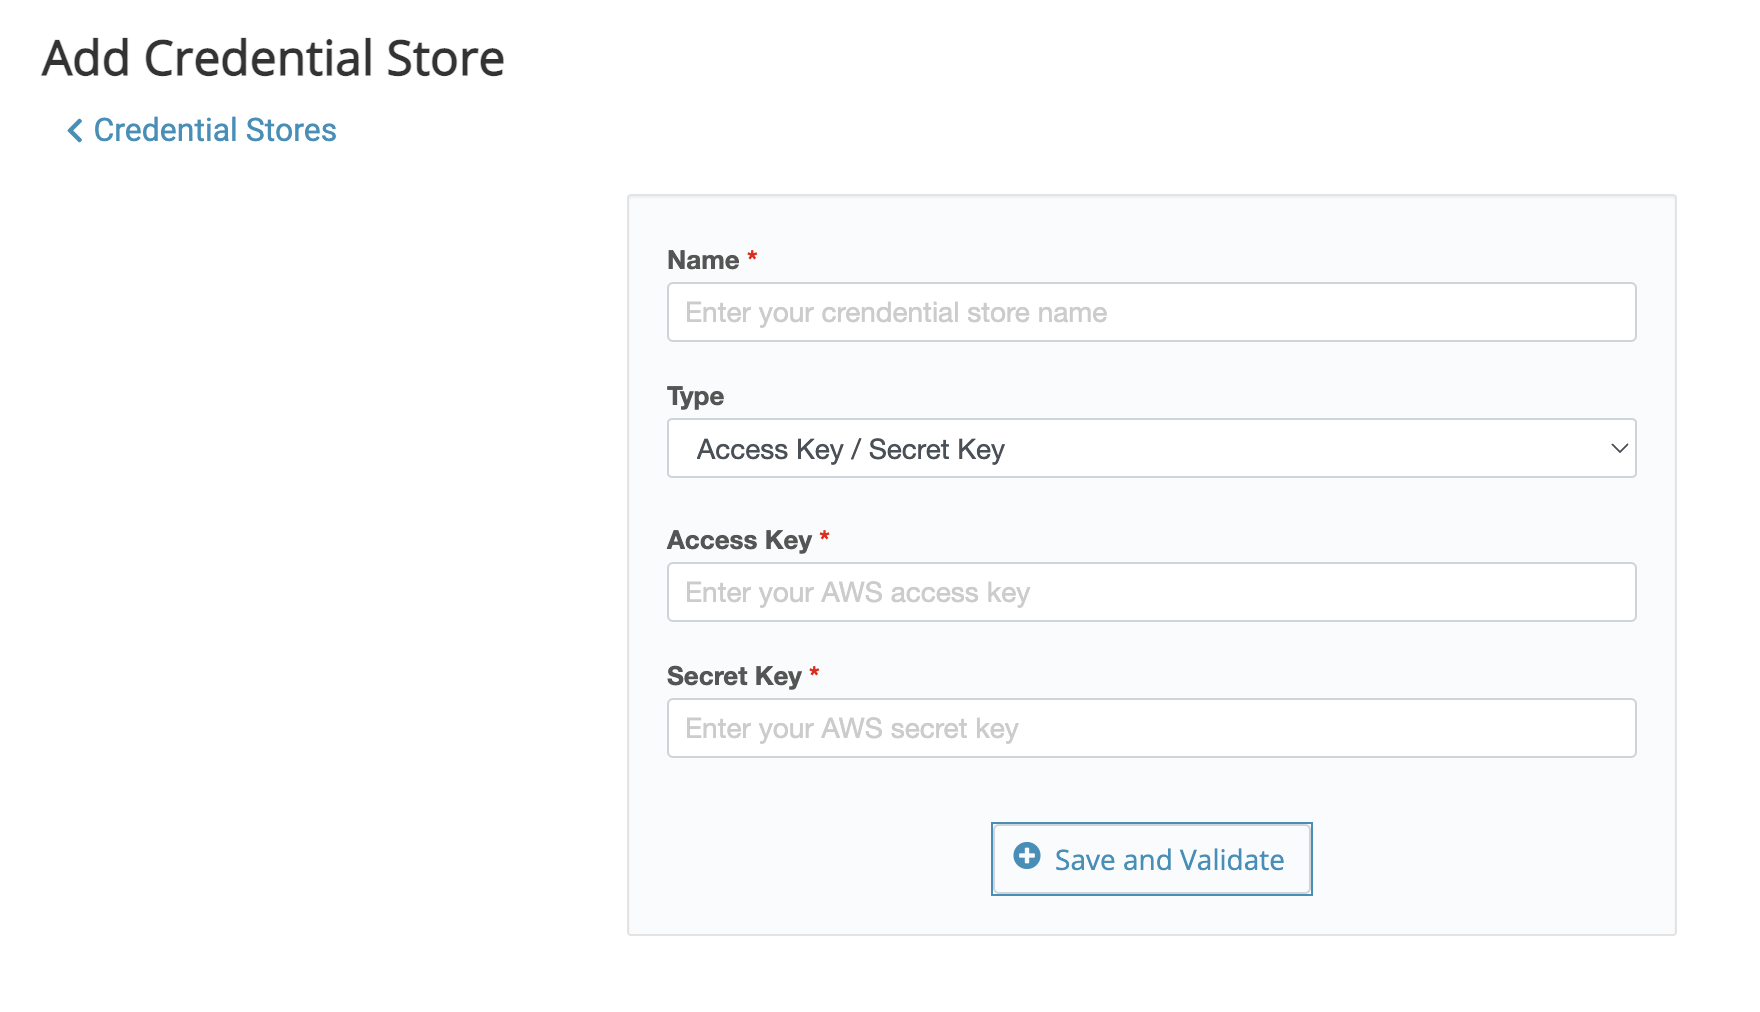
4. Click the "Save and Validate" button, and the registration will be completed if the validation is successful.
If the name of the added credential information is displayed and the term "Validated" is displayed under the State section, the setting is successful. By selecting the registered credential during Web ACL Config and Web Site Config settings, authentication can be performed.
If the validation fails, an error message will be displayed. In that case, correct the entered information and click "Save and Validate" again.
Even if the validation fails, the credential information will be saved with an error state. If a value other than "Validated" is displayed under the State section, the validation is either incomplete or there is an error.
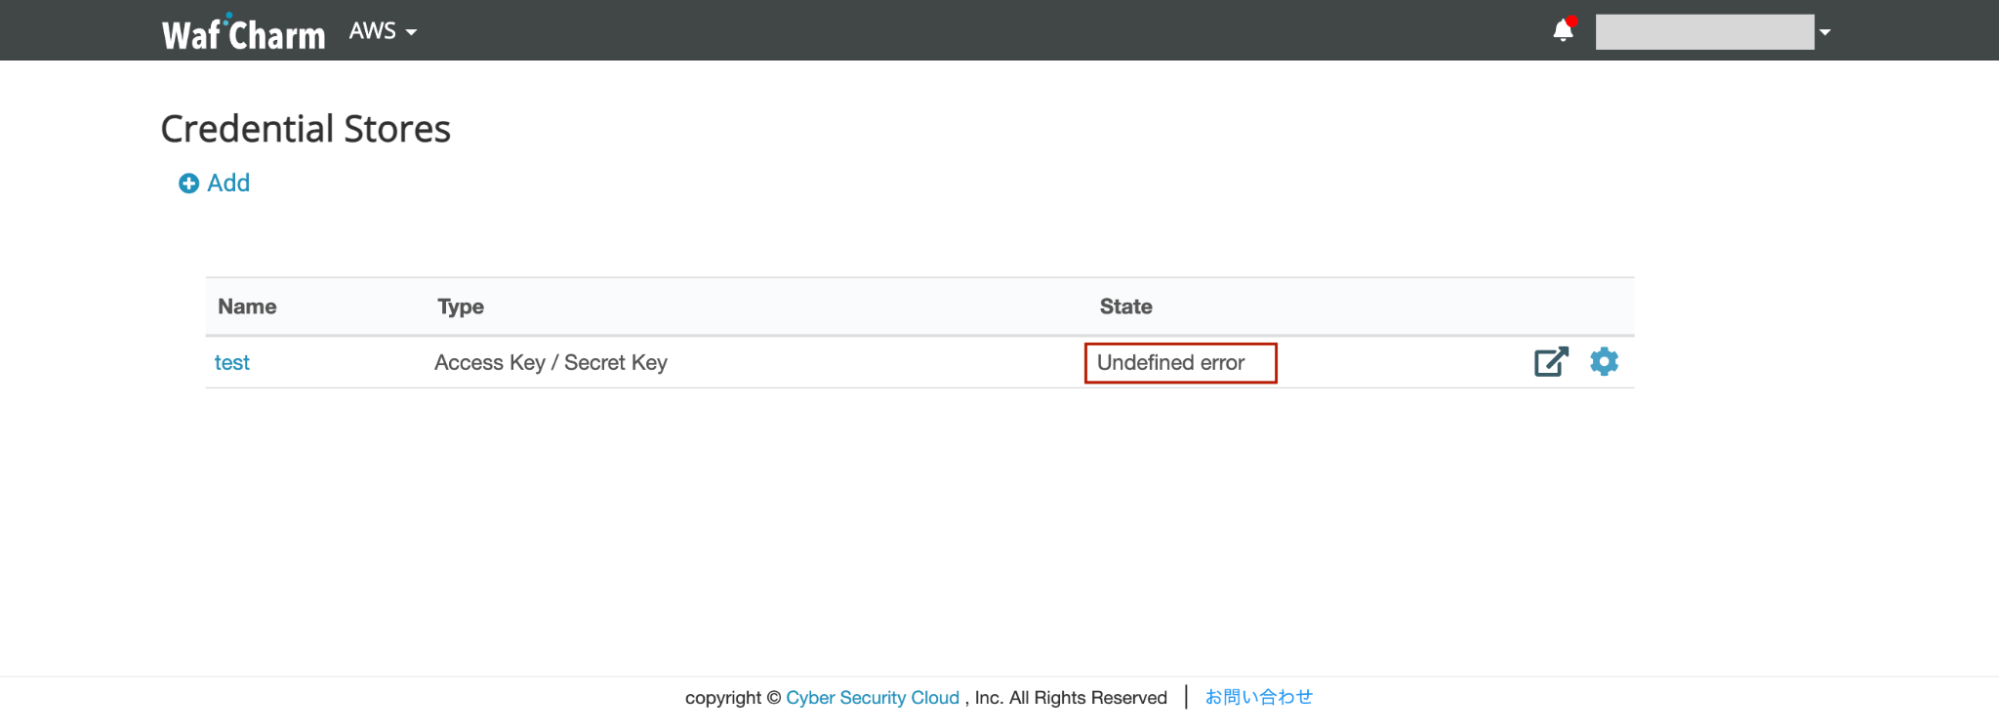
If an error occurs, click the name of the credential information to open the detail page, and then click "Edit" to adjust the information.