Updates from 06/01/2023
The content has been revised due to WafCharm update.
Updates from 03/23/2023
This post is intended for using the access key/secret key.
Please note that we recommend using AssumeRole instead of the access key/secret key.
Refer to the blog posts below for details on using AssumeRole.
- About Credential Stores
- About AssumeRole configuration and IAM policy
- How to switch to AssumeRole from access key/secret key
In this blog, we will create a new user/group for WafCharm from AWS Management Console and show how to grant the required permissions, “AWSWAFFullAccess” for WAF, “AmazonS3ReadOnlyAccess” for S3, and "CloudWatchReadOnlyAccess" for CloudWatch to the created users/groups.
1. Log in to the AWS Management Console.
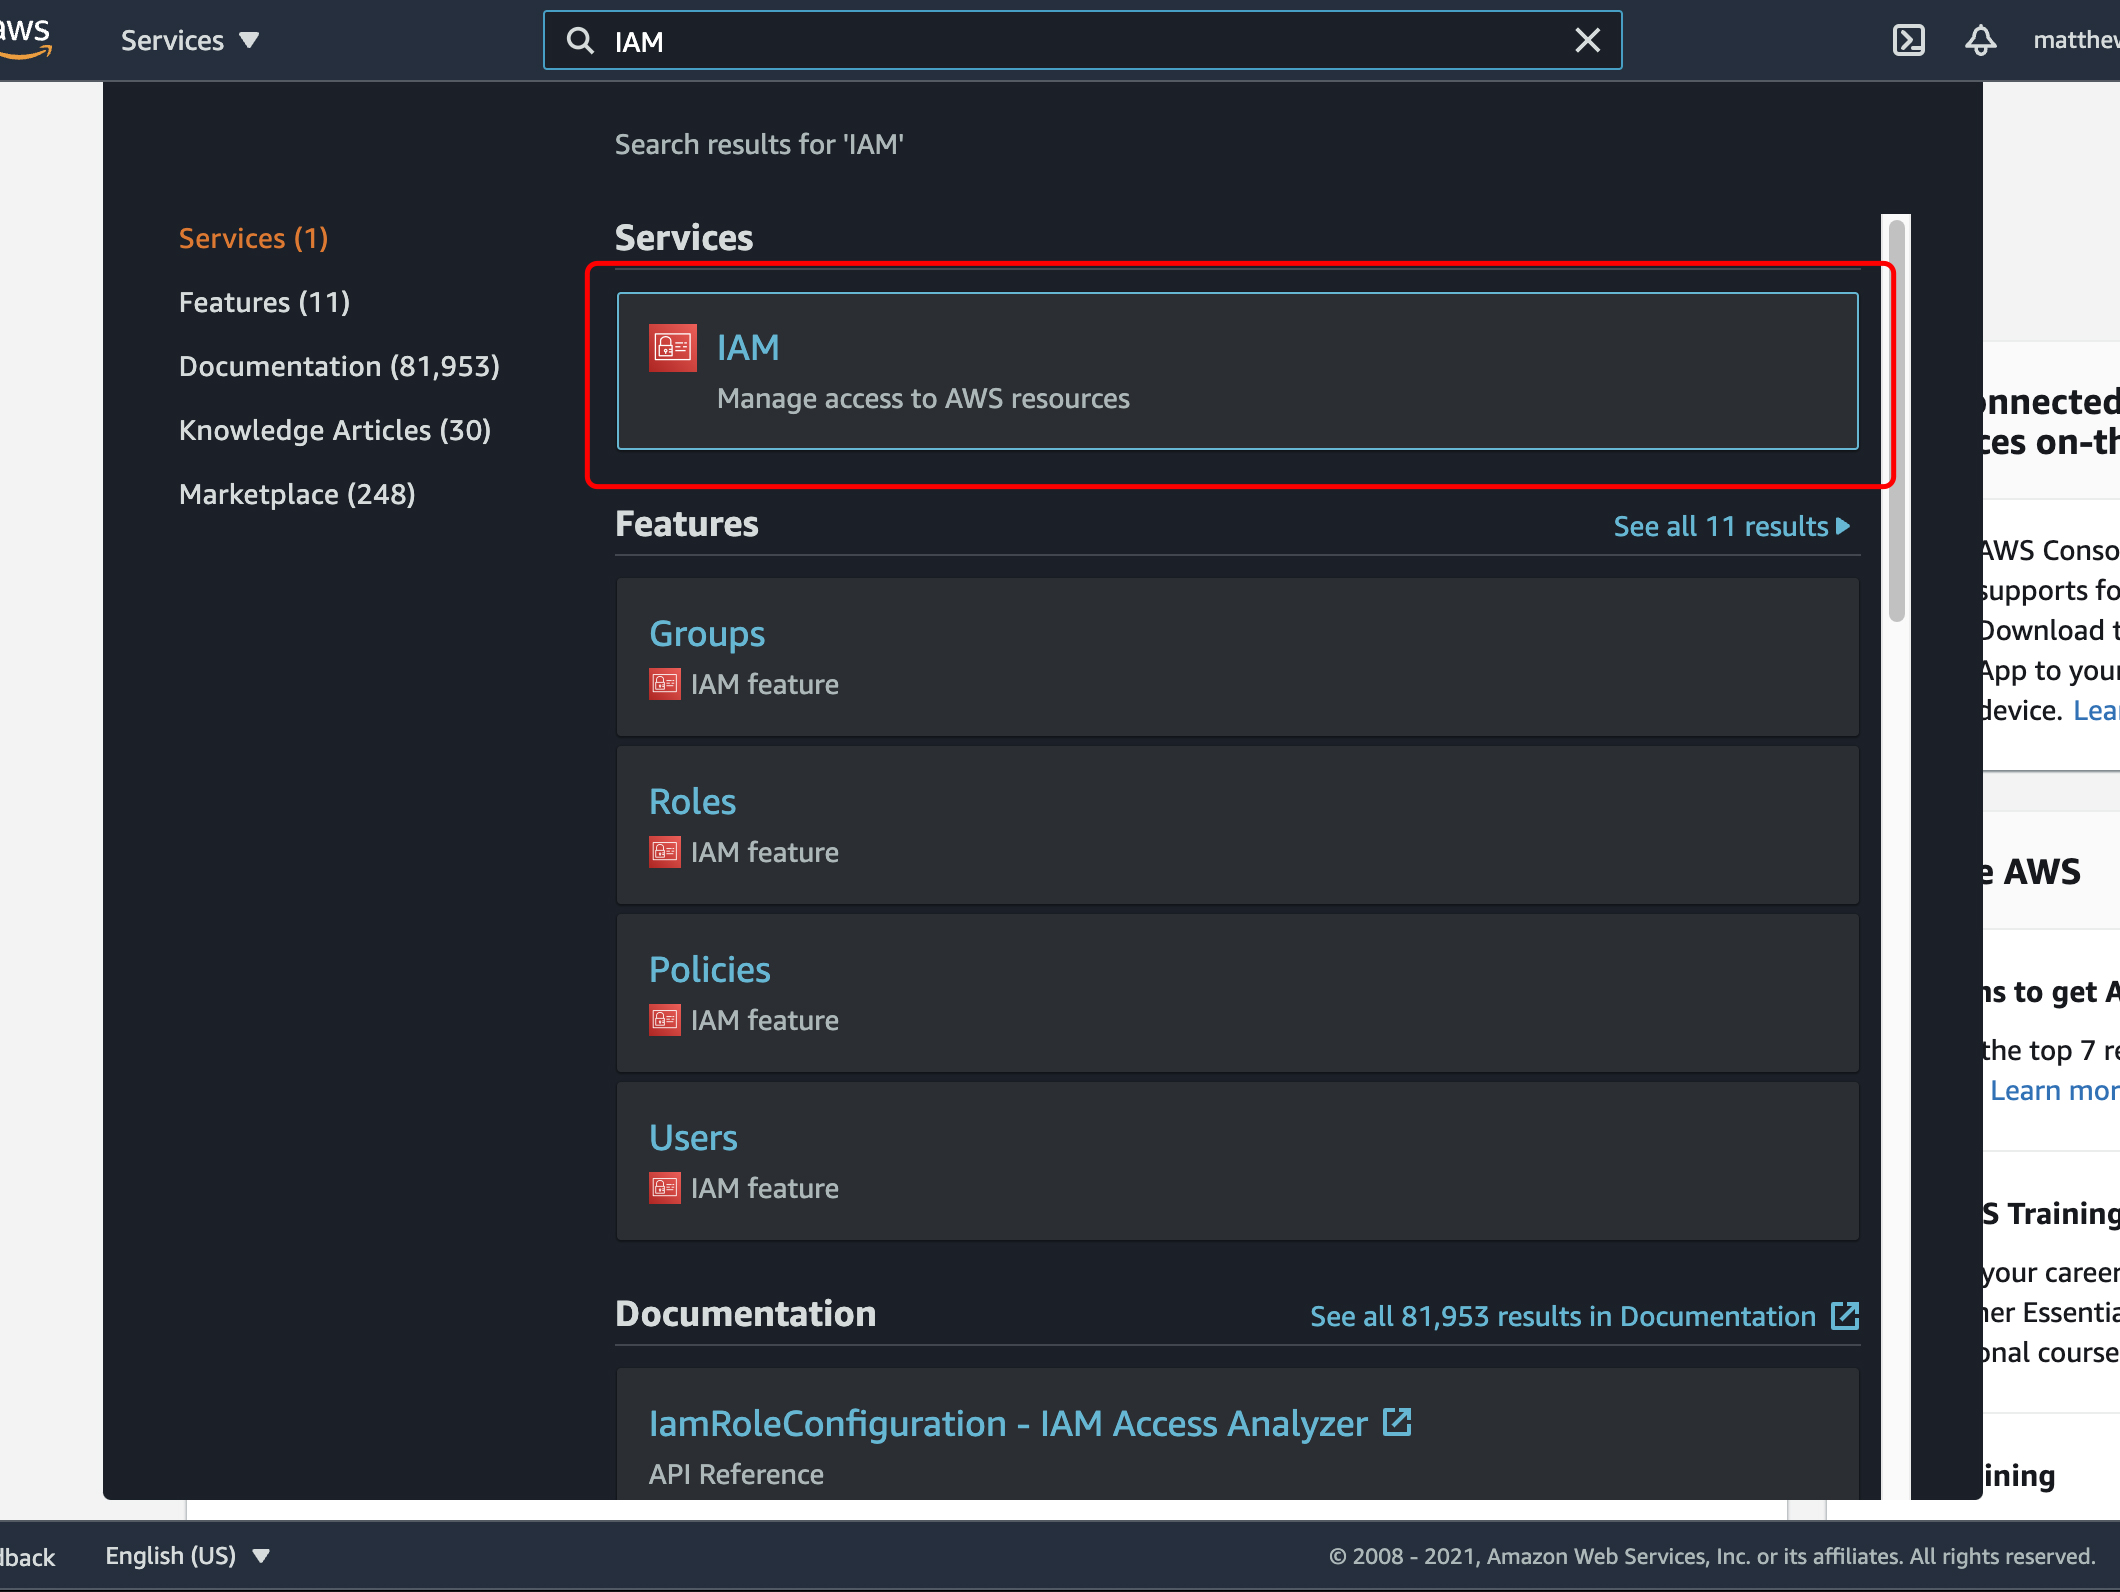
2. Go to "IAM" page.
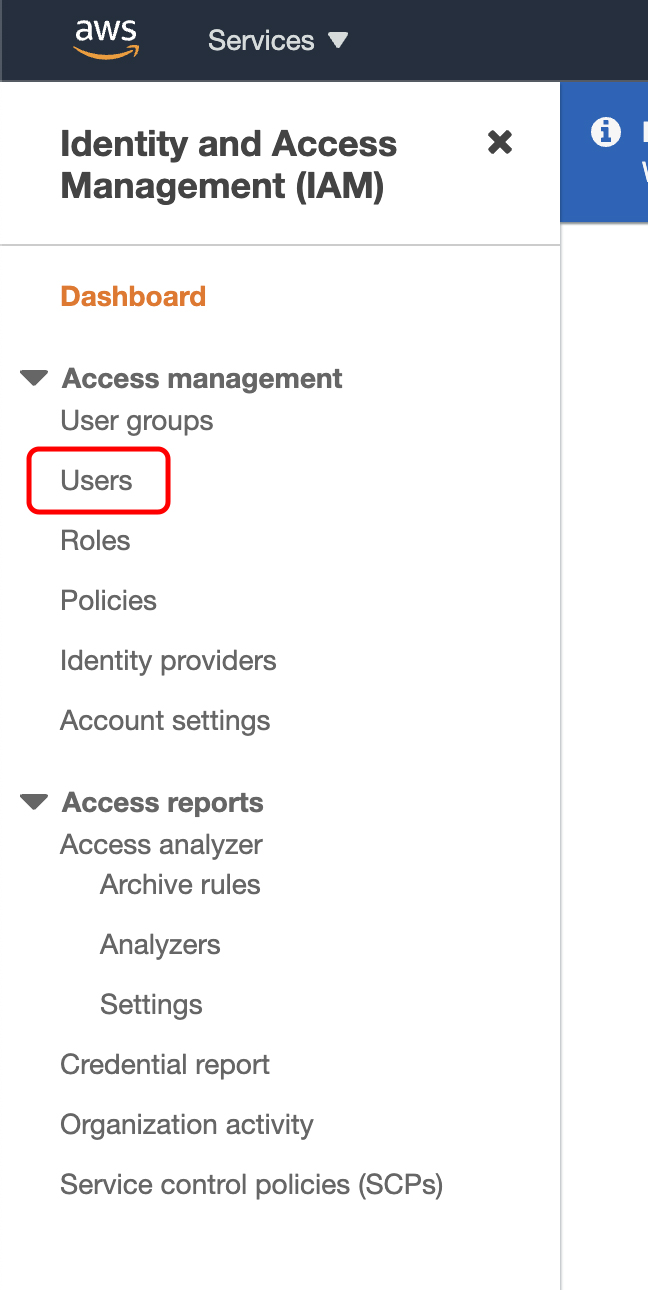
3. Select "Users" from the menu on the left.
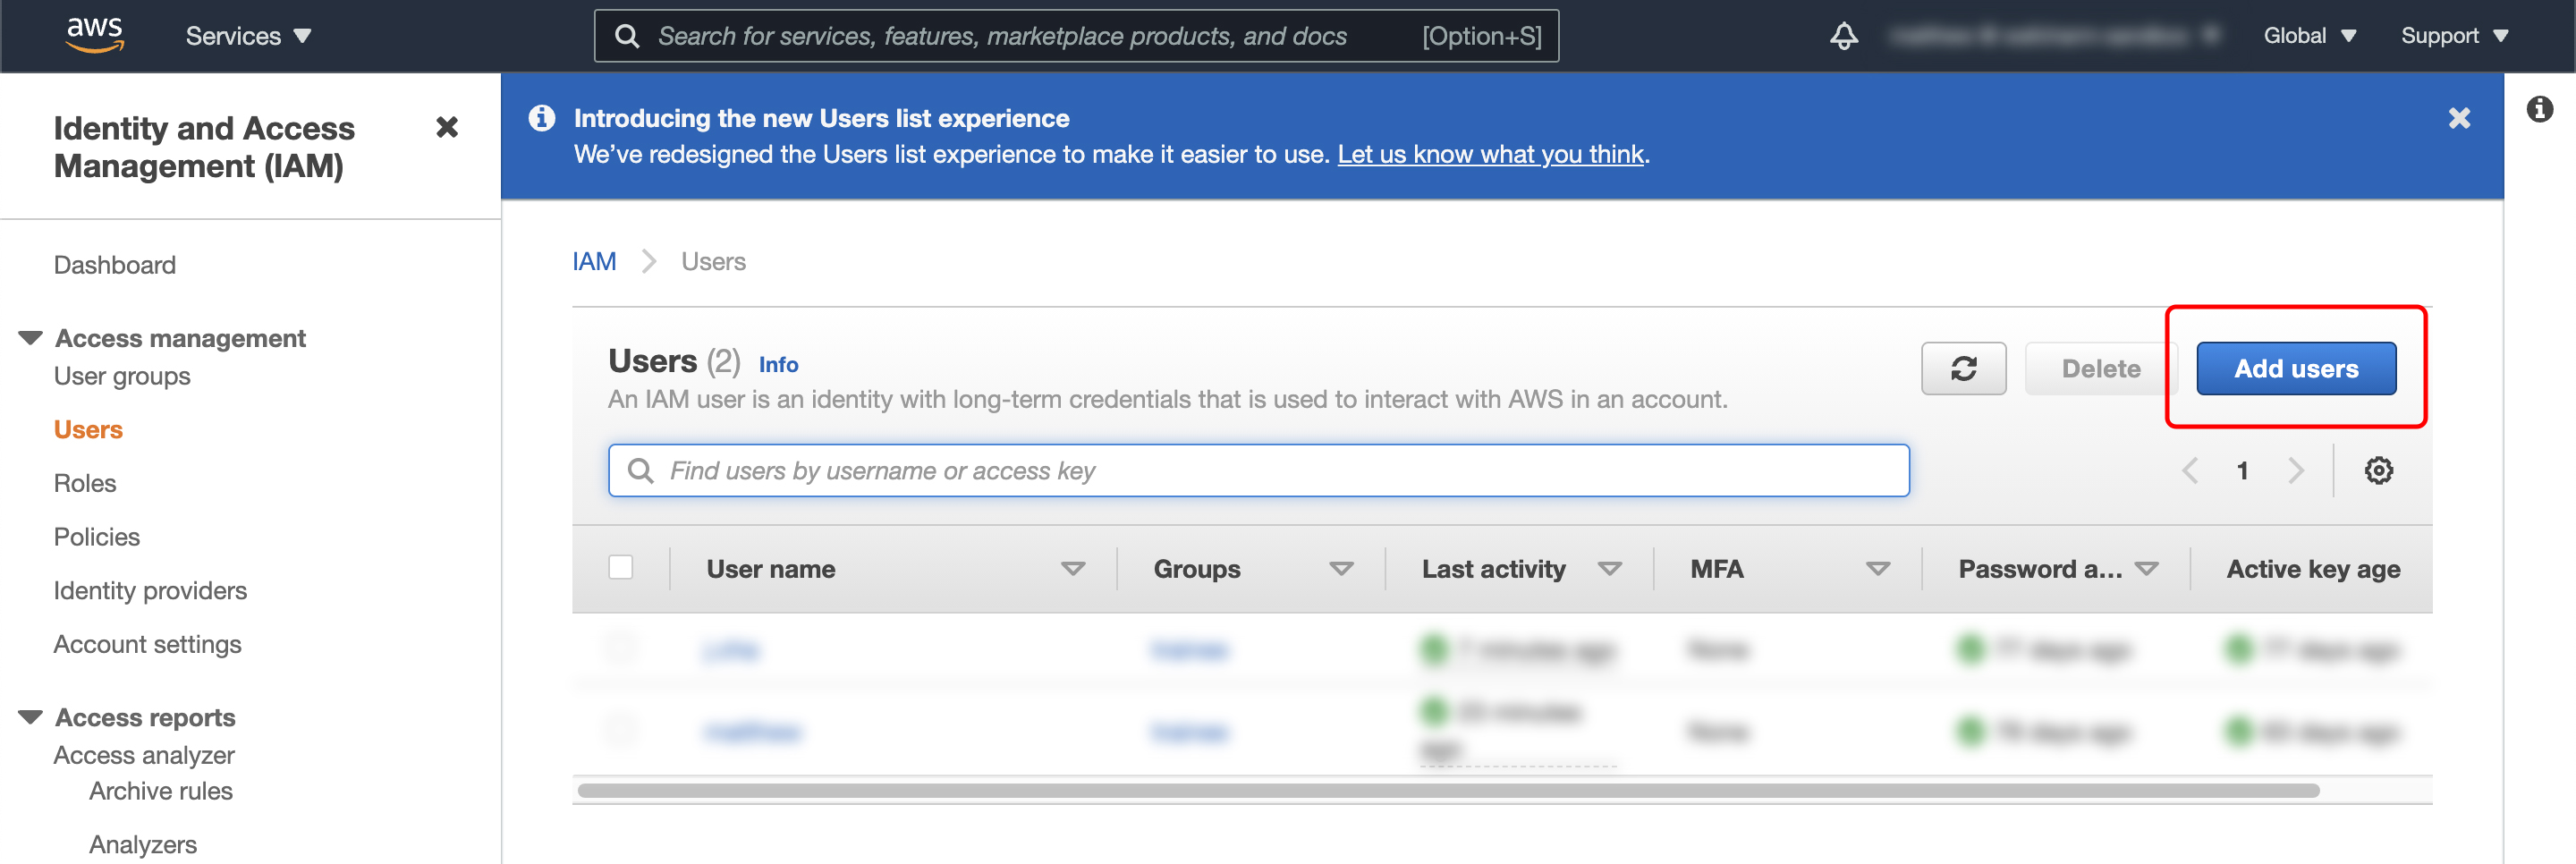
4. Click “Add User”.
5. Configure the following settings for the user.
(a) Set a user name.
(b) For Access type, select "Programmatic access"
(c) Click "Next: Permission".
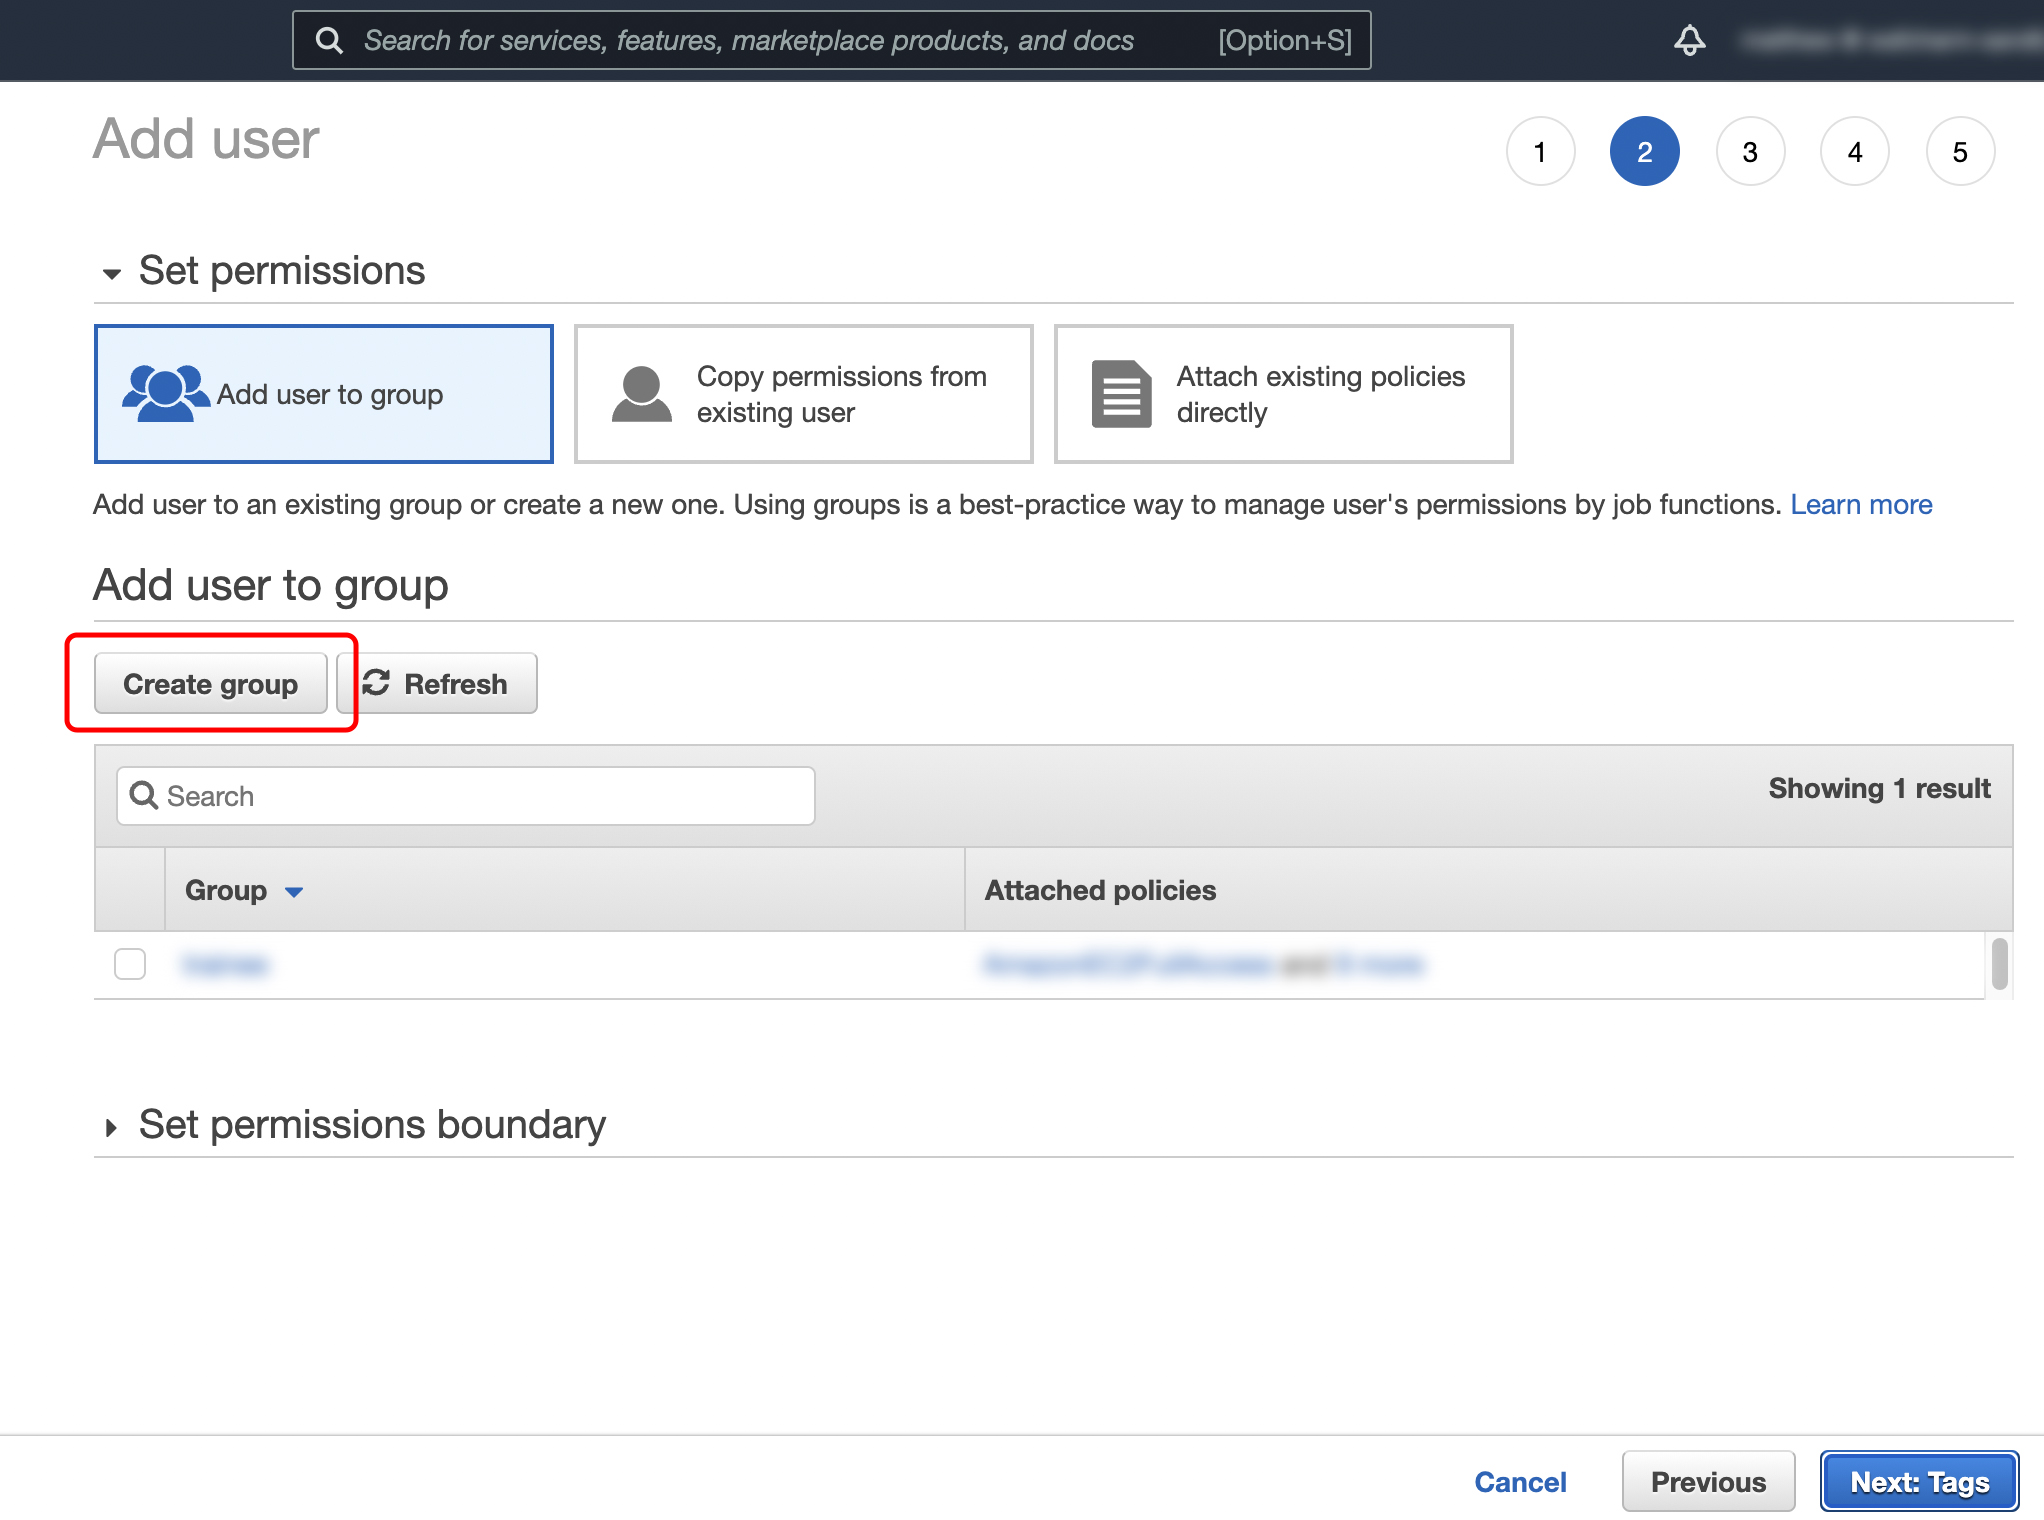
6. Next, we will set access permissions.
(a) If there is a suitable existing group, select it.
(b) If not, click "Create group".
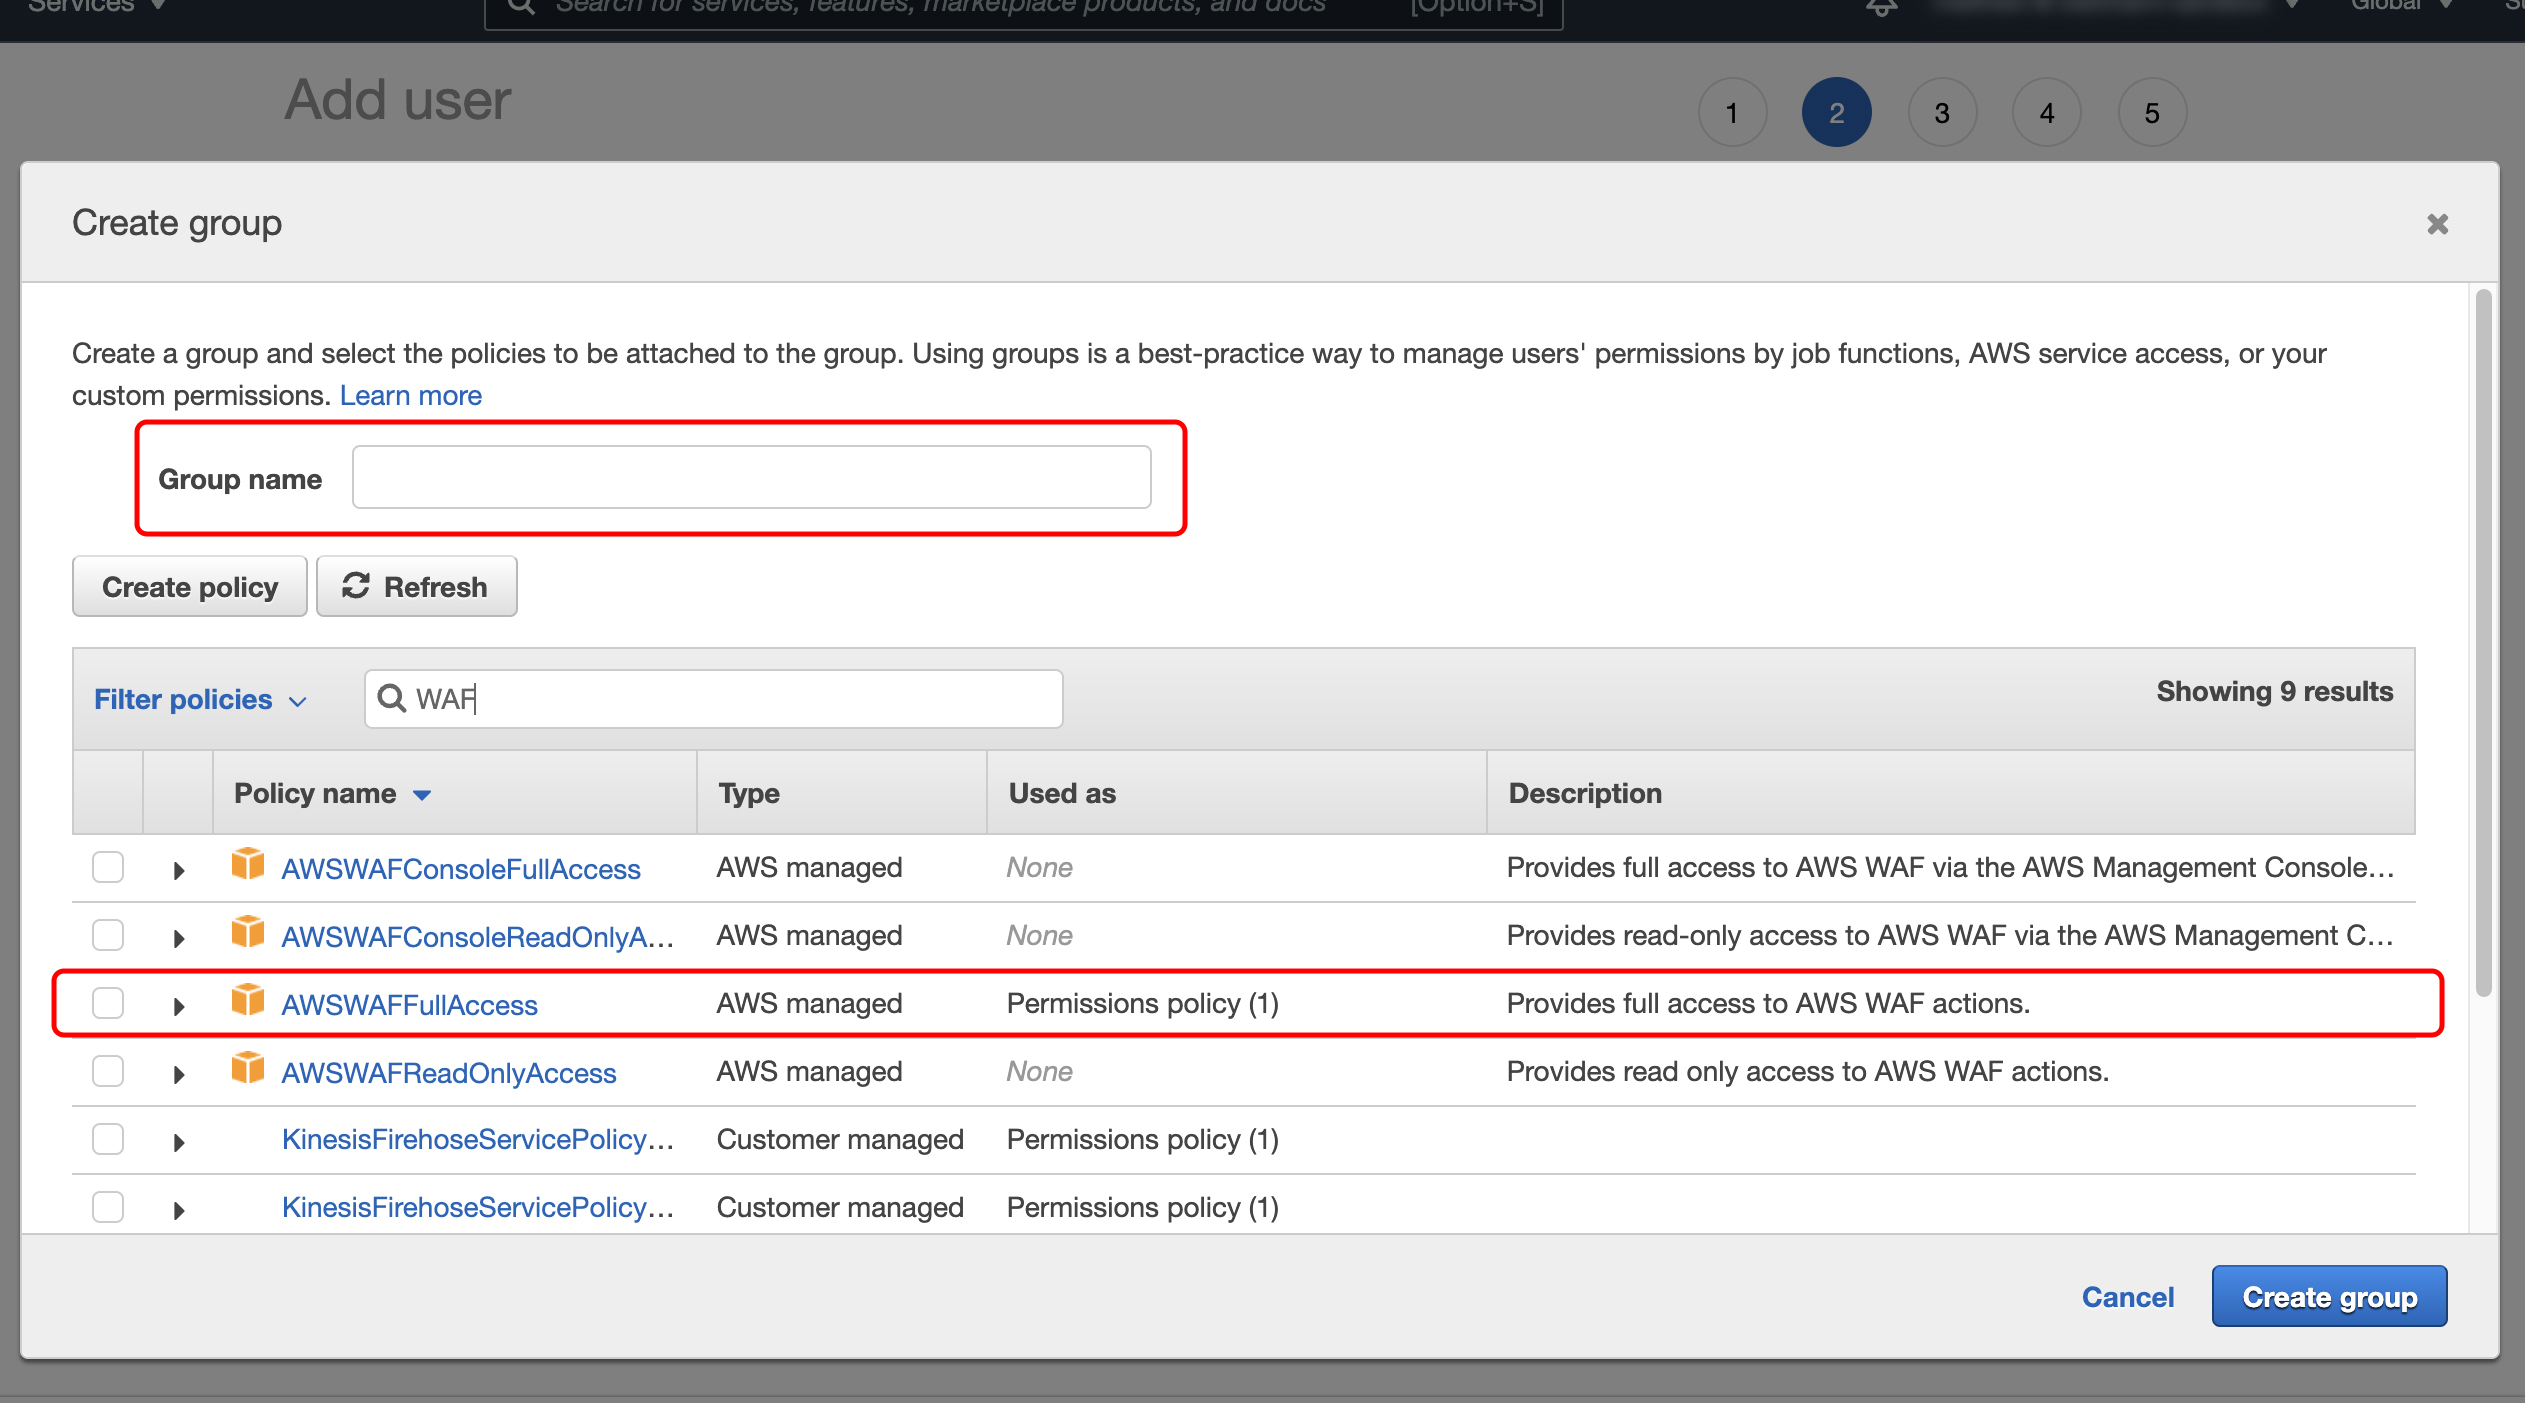
7. Perform the following steps to create a group.
(a) Set a group name.
(b) Enter "WAF" in the search filter, and select "AWSWAFFullAccess" from the policies.
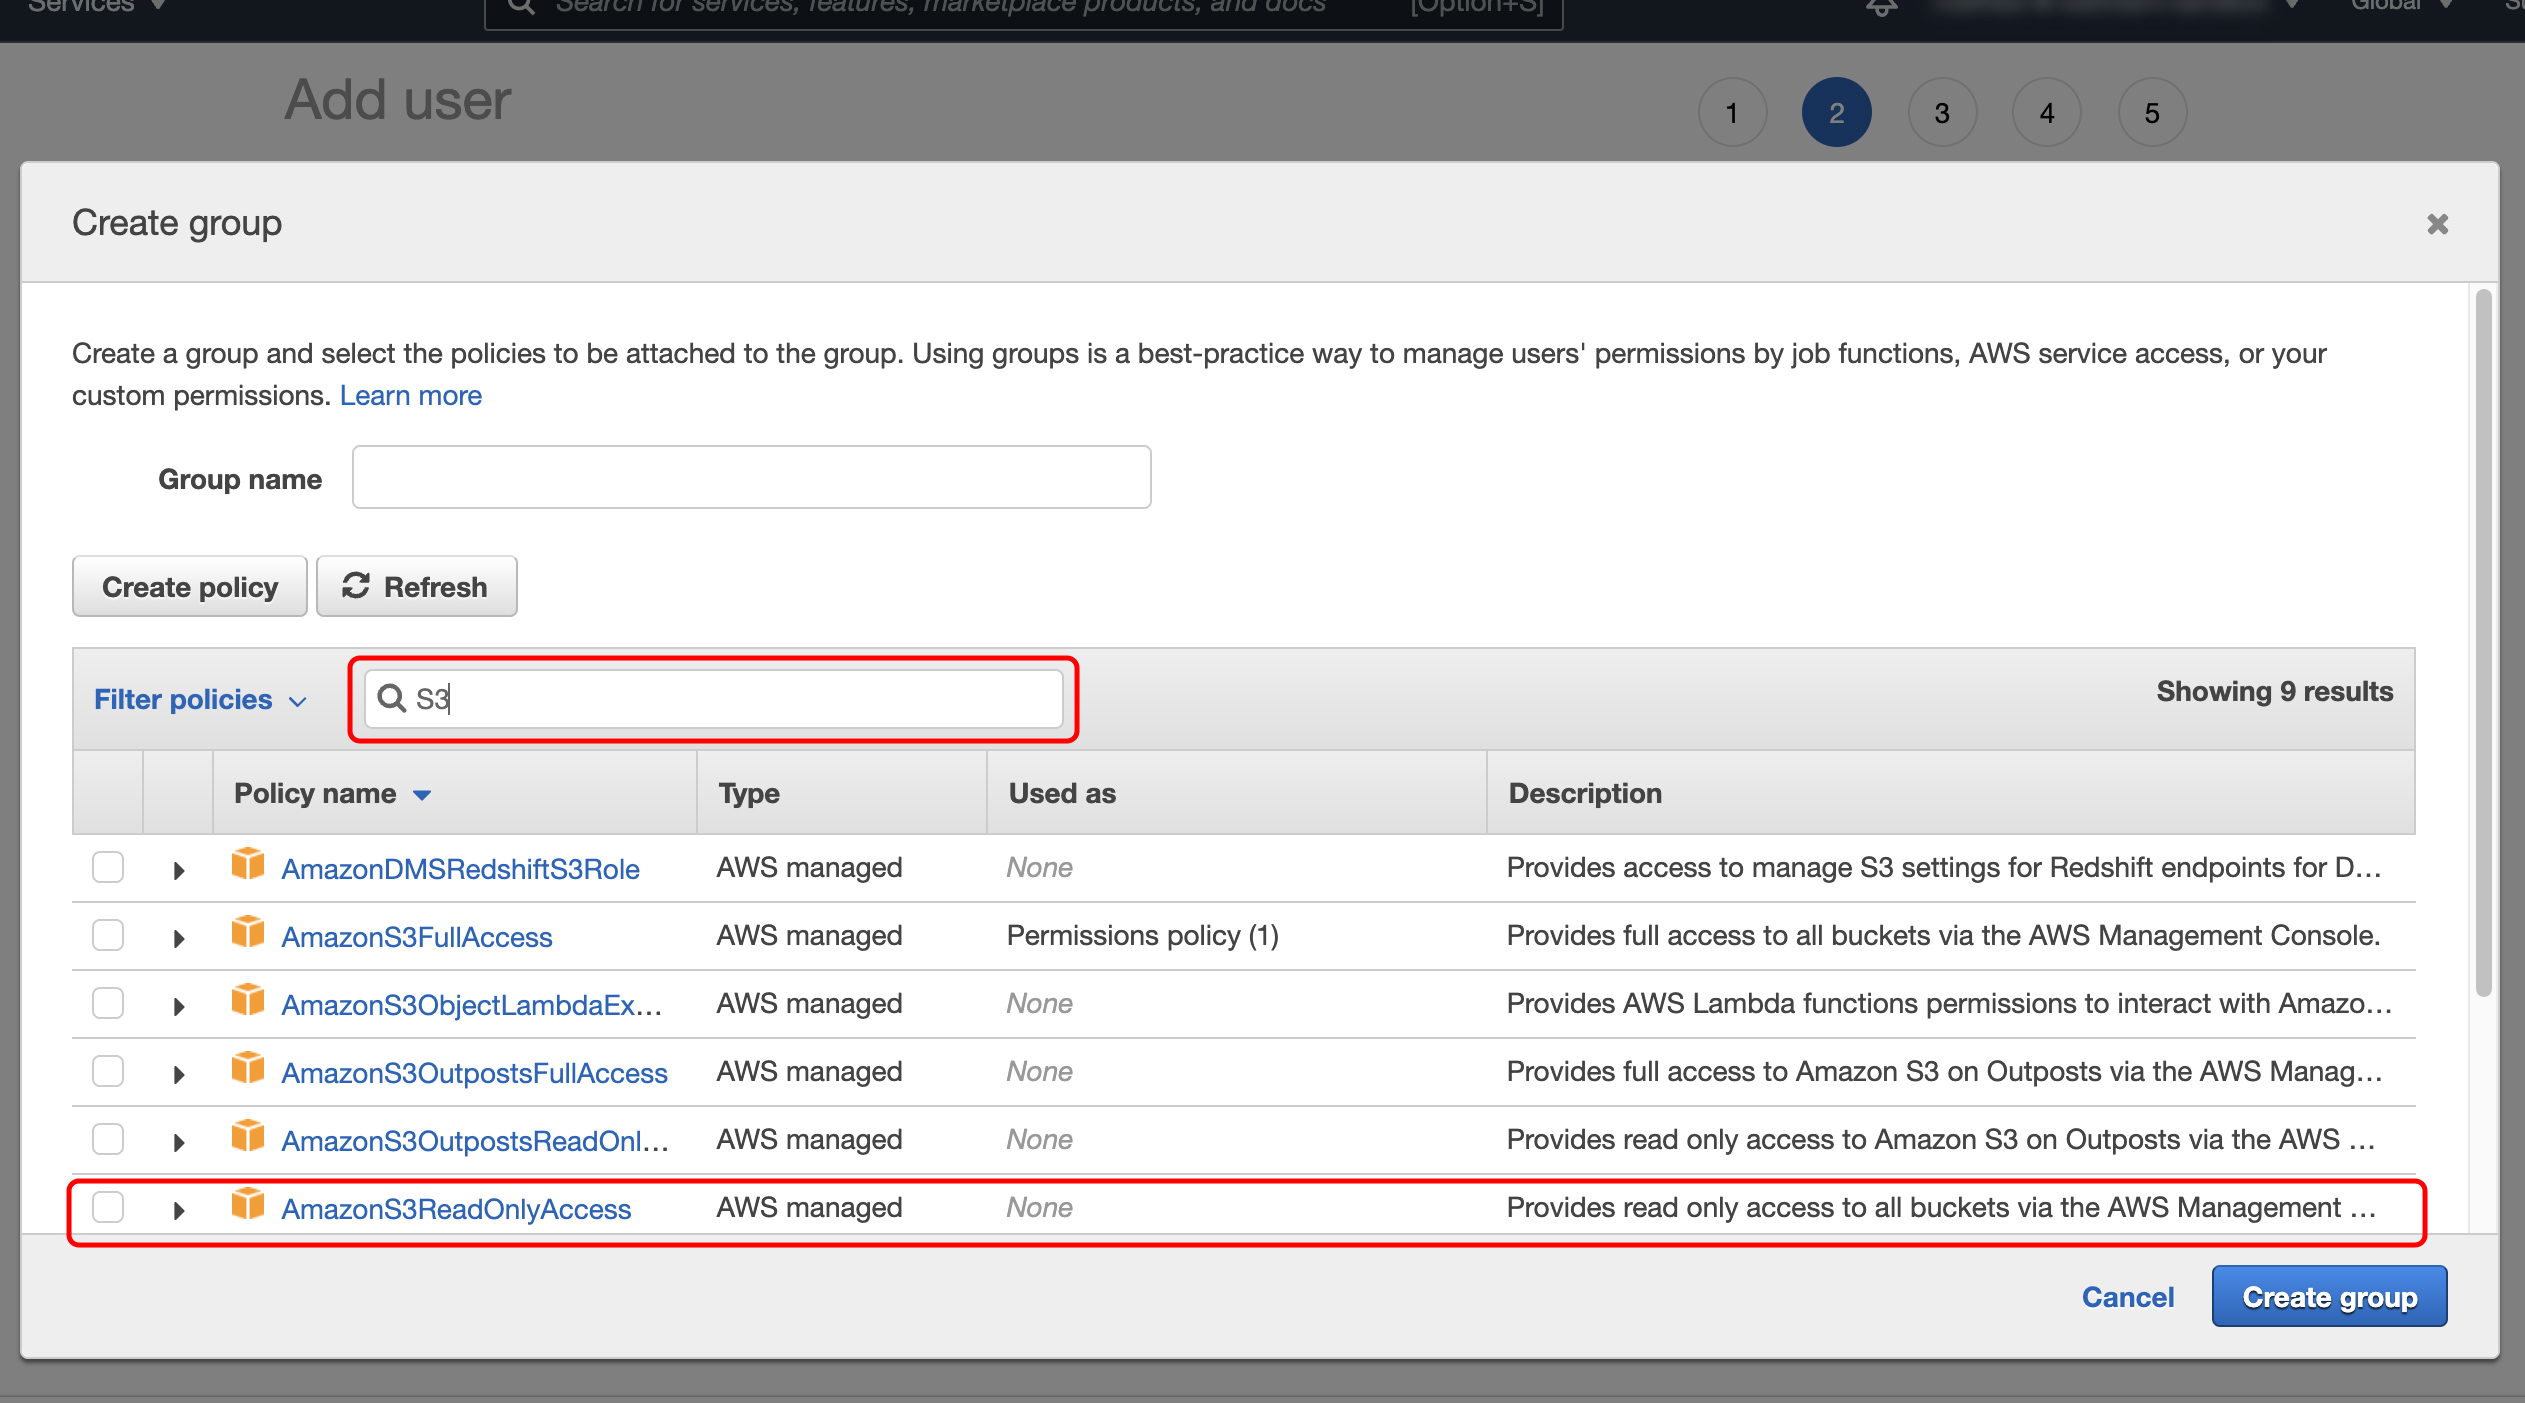
(c) Enter "S3" in the search filter, and select "S3ReadOnlyAccess" from the policies.
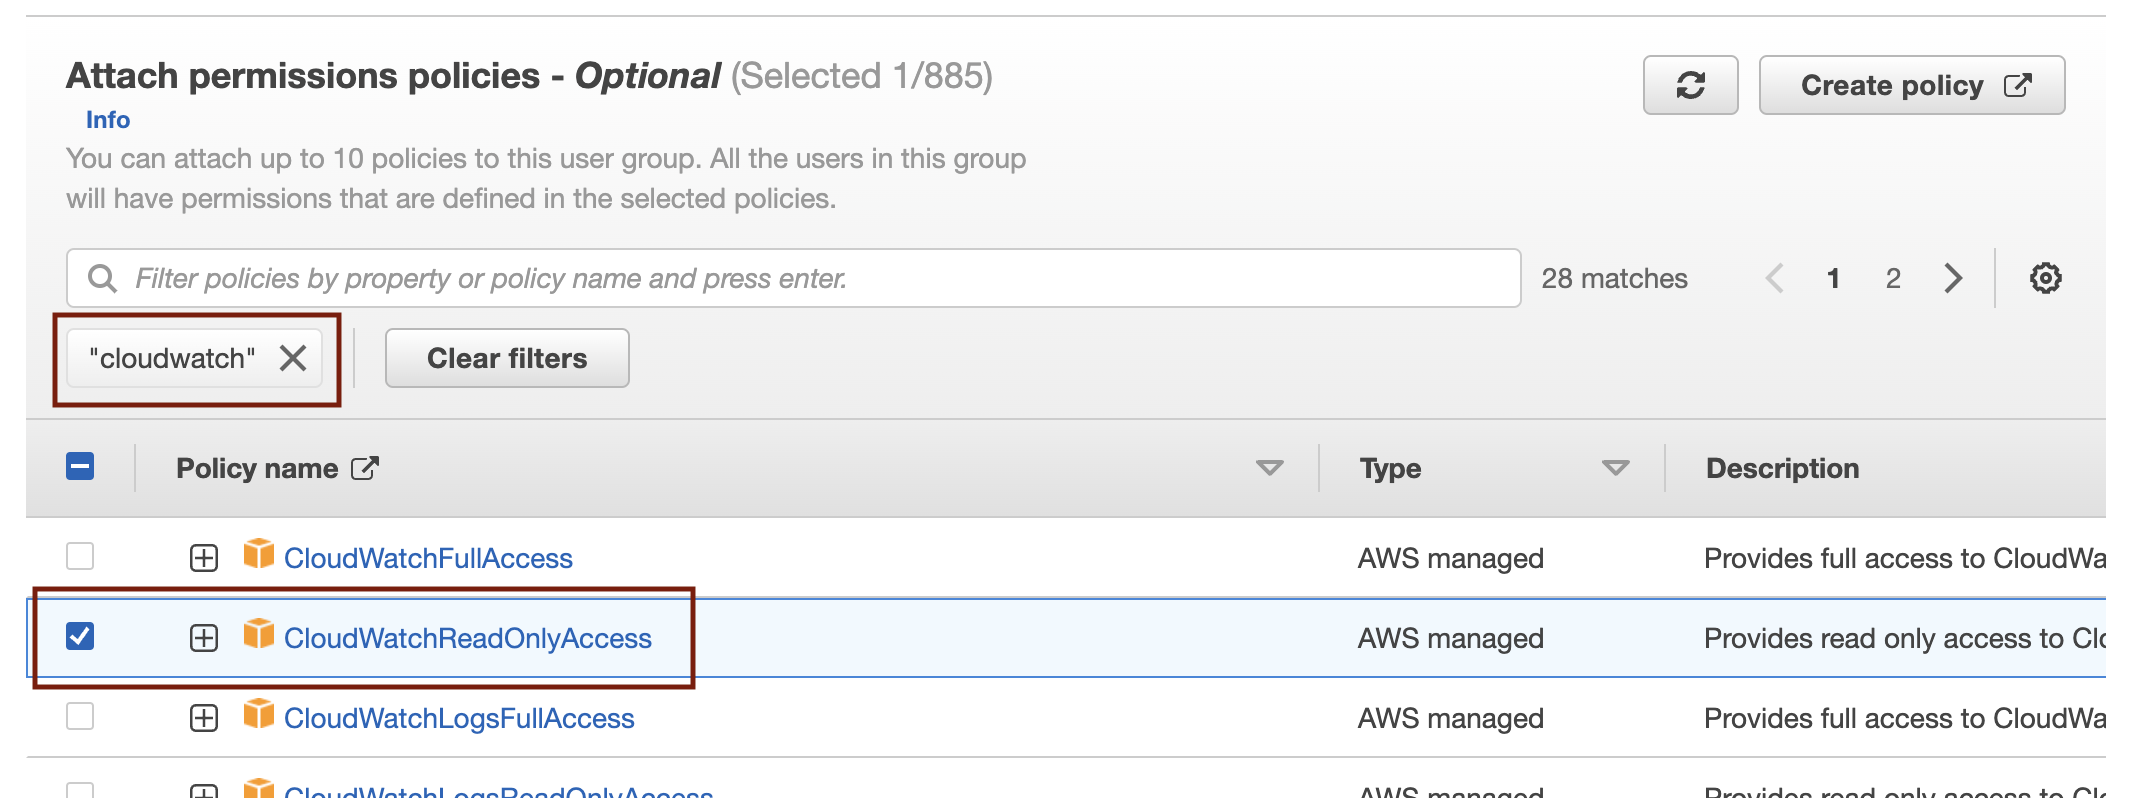
(d) Enter "CloudWatch" in the search filter, and select "CloudWatchReadOnlyAccess" from the policies.
(e) Click "Create group".
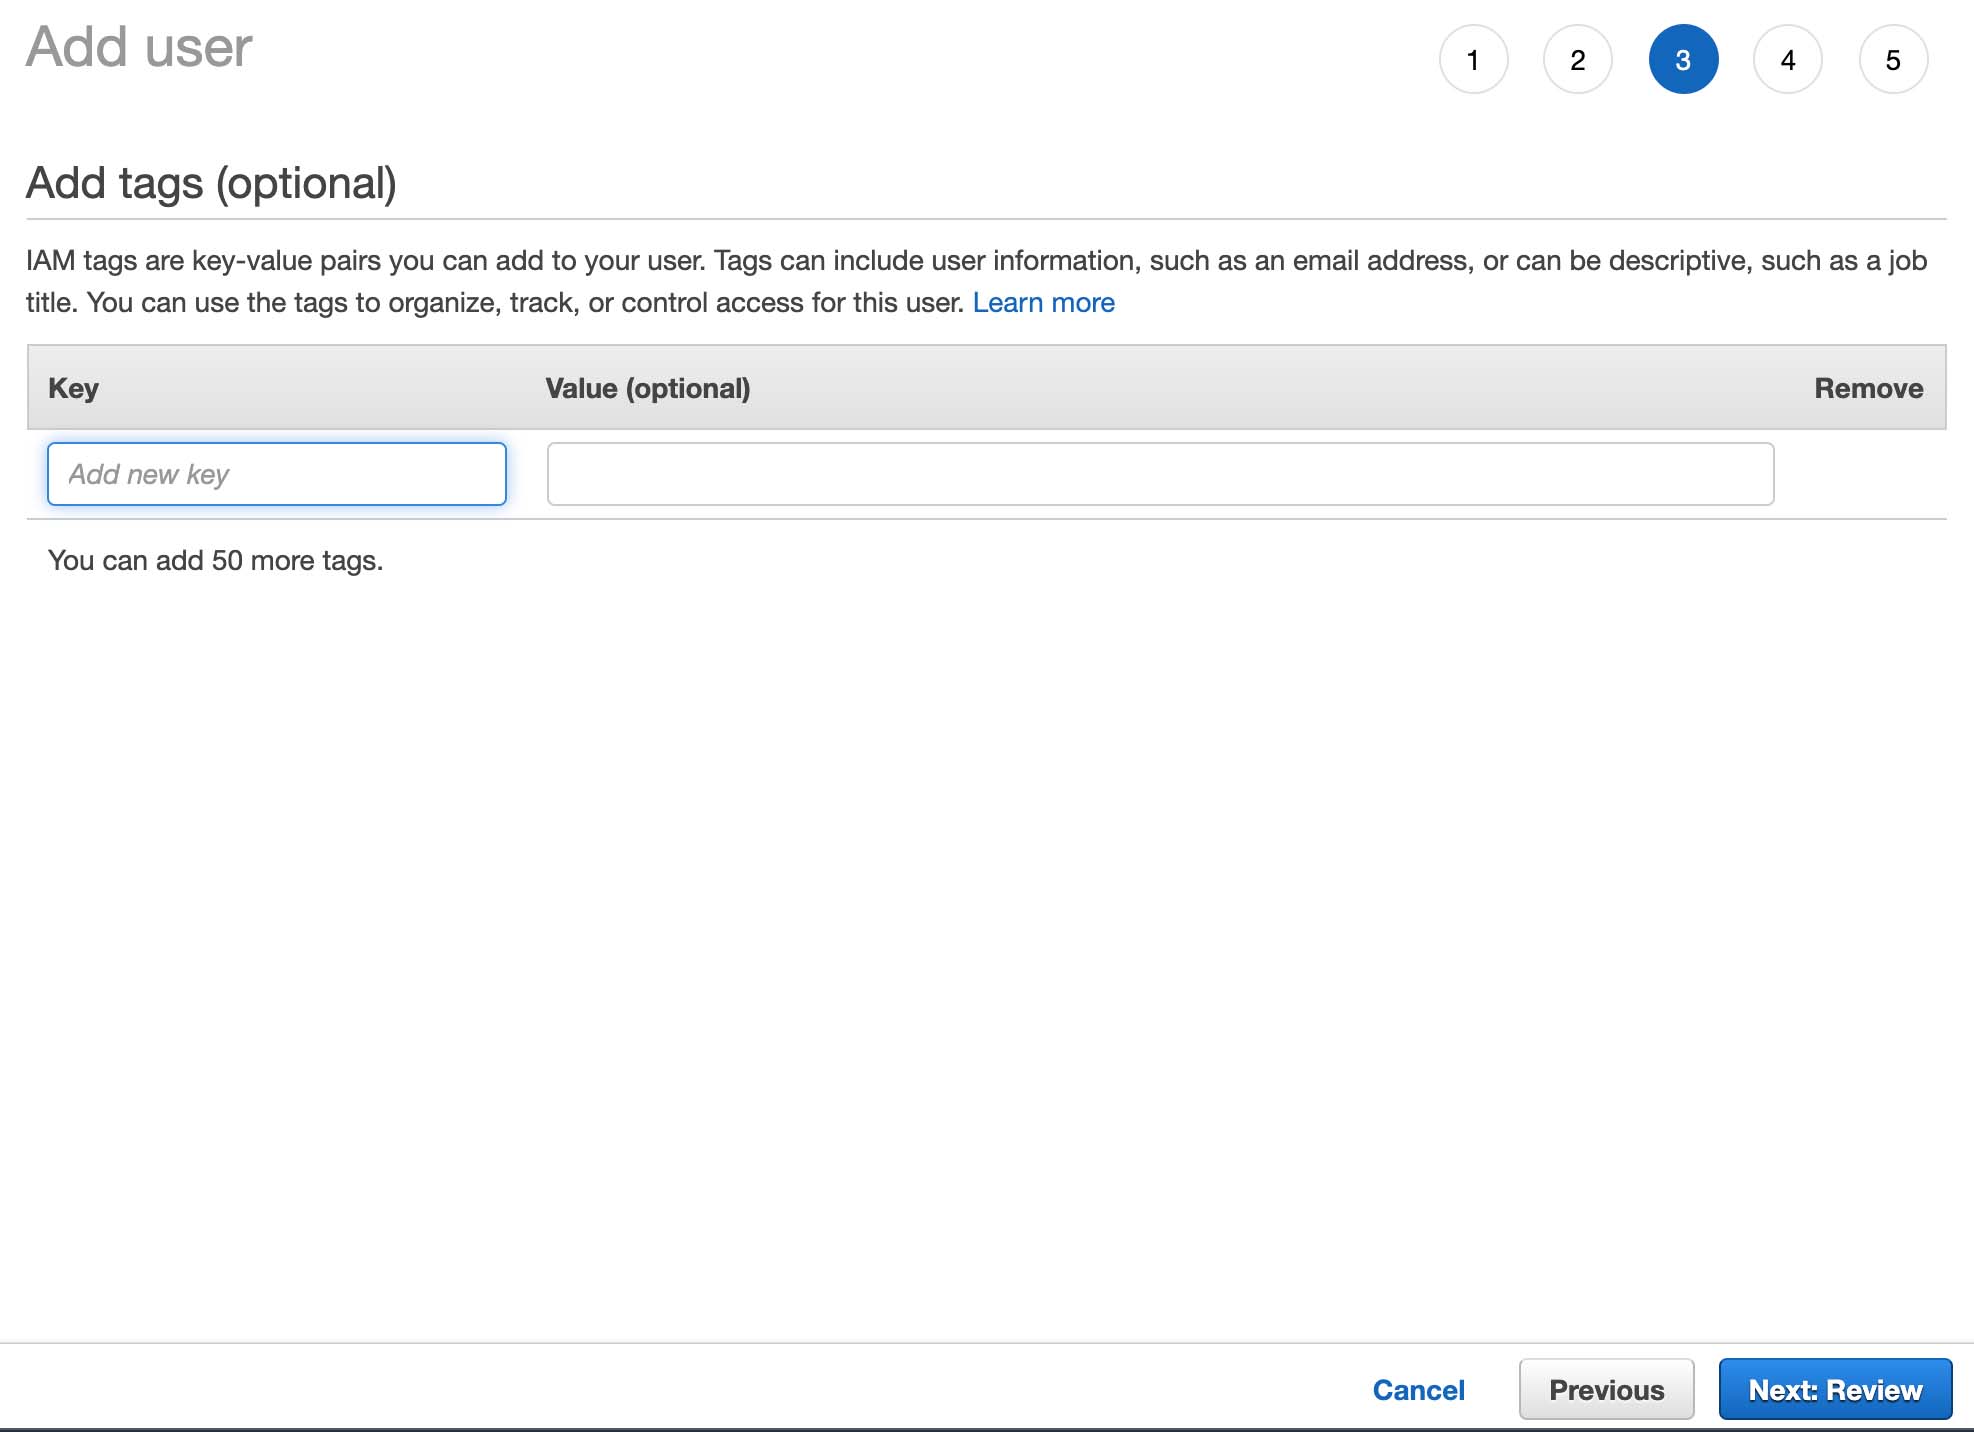
8. (Optional) Add Tags. Tags can include user information, such as an email address, or can be descriptive, such as a job title.
9. Review the set information and click "Create user".
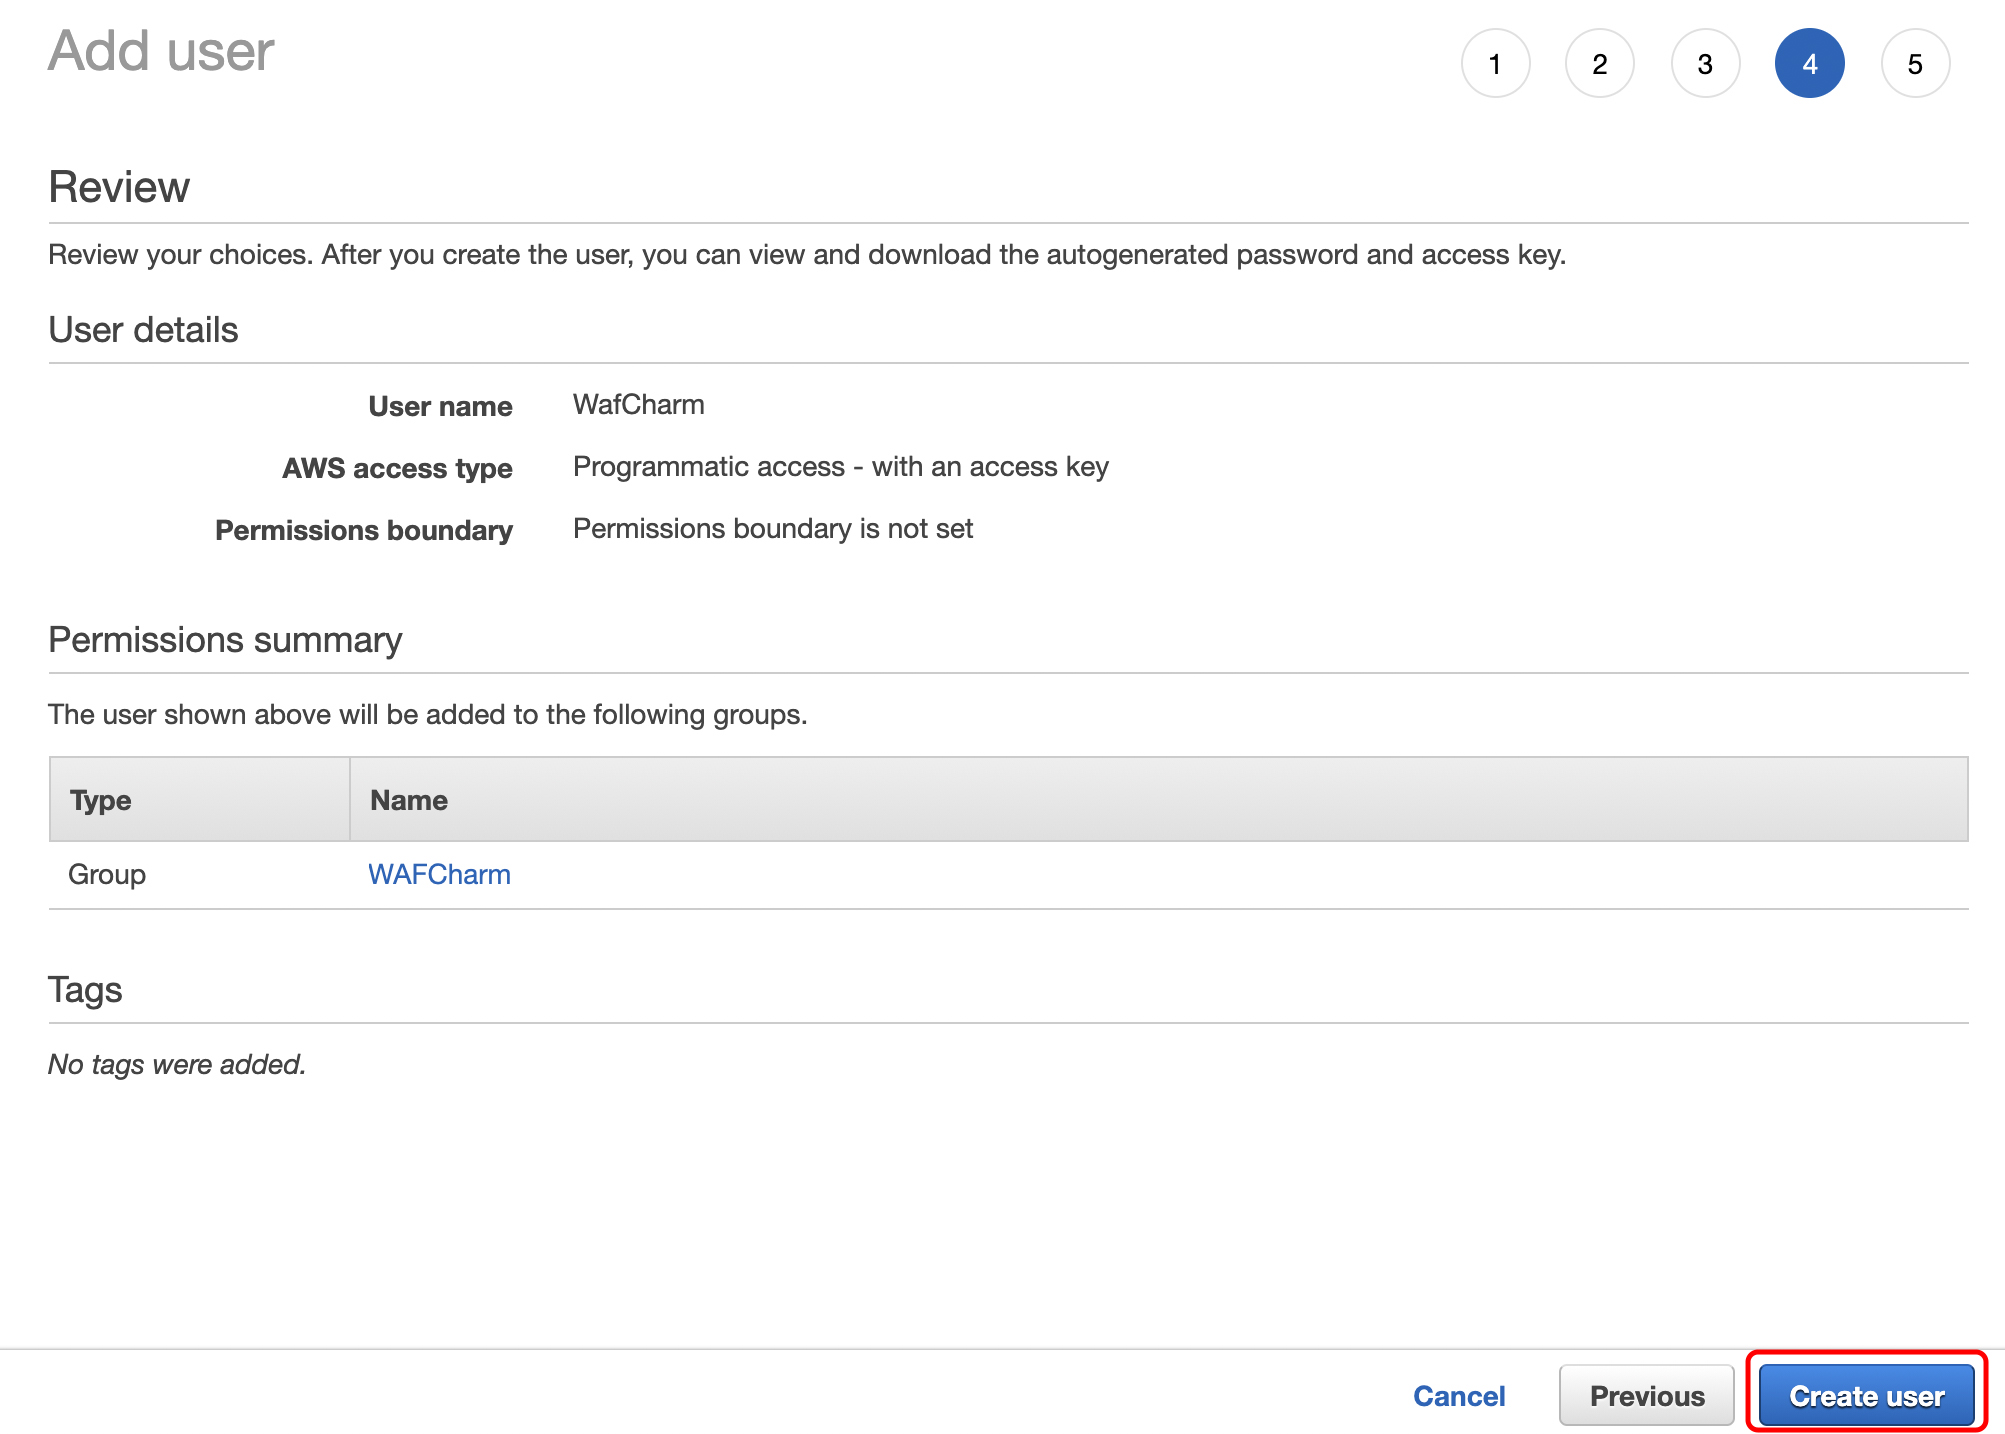
10. The security credentials of the created user (Access Key ID, Secret Access Key) is now available to view and download.
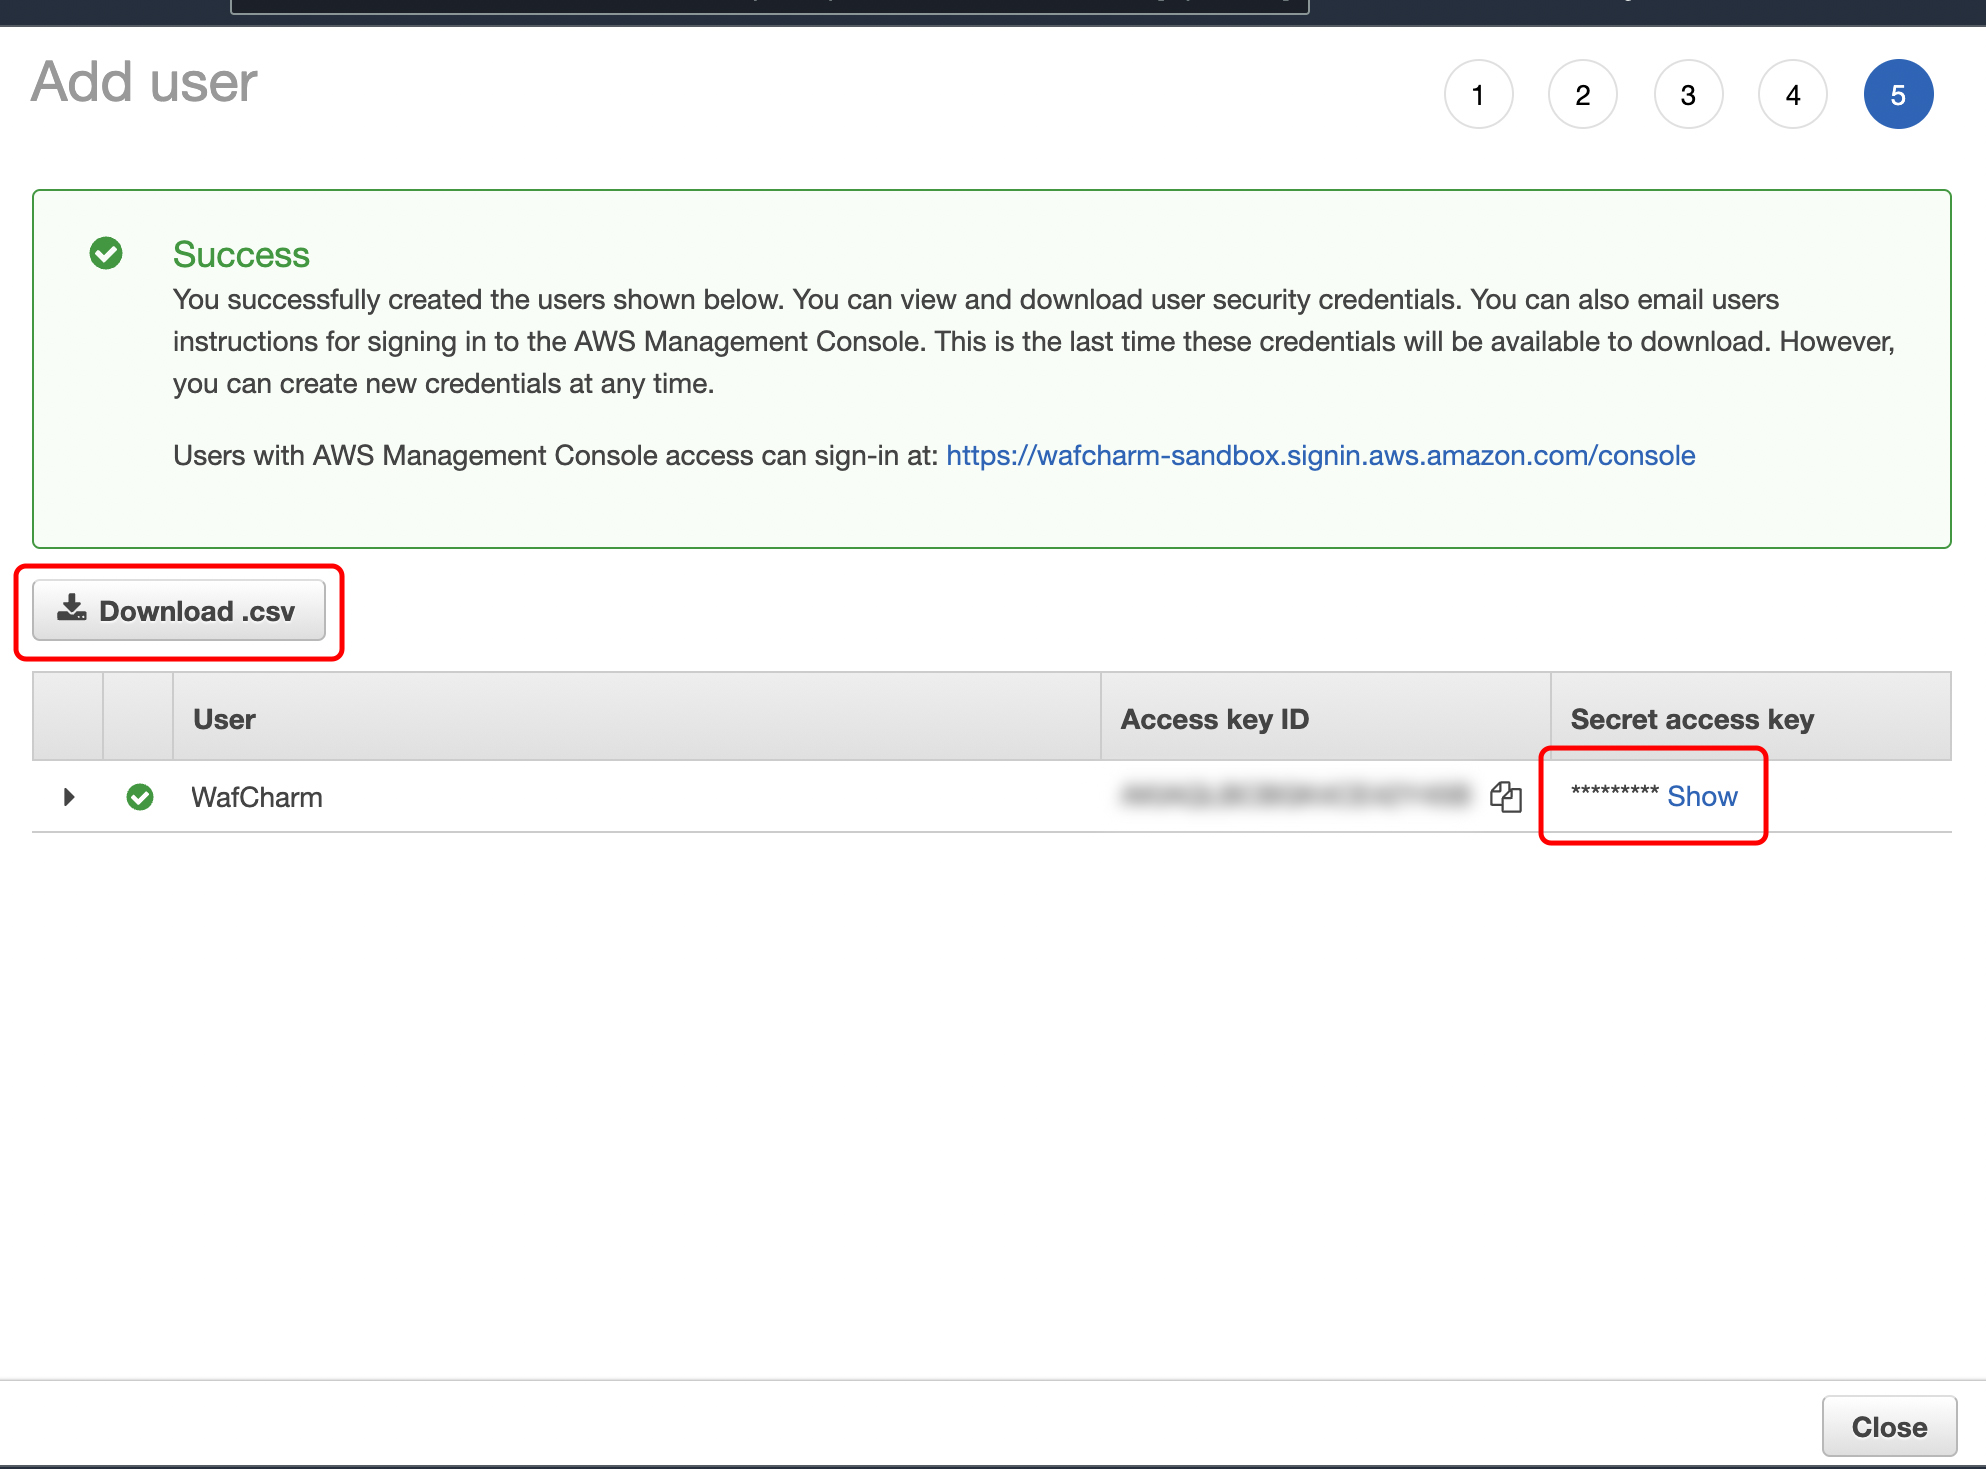
Now that the .csv file has been downloaded, your setup is complete, and your key pair is ready to use.