Table of Contents
- 1. Introduction
- 2. How to associate new web ACLs to CloudFront distributions
- 3. How to associate existing web ACLs to CloudFront distributions
- 4. Disassociating Web ACLs
- 5. Using with WafCharm
- 6. Conclusion
1. Introduction
You can now create and apply web ACLs to CloudFront distributions in the CloudFront console, starting May 10th, 2023.
If you previously had wanted to attach web ACLs to CloudFront distributions to protect your resources, you had to configure CloudFront and AWS WAF separately and then associate the web ACL to CloudFront distribution under the [Associated AWS resources] on the web ACLs page.
From now on, you can associate a web ACL at the time you create a CloudFront distribution.
Amazon CloudFront announces one-click security protections
2. How to associate new web ACLs to CloudFront distributions
When you create or edit CloudFront distribution, you can see a [Web Application Firewall (WAF)] section.
By clicking on the [Enable security protections] in this section, web ACL will be created when the creation or editing of the CloudFront distribution is completed.
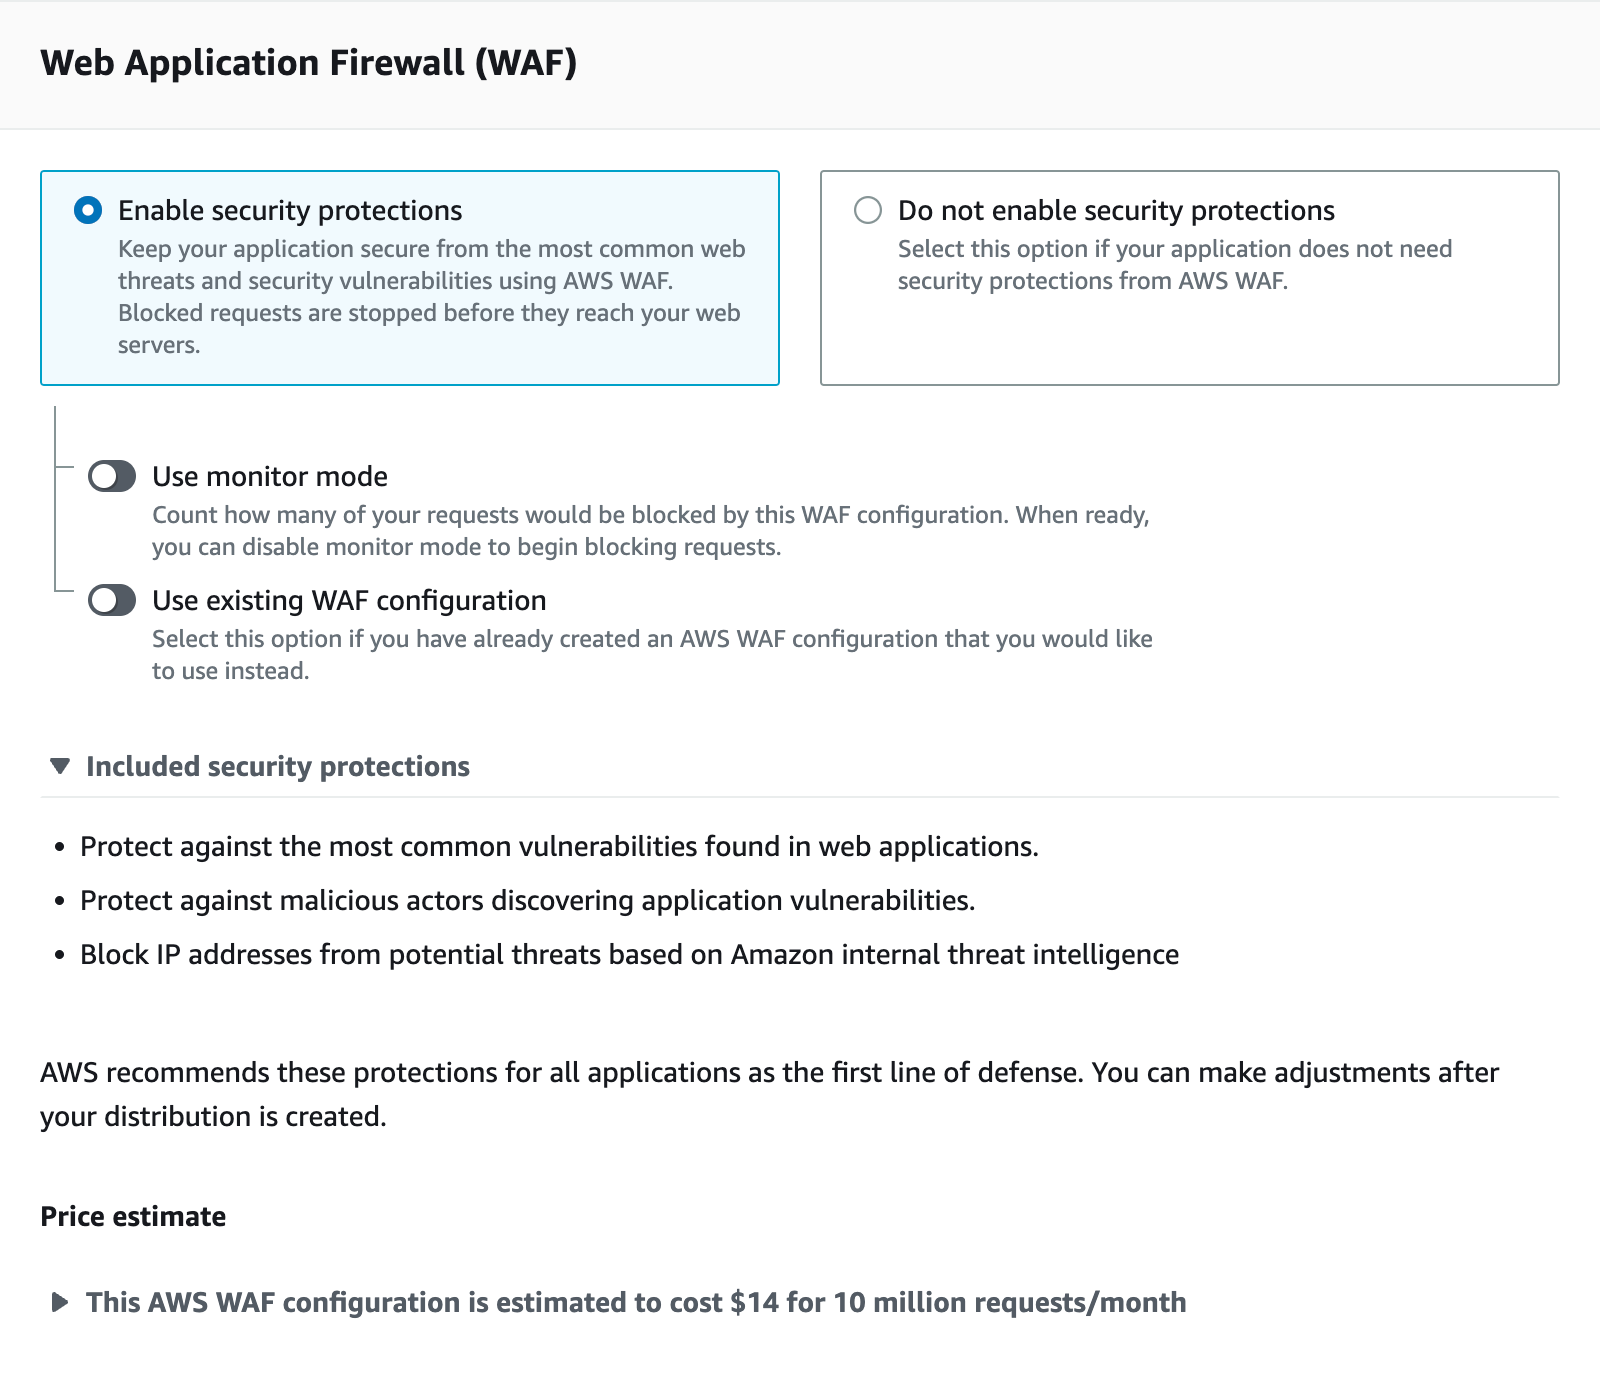
If you want to monitor how the rules in the web ACL work beforehand, click the [Use monitor mode] option to turn the mode on.
By turning this option on, all rules will be applied in the COUNT mode.
When you complete the creation/editing of the CloudFront distribution, you can see the web ACL name that starts with [CreatedByCloudFront] under the Settings in the General tab.
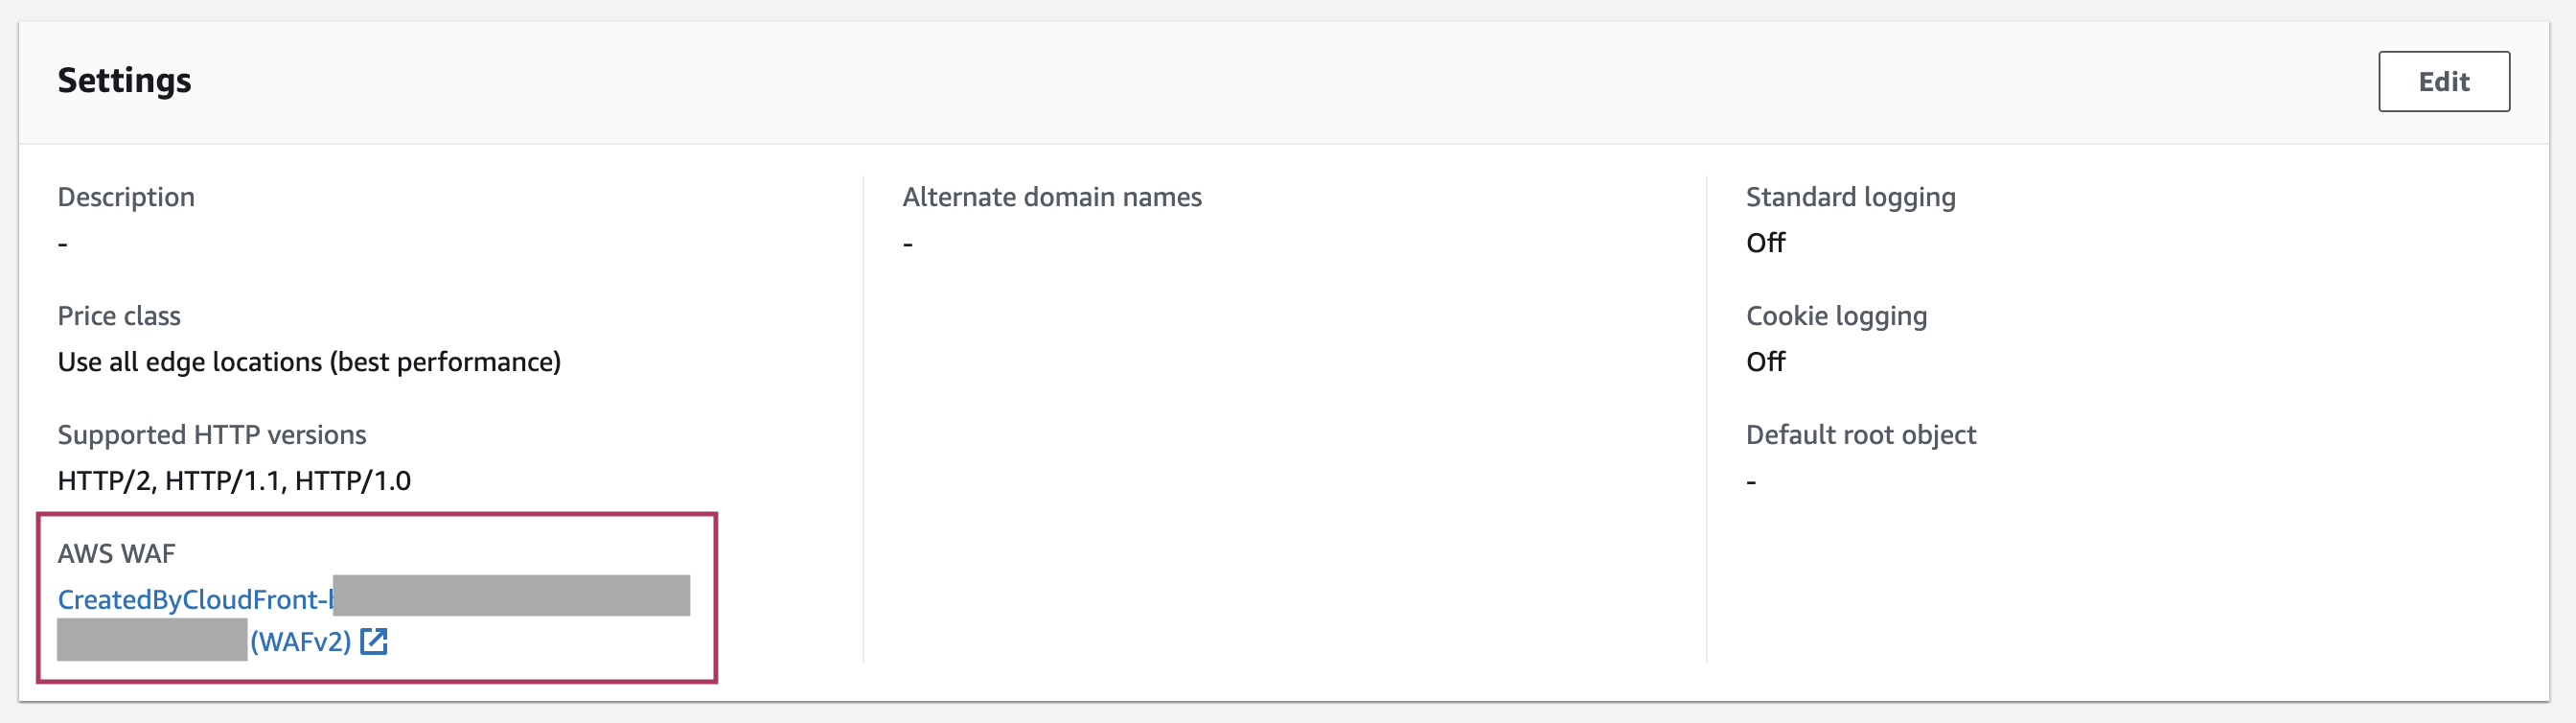
Click on the web ACL name to open the web ACLs page.
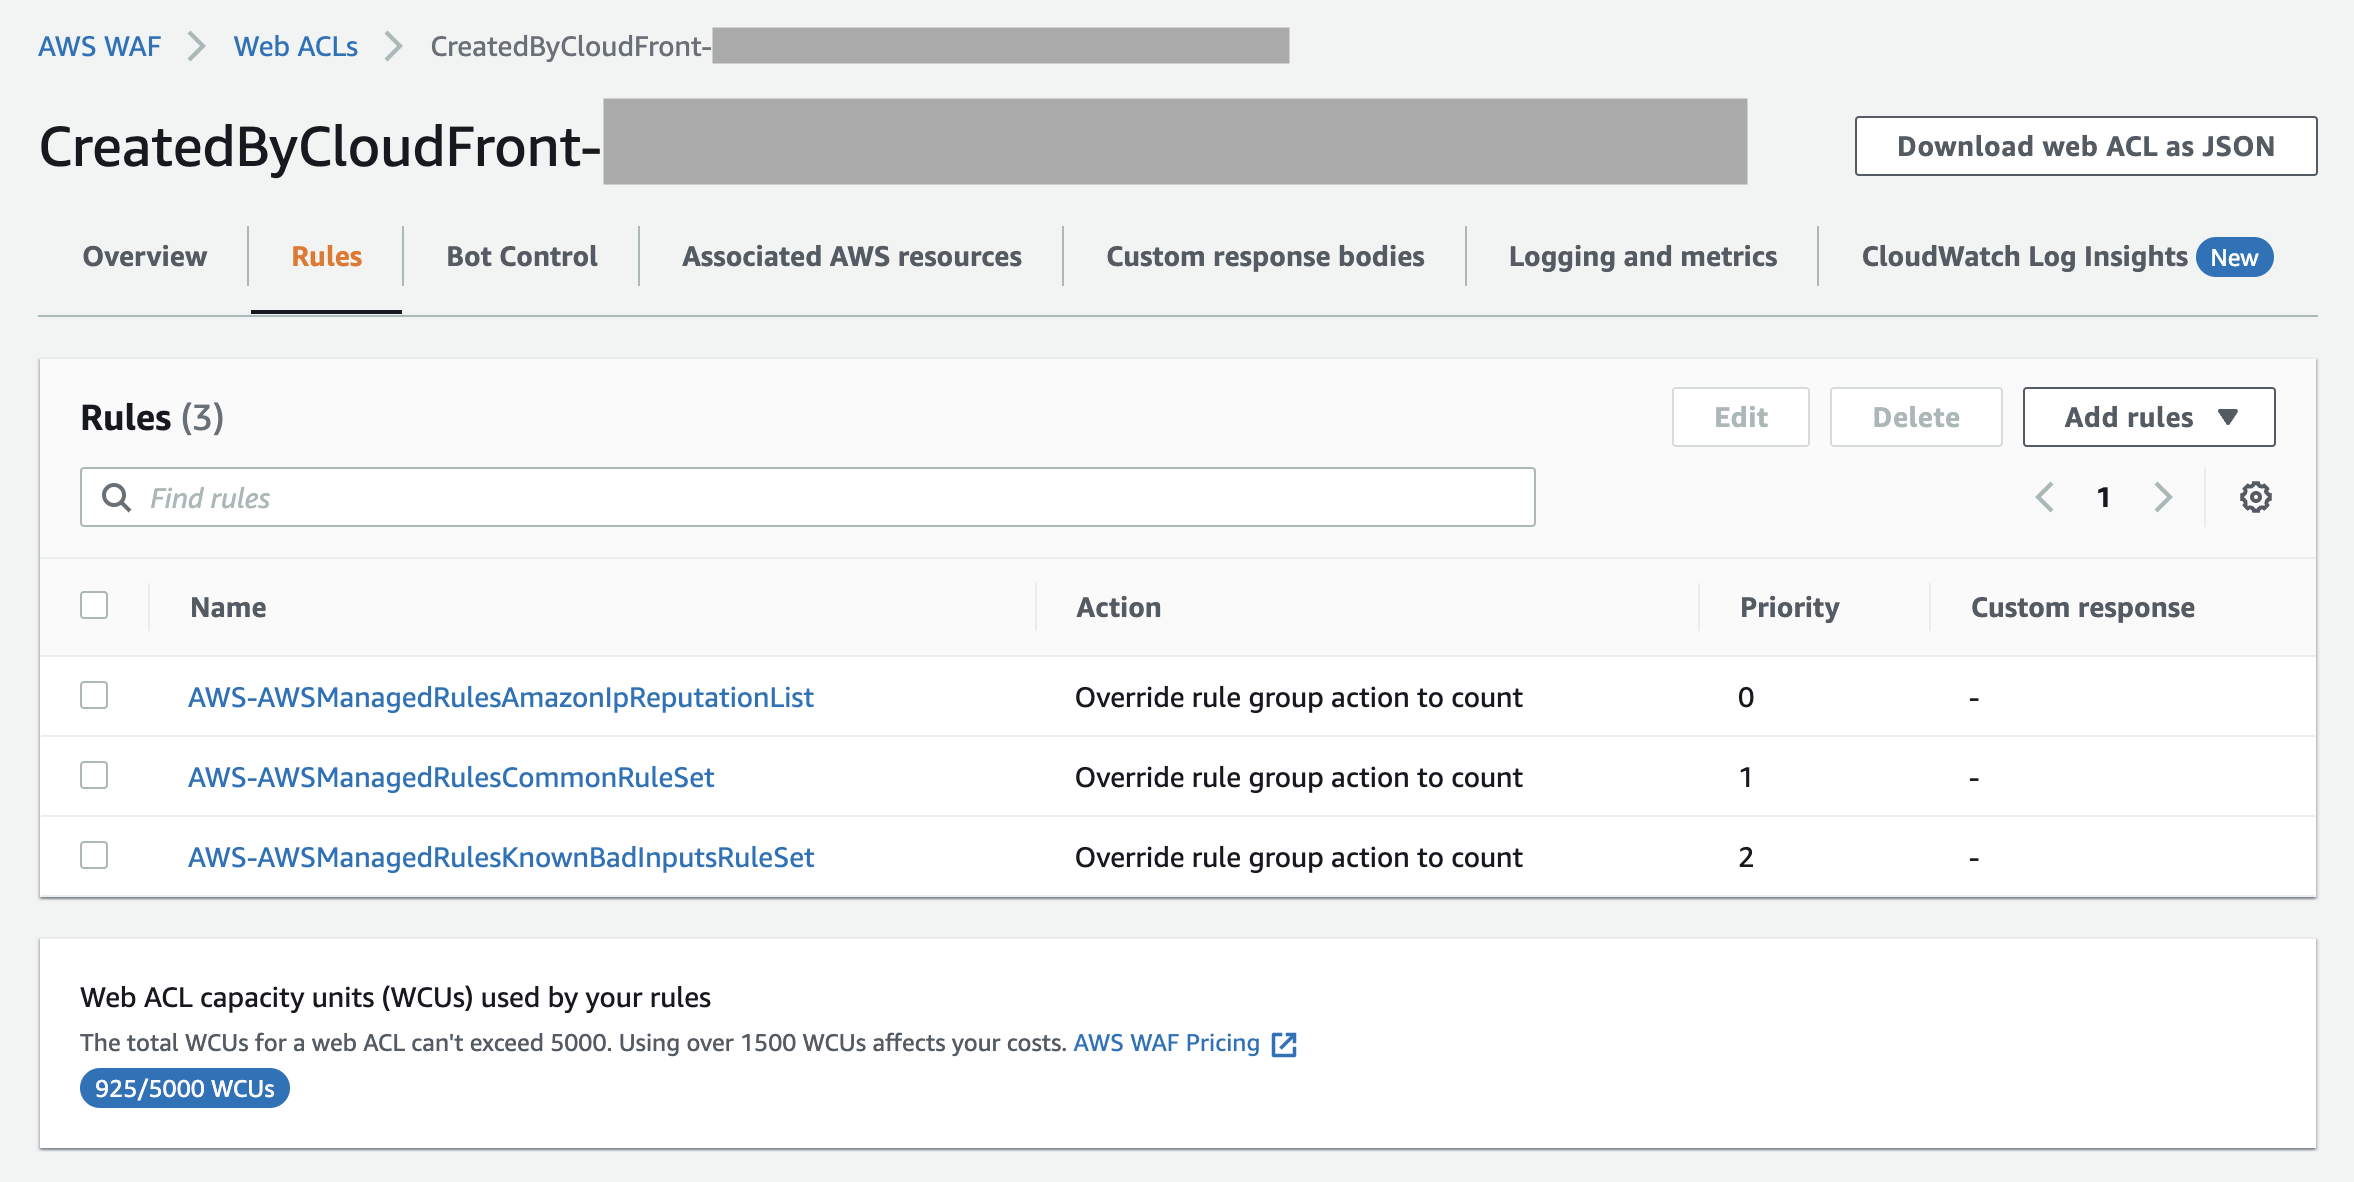
Three managed rules provided by AWS will be automatically applied to your web ACL.
For more details on the rules, please refer to the AWS documents linked below.
- Amazon IP reputation list managed rule group
- Core rule set (CRS) managed rule group
- Known bad inputs managed rule group
If you click on the [Use monitor mode] option when creating a web ACL, the action will be applied as [Override rule group action to count].
After you've monitored how the rules work and you want to switch the action to BLOCK, select the rule name, click the Edit button, and remove the override setting.
3. How to associate existing web ACLs to CloudFront distributions
You can also select an existing web ACL if you already have one.
After clicking on the [Enable security protections] under the [Web Application Firewall (WAF)] section, select [Use existing WAF configuration].
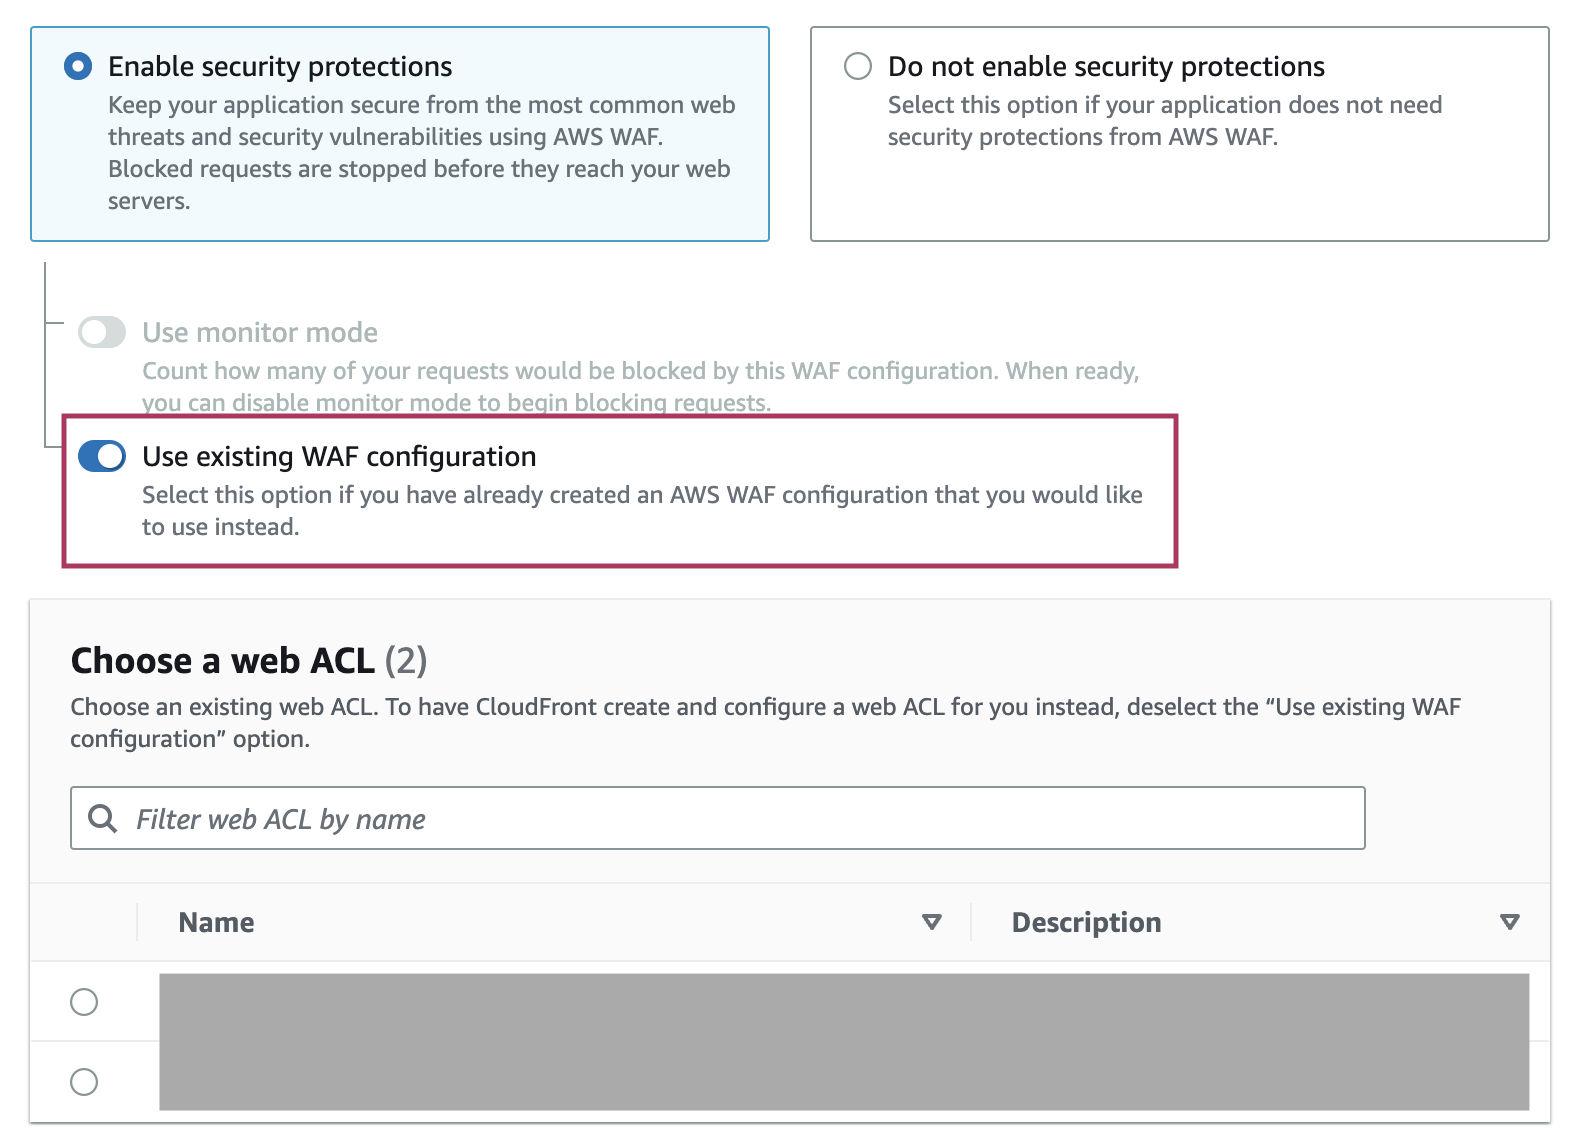
Click the web ACL name you want to attach to your CloudFront distribution from the list of web ACLs in the Global (CloudFront) region.
*Web ACLs must be created under each region, so you cannot attach web ACLs that are used with other resources like ALB to CloudFront distributions.
4. Disassociating Web ACLs
You can also disable the web ACL from the CloudFront console.
To open the editing page, click the Edit button under the Settings in the General tab.
Section to configure WAF will be shown. Select the option to switch between enabled/disabled.
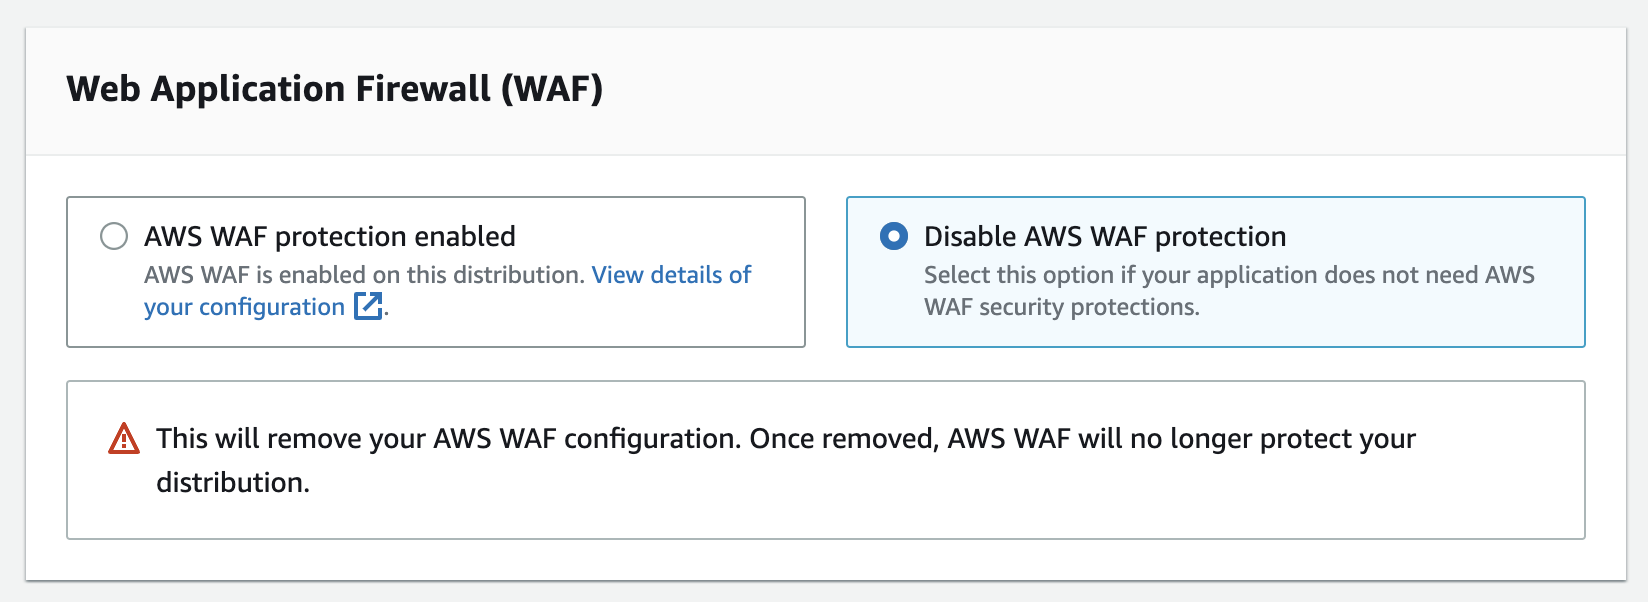
Even if you have disabled the AWS WAF protection in the CloudFront console, it only detaches the web ACL from the CloudFront distribution and does not delete the web ACL itself.
If you also want to delete the web ACL, do so in the AWS WAF console after detaching is complete.
Once the AWS WAF protection is disabled, the [Enable security protections] option is shown again on the CloudFront distribution editing page. However, this option is for creating a new web ACL, so reselecting the option does not re-attach the web ACL with a name that starts with [CreatedByCloudFront].
A new web ACL is created every time the [Enable security protections] is executed.
In addition, a web ACL with a name that starts with [CreatedByCloudFront] was not shown in the list of existing web ACLs when trying to attach the existing web ACLs from the CloudFront distribution editing page. If you accidentally detached the web ACL and want to reattach the existing [CreatedByCloudFront] web ACL, use the [Associated AWS resources] section in the AWS WAF console.
You also cannot switch the attached web ACL from the CloudFront distribution editing page, so use the [Associated AWS resources] section in the AWS WAF console for switching the web ACLs as well.
5. Using with WafCharm
As for WafCharm, you can use both methods to create/attach web ACLs: creating a new web ACL from the CloudFront console or creating a web ACL first and attaching later.
If you choose the first method, creating a new web ACL in the CloudFront console, managed rules provided by AWS will be automatically added as stated above, so WafCharm rules will be added to the web ACL on top of the AWS managed rules.
WafCharm rules can be applied because the WCU capacity is 5,000, but the used WCUs may exceed 1,500. AWS WAF charges an additional fee based on the number of requests if more than 1,500 WCUs are used, so if you want to keep the used WCUs within the 1,500 limitations, please delete the AWS managed rules first and then configure to apply WafCharm rules.
*As of April 2023, WafCharm rules will use 1,100 WCUs for rule application. However, AWS WAF may reduce the number of used WCUs for shared resources. WafCharm will need 1,100 WCUs for the application process, but the number of used WCUs may decrease a little bit when the rules are fully applied.
If you are going to create a web ACL first and then attach it to CloudFront distribution, managed rules provided by AWS will not be applied to the web ACL and you don't have to worry about something like the above affecting your web ACL.
You can also choose to add WafCharm rules first and then attach the web ACL to the CloudFront distribution or vice versa.
6. Conclusion
You can now create and attach a web ACL to CloudFront distributions at the time of creation and do not have to hop around different pages to protect your resources.
However, it will be beneficial to know both consoles well because you will need to use the AWS WAF console if you want to configure your web ACLs flexibly, such as giving a name with specific naming rules or you want to switch the attached web ACL.