【Table of contents】
- 1.Introduction
- 2.About accounts
- 3.About policy
- 4.How to create a member
- 5.How to create a restricted policy
- 6.How to create a member with restricted policy
- 7.Conclusion
1.Introduction
Until now, WafCharm could only be used by registering one account at a time.
With this release, it is now possible to create a "member account" under the user account. By creating member accounts according to the requirement, you'll be able to manage your accounts properly.
2.About accounts
There are three types of accounts.
| User account | ● The account that you have registered and are using with WafCharm. ○ Your existing account or newly registered account with WafCharm are considered as user accounts. ● User accounts can create up to 100 member accounts. ● The Owner policy described later will be set automatically. ○ ※It is not possible to change to other policies. |
| Member account | ● An account created by a user account. ● A policy is always set for a member account. ● Based on the set policy, the permissions and range of operation are limited. ● A member account with a Manager policy set can create a member account in the same way as a user account. |
| Agency Account | ● Some designated accounts are agency accounts. ● You can refer to the members and policies created by a subordinate user. ○ Cannot create/modify/delete. |
3.About policy
There is always one policy set for each member account.
The policies you set determine the permissions and range of operation for the resources of the member account. Resource here refers to the Web ACL Config and the Web Site Config associated with the Web ACL Config.
The policies are divided into 2 types.
Restricted Policies: Policies that allow only authorized resources to be operable.
Default policy
It is a policy that allows all resources to be operable.
Depending on the operating permission, the default policy is divided into 5 sub-categories.
| Policy Name | Description |
| Owner | ● Has all the permissions for the resources. ○ All permissions refer to the 4 types of permissions: creating/browsing/updating/deleting. ● Has all the permissions for the members. ● Has all the permissions for the policies. ● Automatically set to the user account. ● Not possible to set it to another member account. |
| Manager | ● Has all the permissions for the resources. ● Has all the permissions for the members. ● Has all the permissions for the policies. |
| Developer | ● Has all the permissions for the resources. |
| Editor | ● Has only browsing/updating permission for the resources. |
| Reader | ● Has only browsing permission for the resources. |
Restricted policy
Policies that allow only authorized resources to be operable.
Depending on the operating permission, the restricted policies are divided into 3 sub-categories.
※Usually, no restricted policies are created. It is necessary to create it according to the requirement.
| Resource | Description |
| Limited Developer | ● Has all the permissions for the allowed resources. |
| Limited Editor | ● Has browsing/updating permissions for the allowed resources. |
| Limited Reader | ● Has browsing permissions for the allowed resources. |
See also:Help : Member and Policy setting
4.How to create a member
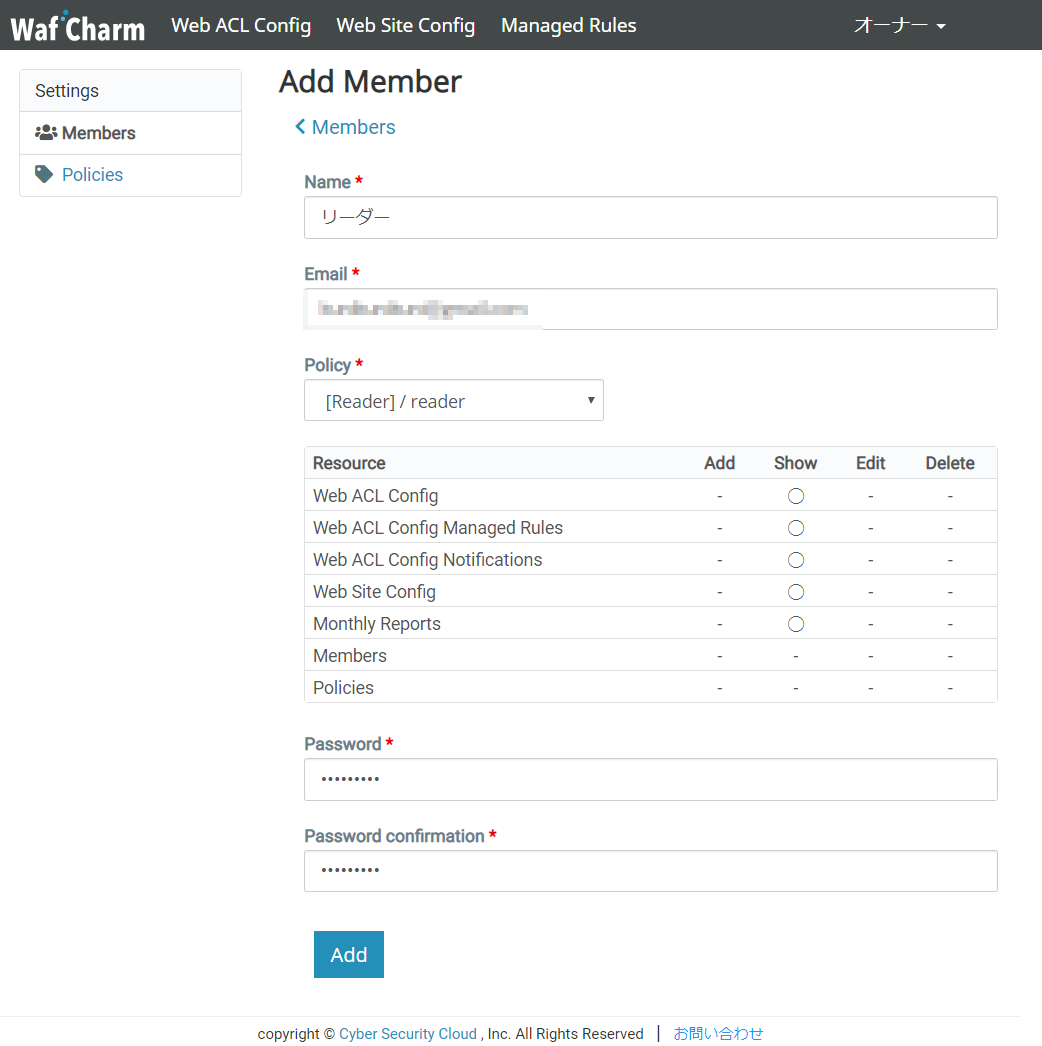
Select the username at the top right of the screen to display the menu.
Select “Settings” from the menu.
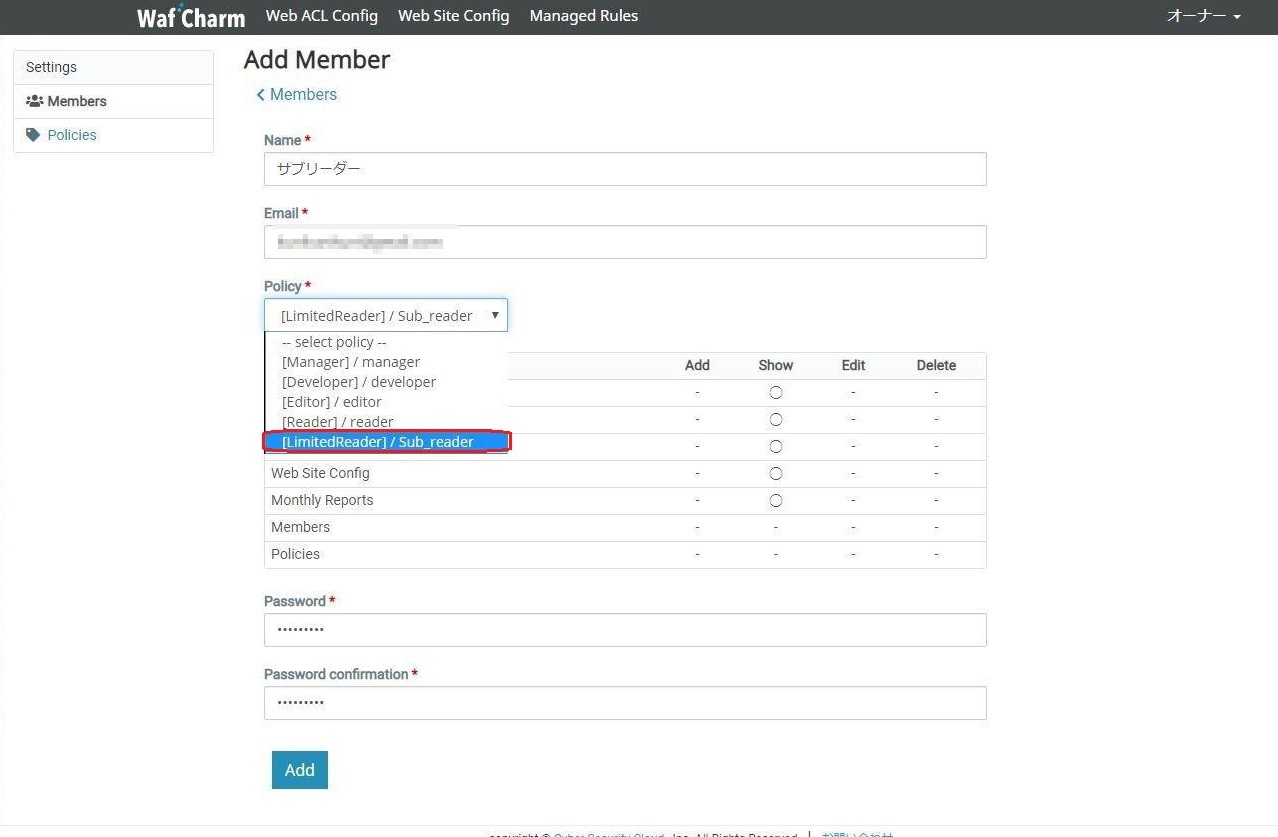
Enter the following information and click "Add".
・Member name
・Email address
・Policy
・Password
※Email addresses that have already been registered with WafCharm cannot be used.
※Only one policy can be set for a member. You can't choose to set more than one policy per member.
Once you create a member, you return to the Members screen, where you can see the created members.
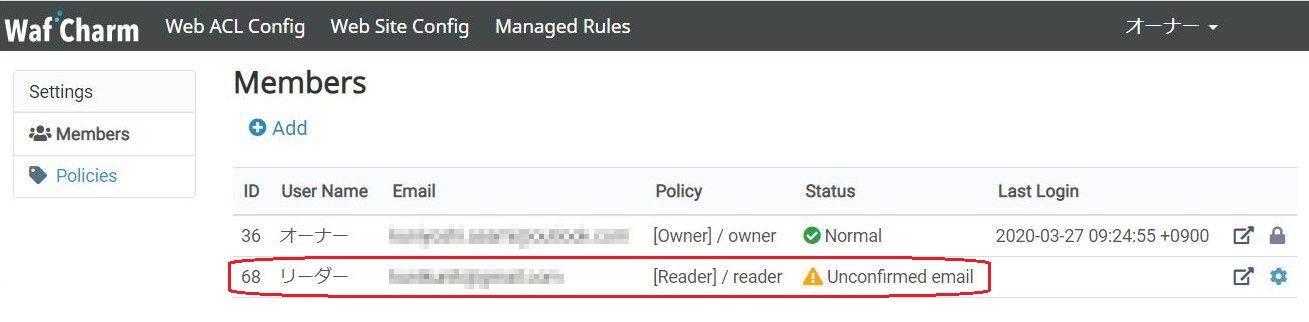
An email with a verification link will be sent to the email address you entered. Click on the verification link to complete the verification.
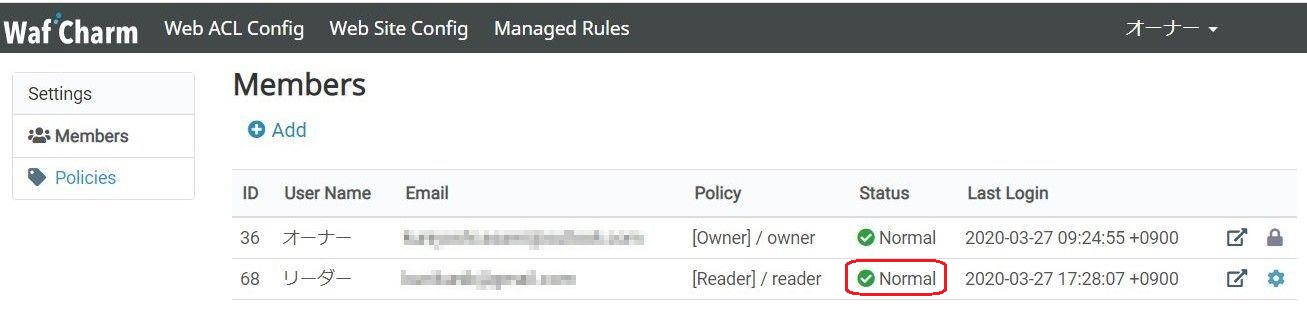
When the authentication of the created user is completed, the「Status」will change to「Normal」.
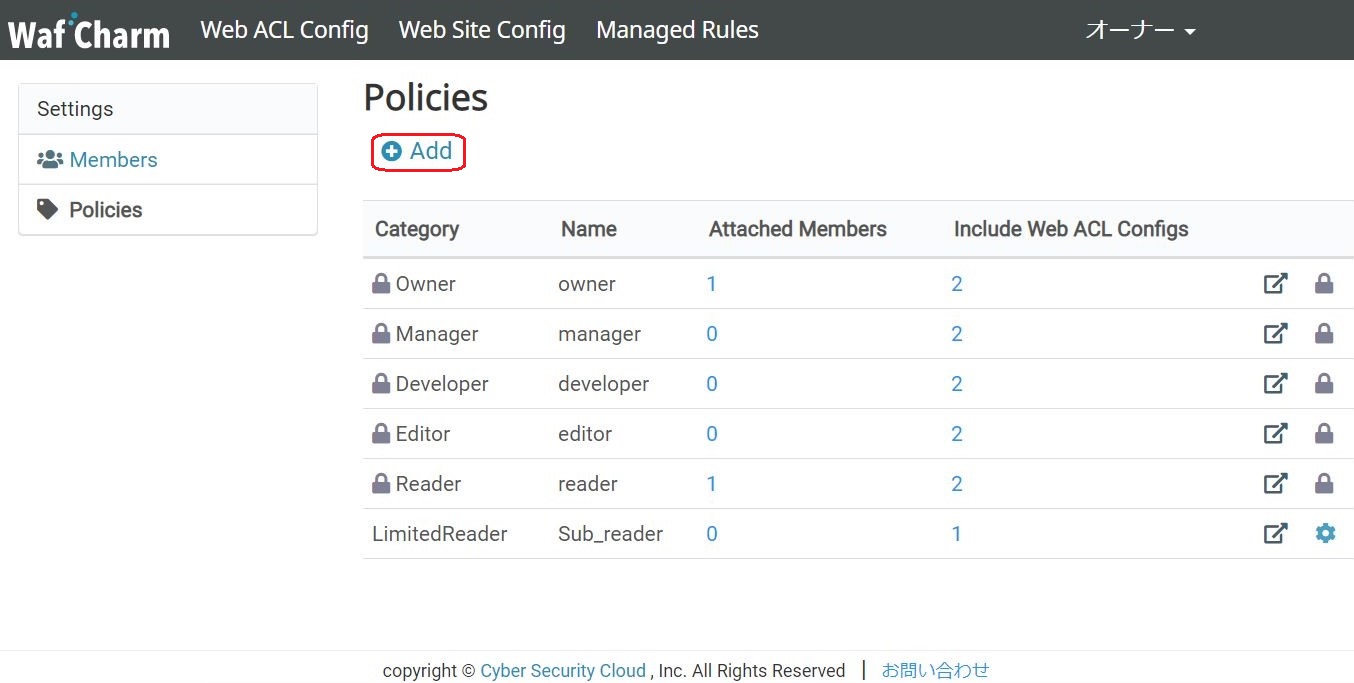
5.How to create a restricted policy
Click on your username in the upper right corner of the screen and select “Settings”.
From the menu on the left side of the screen, select Policies to display the Policies screen.
Click “Add” to display the Add Policy screen.
In the “Name” field, enter an arbitrary policy name.
In “Category”, selects the restriction policy you want to create.
Under “Allow Web ACL Configs”, select the Web ACL Configs allowed for the operation. You can select multiple Web ACL Configs.
Please note that the Web Site Config associated with the selected Web ACL Config is also included in the operational range.
The following is an example when only one Web ACL Config is selected.
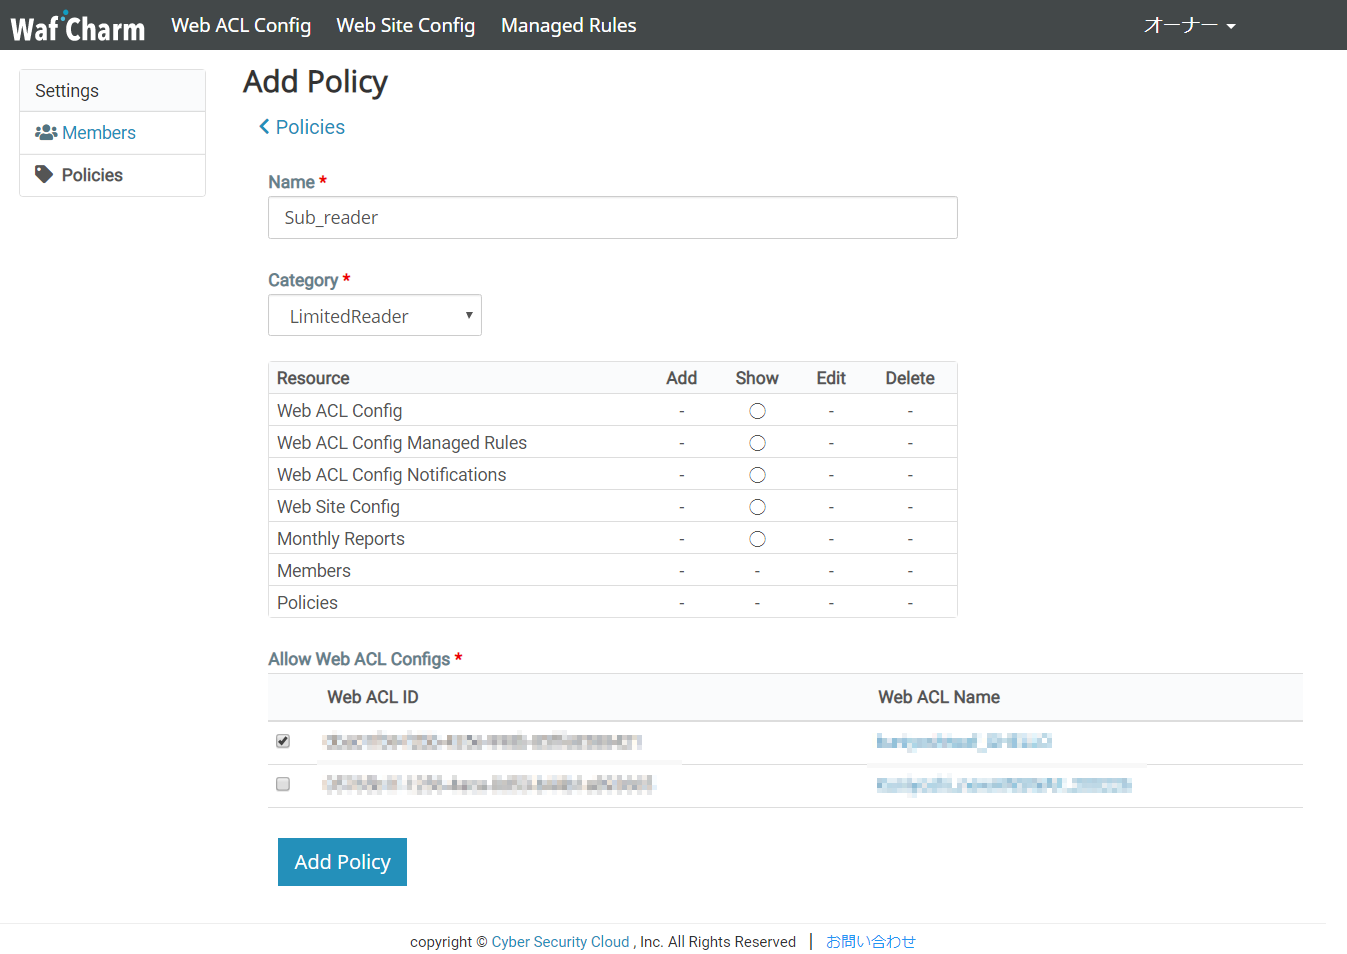
Click “Add Policy” to create the restricted policy.
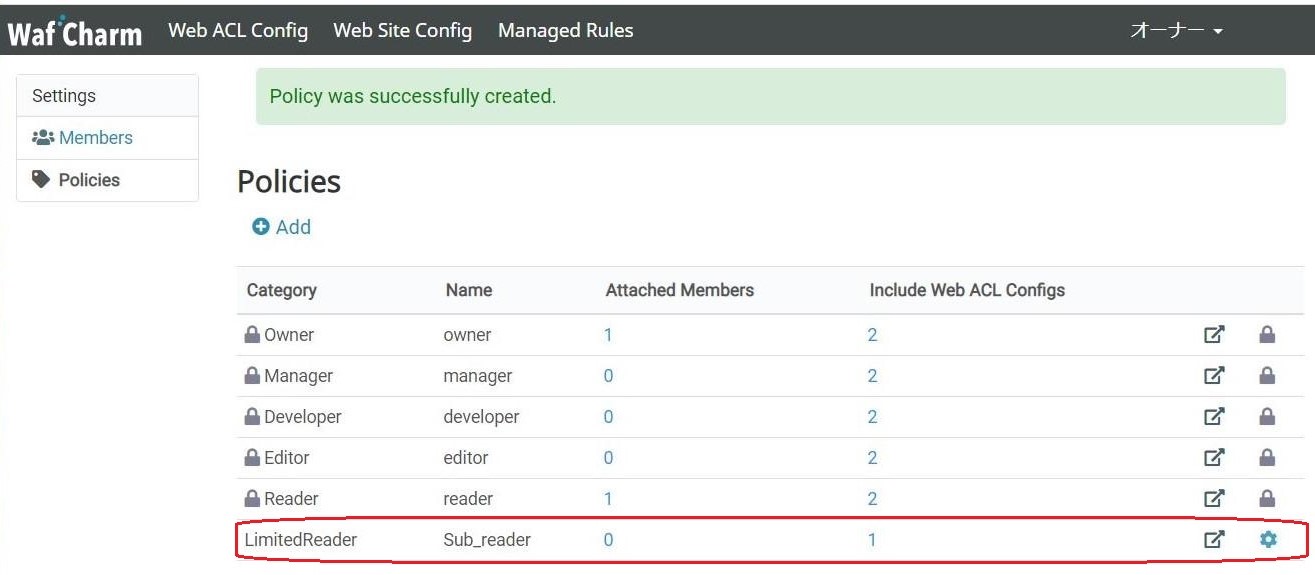
The Policies screen allows you to see the number of policies currently created, the number of users whose policies are set, and the number of Web ACL Configs included in the operational range.
Attached Members: Number of members for whom the policy is set.
Include Web ACL Configs: Number of Web ACL Configs to which the policy will be set.
6.How to create a member with restricted policy
Create a member with the restricted policy you just created.
Again, click the Add button on the Members screen to display the Add Member screen.
And in the Policy field, select the policy that you just created.
For the rest of the entries, please refer to 4. Creating a Member.
Click “Add” to create the member with the restricted policy.
7.Conclusion
With this new member creation feature, you can now limit the number of permissions to what you need and assign them accordingly. This feature allows you to flexibly manage your permissions, making WafCharm more convenient to use.