【Overview】
In this blog, we will introduce a method to block requests from specific IP addresses by blacklisting when being attacked by those specific IP addresses.
【1. Creating a new Blacklist】
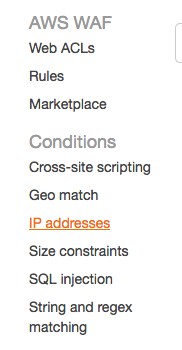
1. Select "IP addresses" from the AWS WAF console.
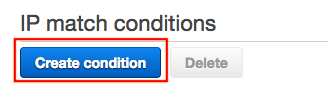
2. Click “Create condition”.
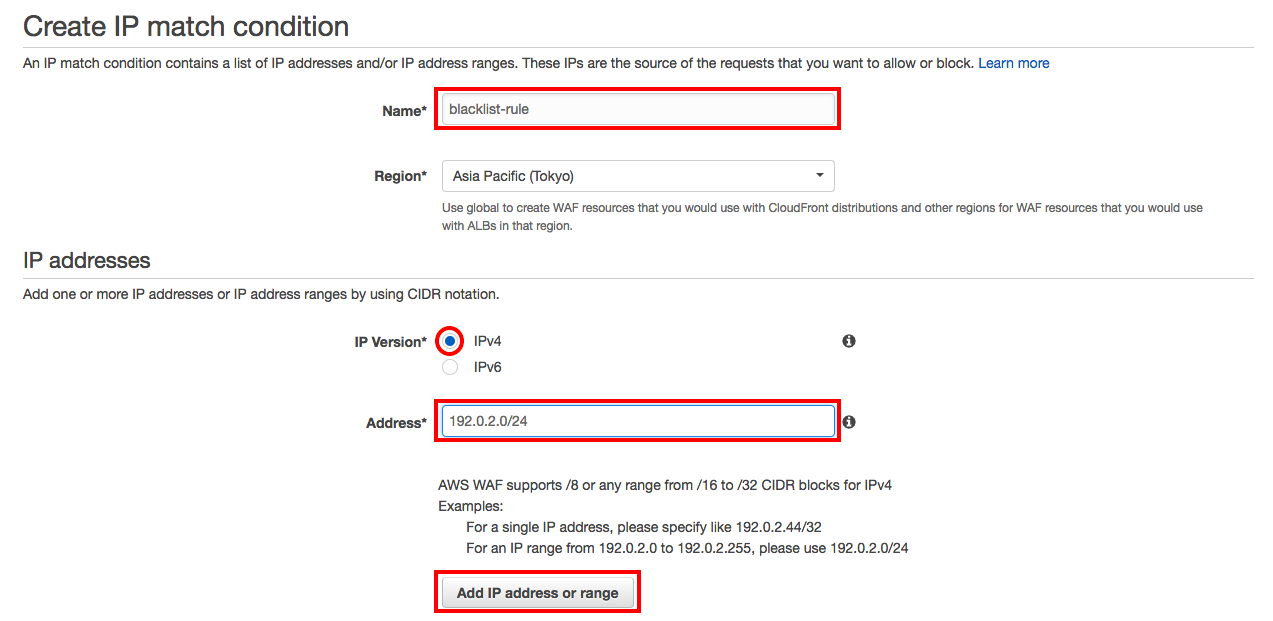
3. Perform the following steps:
・ Name*: Choose an arbitrary name.
※ We recommend a name that can be identified as a blacklist condition.
・ IP Version*: Select IPv4.
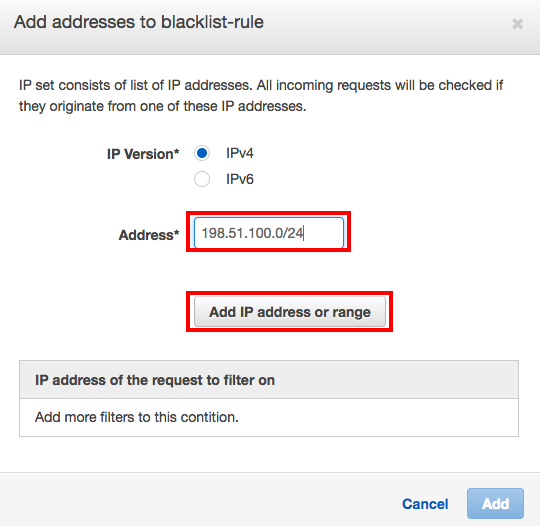
・ Address*: Add the IP address (CIDR notation) you want to add to the Blacklist.
※ For a single IP address, please specify "/32" after the IP address.
・ Click “Add IP address or range”.
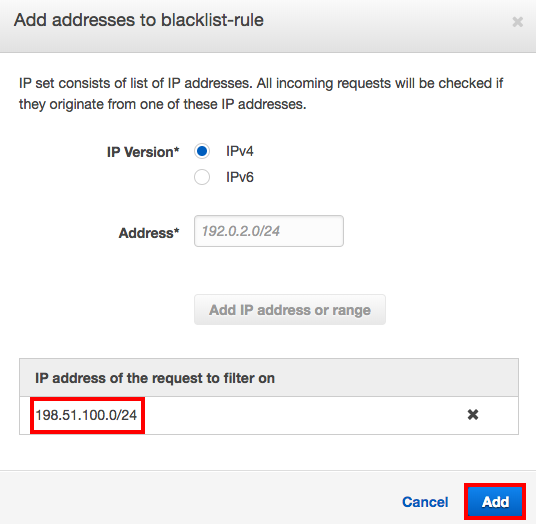
4. Make sure that the IP address you added earlier is listed in "IP address of the request to filter on", and then click “Create”.

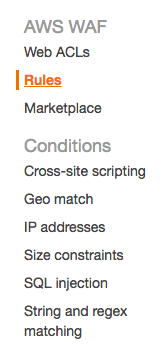
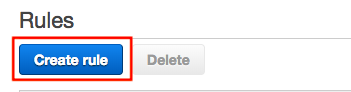
5. Next, select "Rules" from the AWS WAF console.
6. Click “Create rule”.
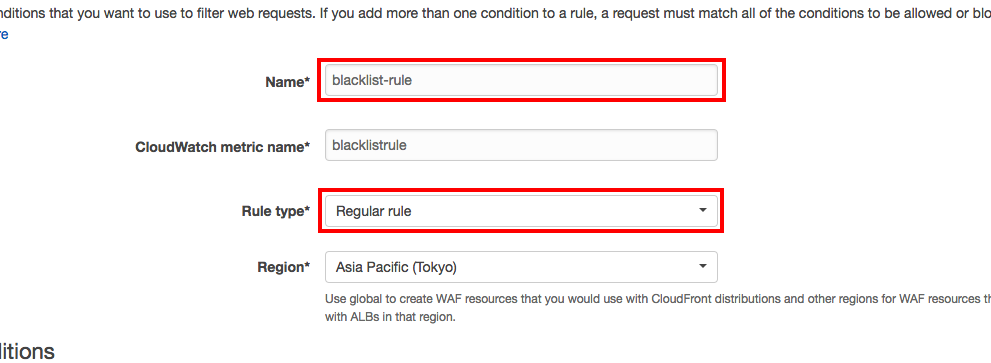
7. Perform the following steps:
・ Name*: Choose an arbitrary name.
※ We recommend a name that can be identified as a blacklist rule.
・ Rule type*: Select "Regular rule".
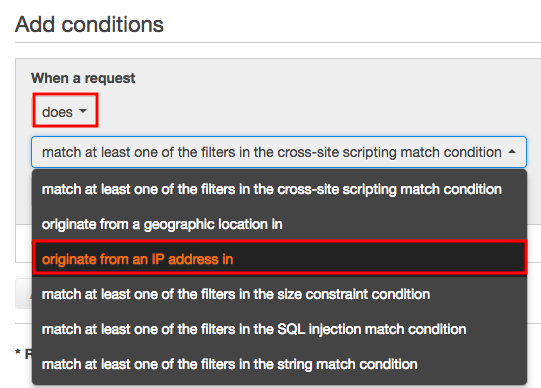
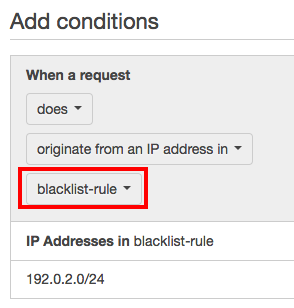
8. Under "When a request", select "does" / "originate from an IP address in".
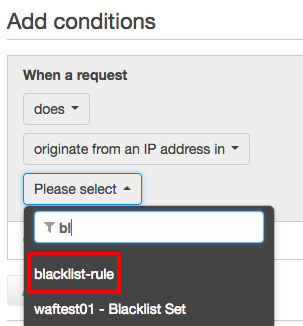
9. Select the condition you created earlier.
10. Make sure that the contents of the conditions is reflected.
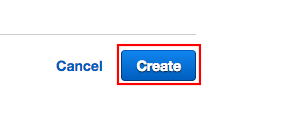
11. Click “Create”.
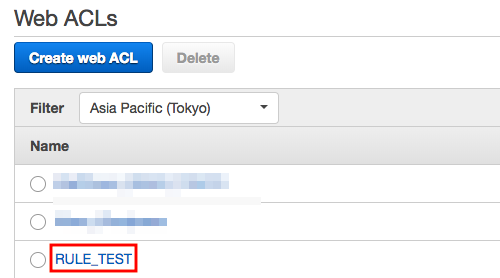
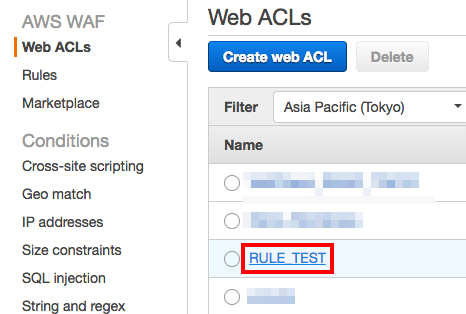
12. Select “Web ACLs” from the AWS WAF console.

13. Click the target Web ACL.
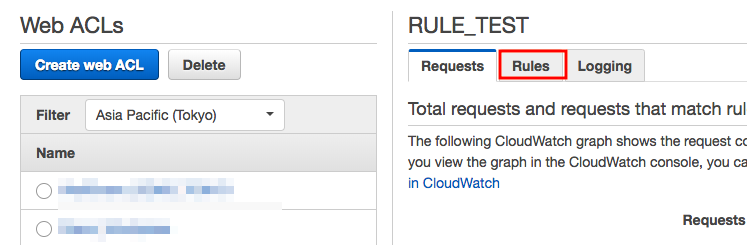
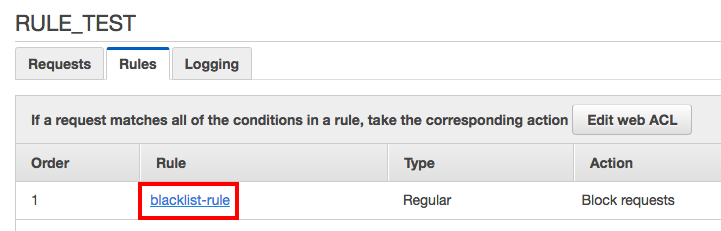
14. Select the “Rules” tab.
15. Click “Edit web ACL”.

16. Select the rule you created earlier.

17. Select "Block" for action for the added rule.
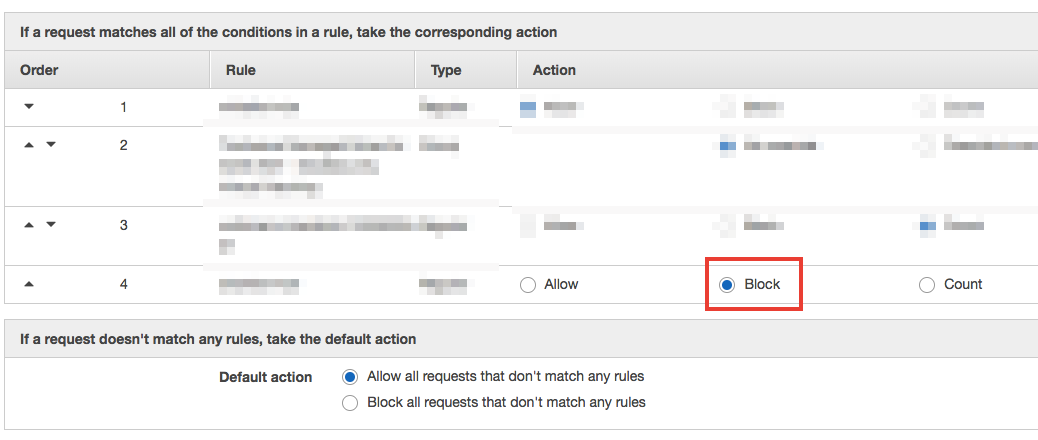
18. Set the priority to any position.
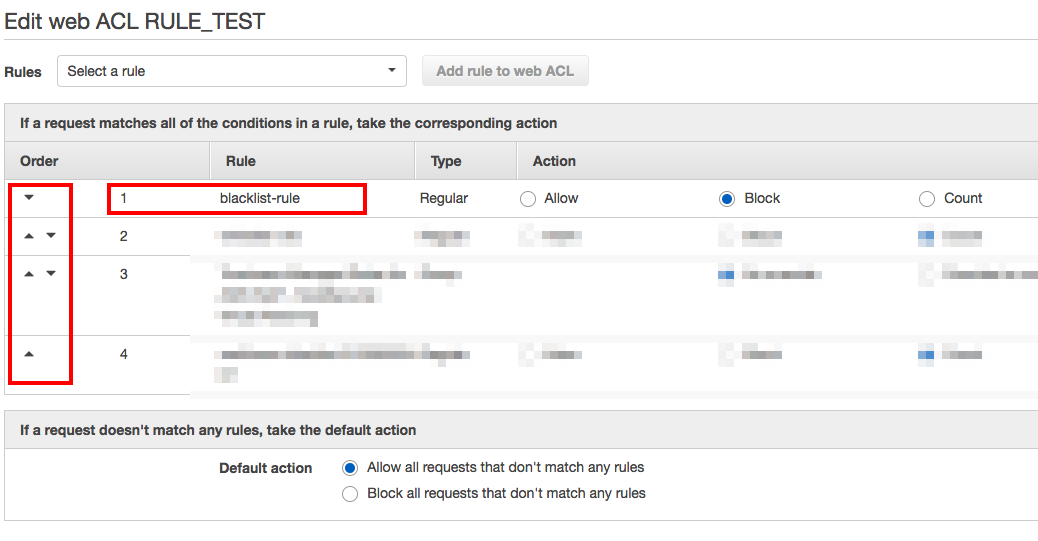
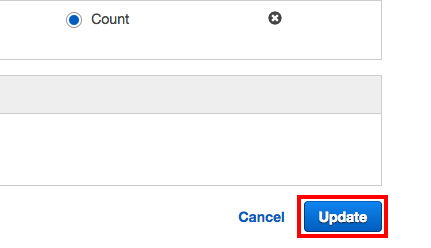
19. Click “Update”.
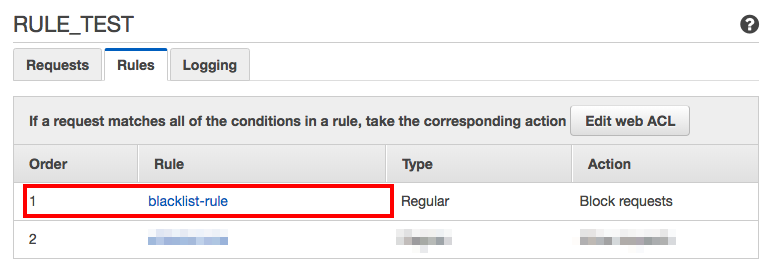
20. Once the created rule is applied and the order is displayed in the specified position, the process is complete.
【2. Adding IP address to the Blacklist applied to the Web ACL】
1. Click the target Web ACL.
2. Select the “Rules” tab.

3. Click the target rule name.
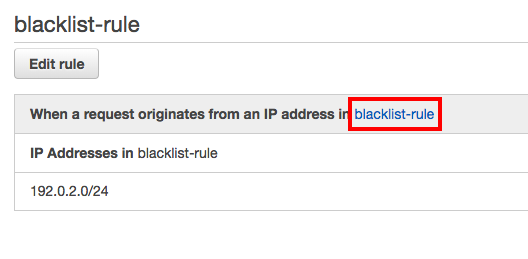
4. Click the condition name on the page opened in the new tab.
5. Click “Add IP addresses or ranges”.
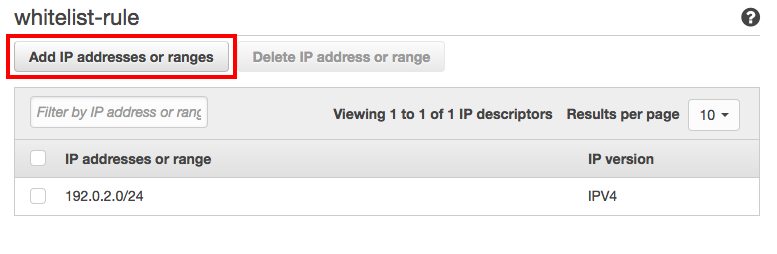
6. Enter the IP address (CIDR notation) you want to add, and click "Add IP address or range".
7. Confirm "IP address of the request to filter on", and click "Add".
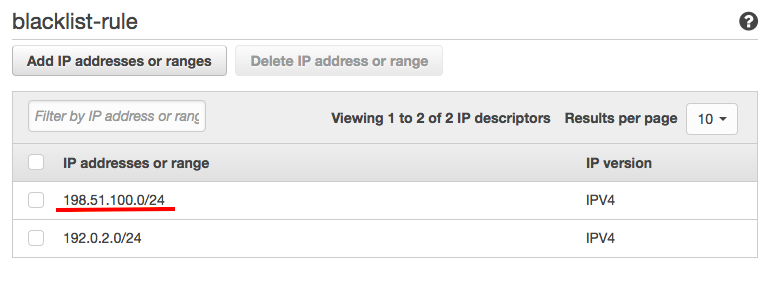
8. Once you confirm the IP address is added, the process is complete.
【Summary】
This time, we introduced how to respond when there is a request that seems to be an attack from a specific IP address by using a blacklist. Identifying the IP address can provide a temporary response to the attack in this way.